Prerequisites
Before you connect, you must first connect a data source to your Connect AI account. See Sources for more information.Connect to Connect AI
To establish a connection from Microsoft Fabric to Connect AI, follow these steps.1
Log in to Microsoft Fabric.
2
In Microsoft Fabric, select a workspace in which to create the flow, or create a new workspace.
3
Click New item and then click Dataflow Gen2.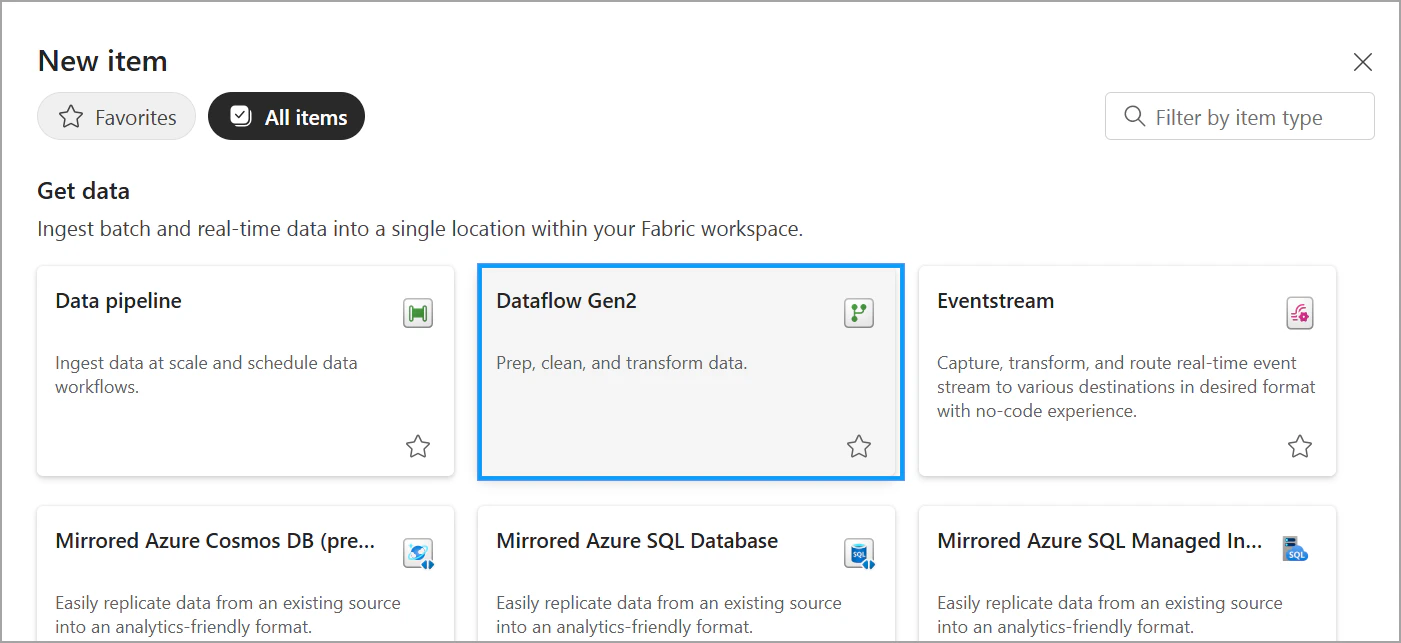
4
Once inside the data flow, click Get Data. Enter Connect AI in the search bar and select the Connect AI plugin.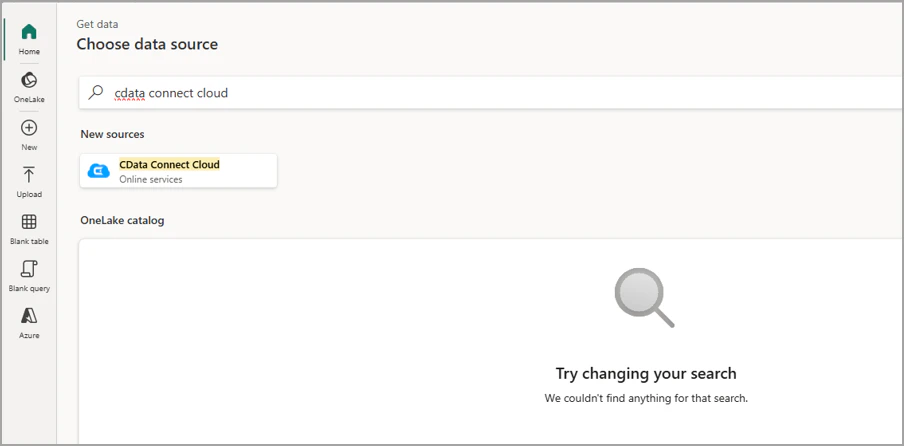
5
In the Get data dialog, enter the following credentials: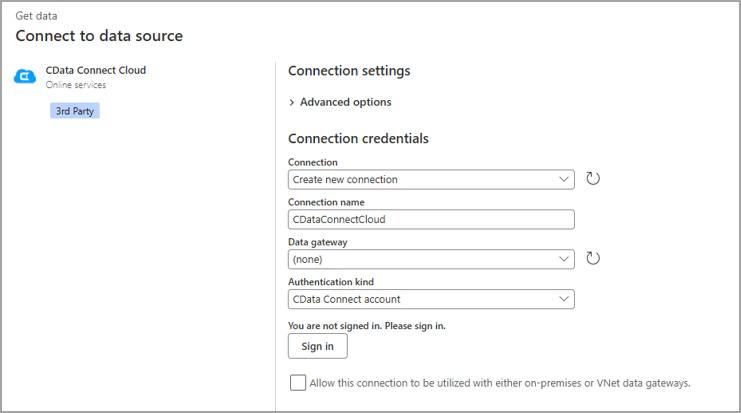
- Connection—select Create new connection.
- Connection name—create a user-defined connection name.
- Data gateway—select (none).
- Authentication kind—select CData Connect account.
6
Click Sign in. You are redirected to our authentication page via OAuth, establishing a connection to Connect AI.
7
Click Next. All your connections, derived views, and workspaces are now visible.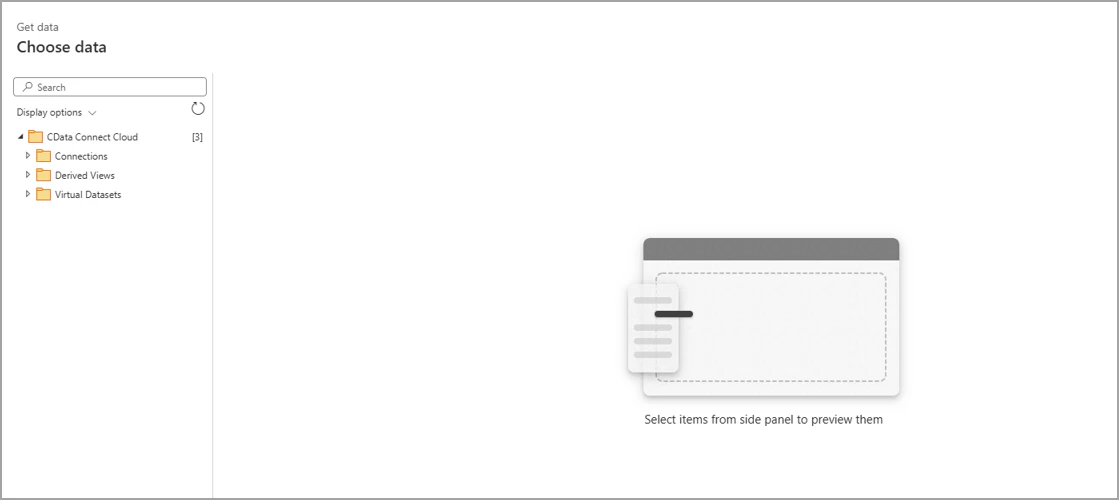
8
Select a table in your connection/schema hierarchy to load the desired table.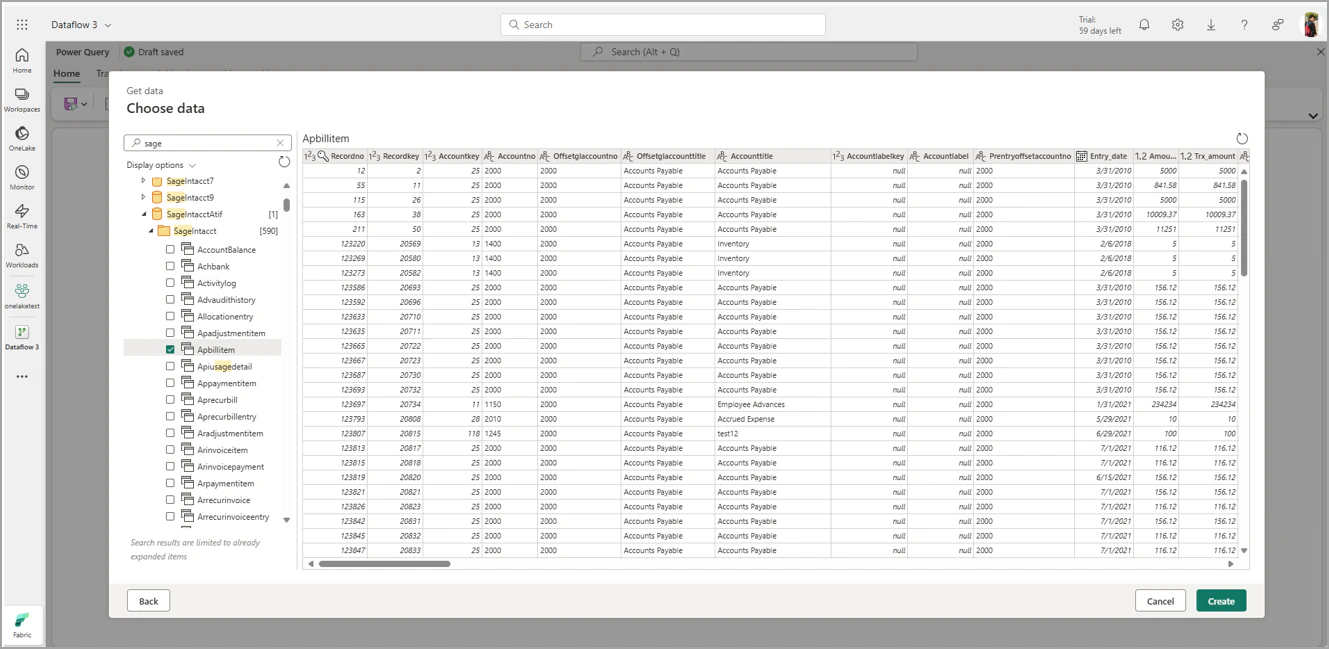
9
Click Create to launch the Power Query page.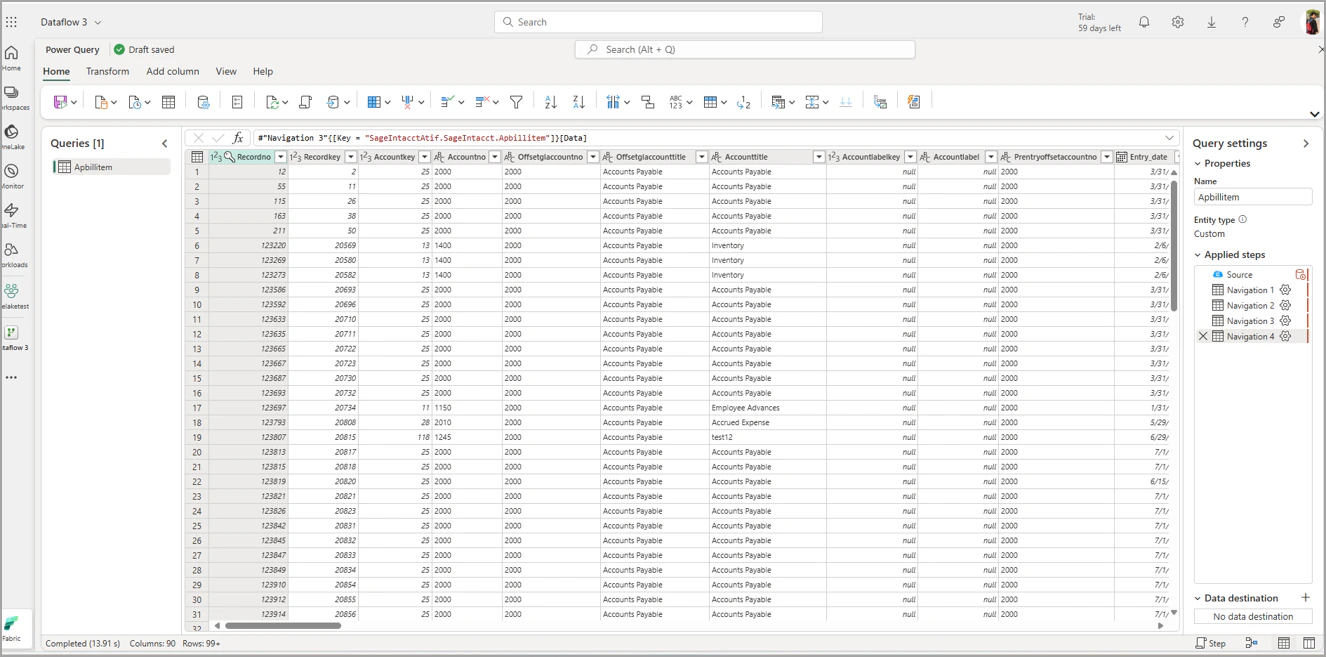
10
To replicate your data to a destination, click + next to Data destination. A Connect to data destination dialog appears. In this example, we used SQL Server as a destination. Enter the destination settings and click Next.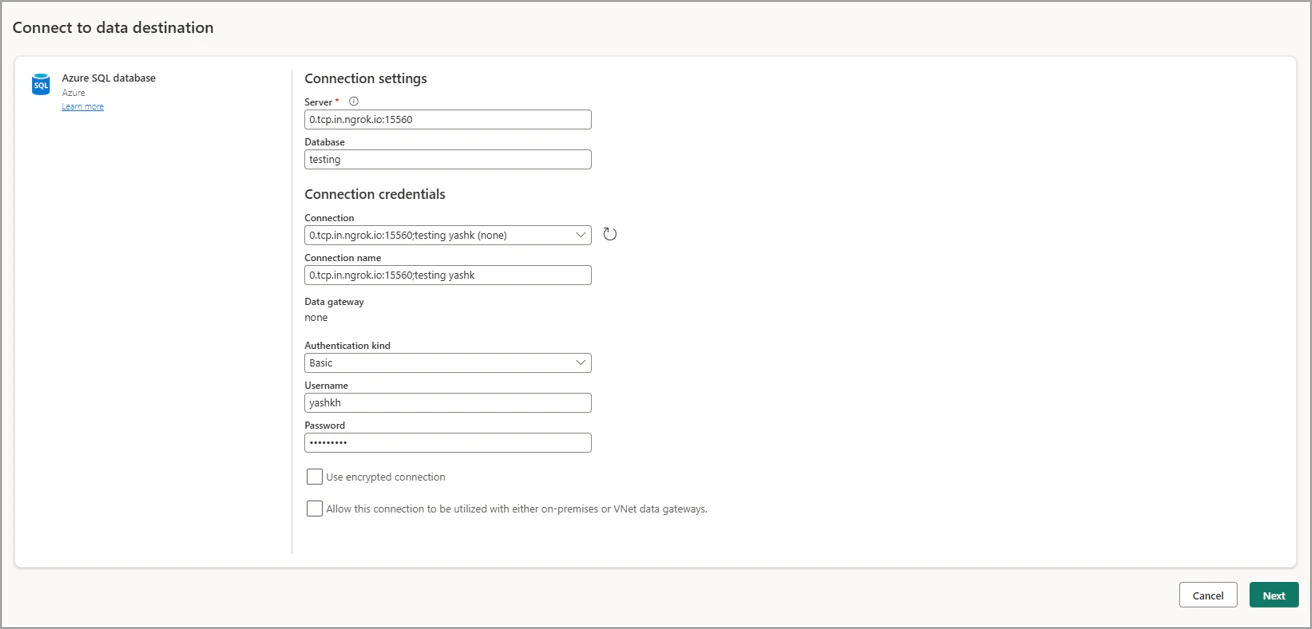
11
Select a destination target. You can overwrite an existing table or create a new destination table. Click Next.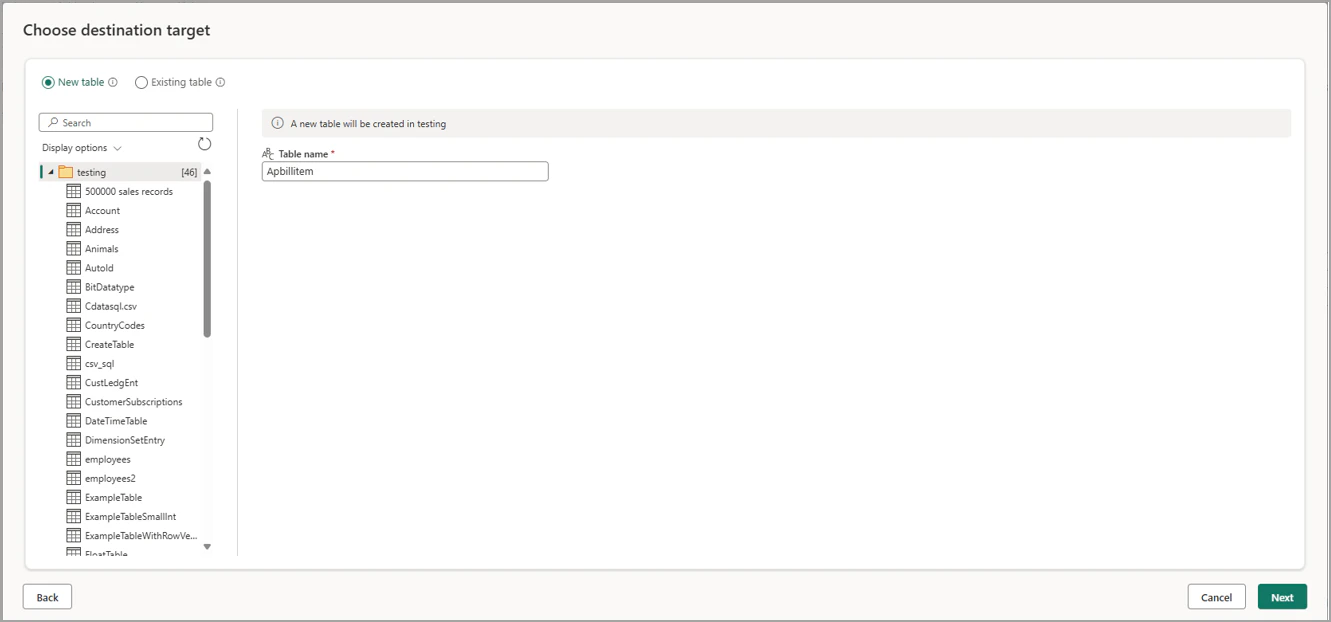
12
Map the data types for your destinations. Click Save settings.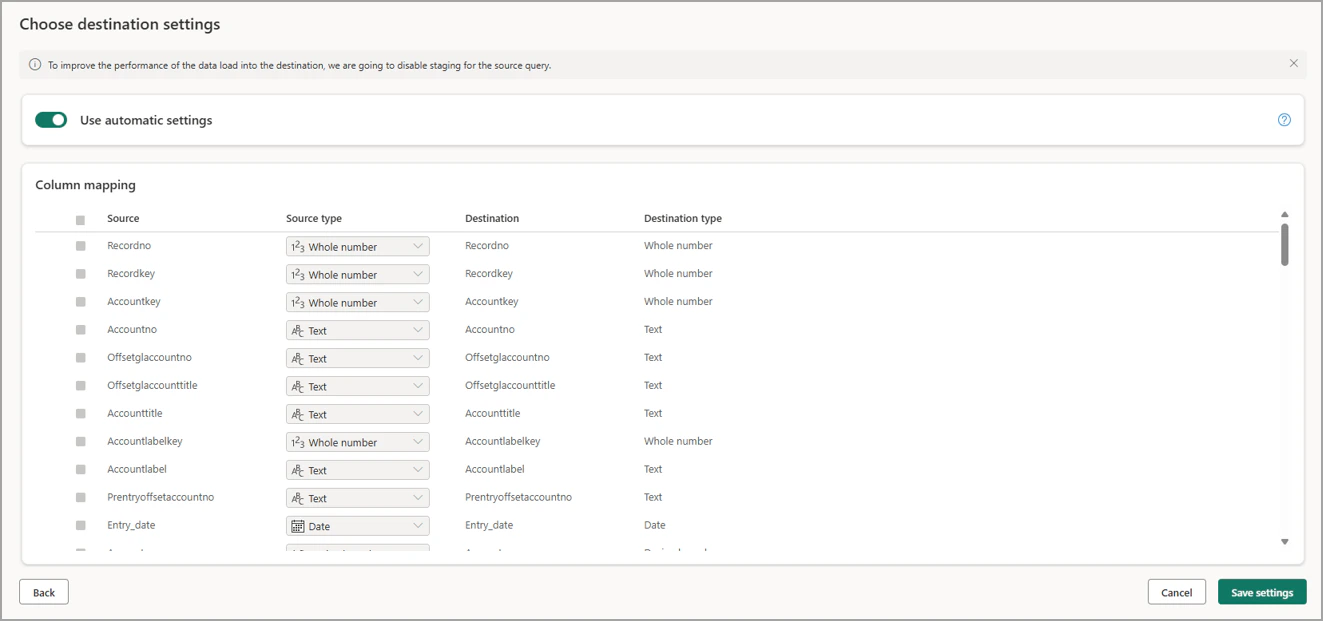
13
When you run/refresh the data flow, your table is copied to the selected destination. You can also modify the content in the Power Query editor.