Prerequisites
Before you can configure and use Amazon Quick with Connect AI, you must first do the following:- Connect a data source to your Connect AI account. See Sources for more information.
- Have access to Amazon Quick and an IAM user with permission to create and publish connectors for your team.
Create an MCP Connector in Amazon Quick
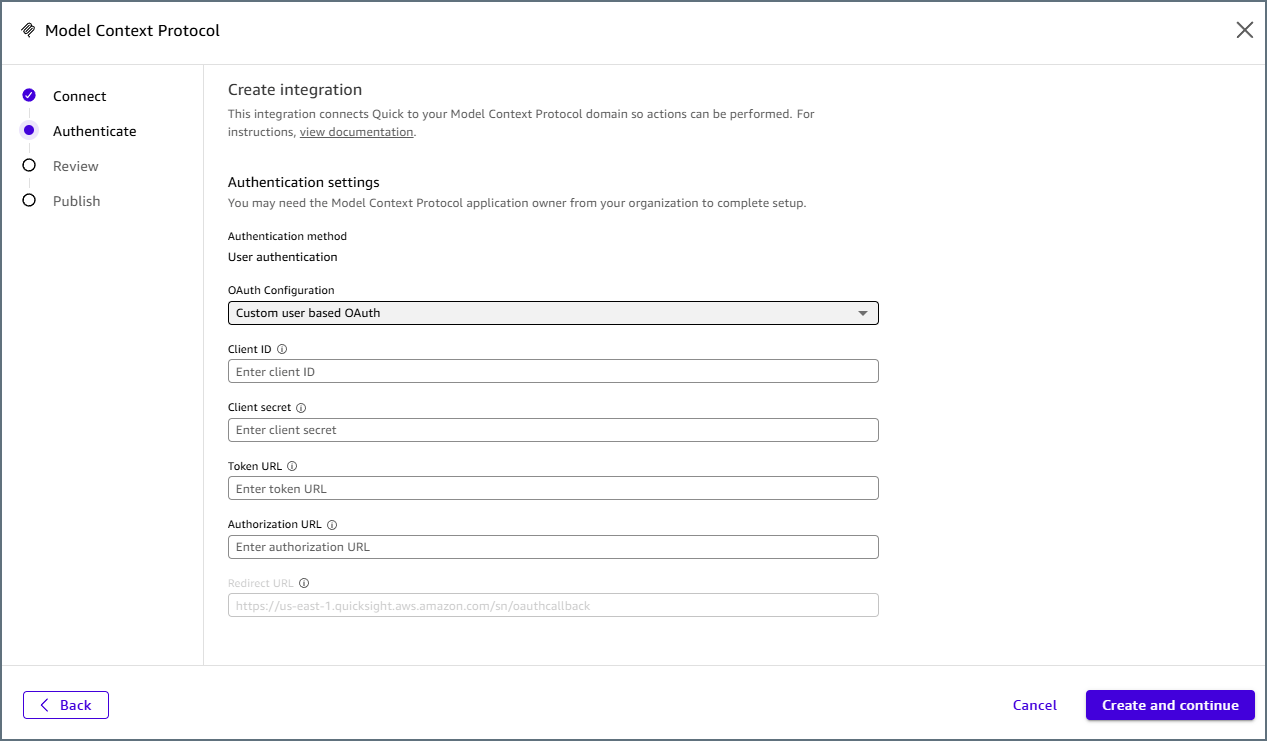
Begin creating the connector in Amazon Quick. During setup, Amazon Quick displays the redirect URL that you need to create the OAuth App in Connect AI.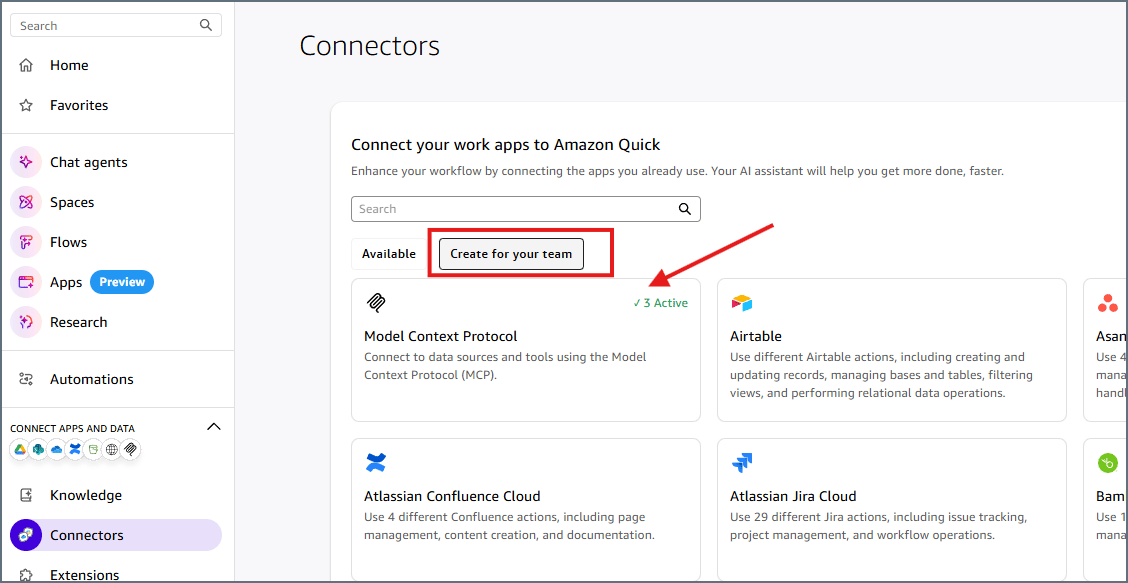
Create a new MCP connector by providing the MCP URL https://mcp.cloud.cdata.com/mcp. You can also use a toolkit URL to scope the connector to a specific toolkit.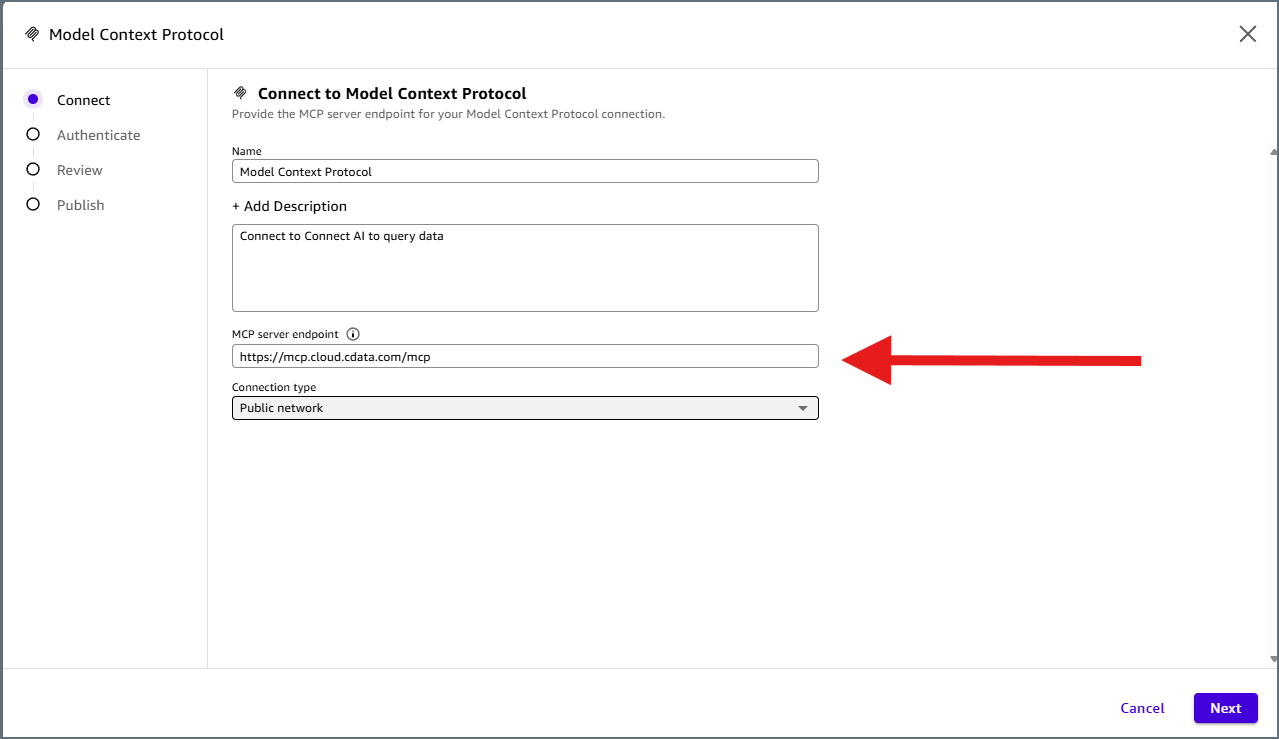
Create an OAuth App in Connect AI
Amazon Quick uses OAuth 2.0 to authenticate users against the Connect AI MCP Server. This requires a user-based OAuth application in your Connect AI account.Enter the following settings: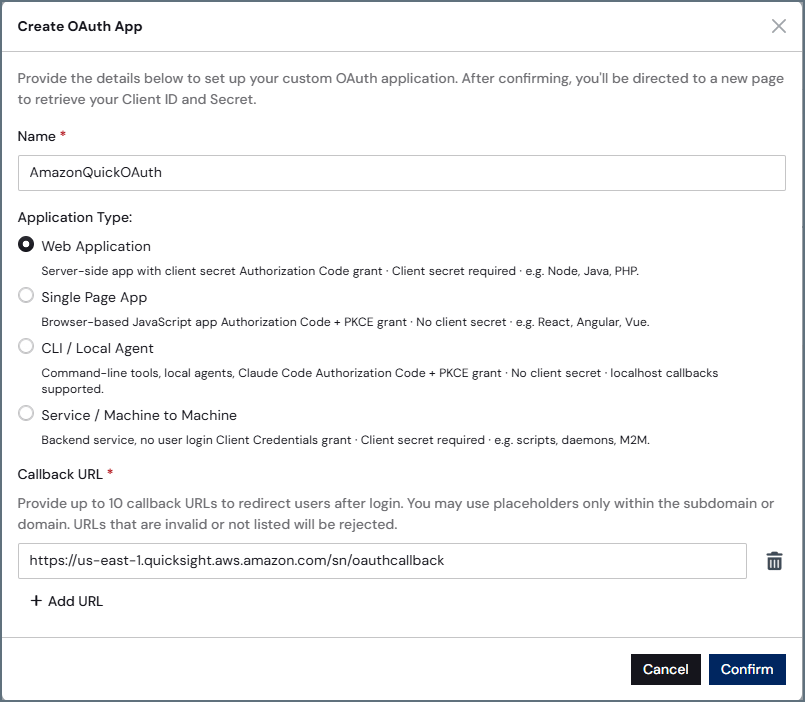
- Name–enter a descriptive name (for example, AmazonQuickOAuth).
- Application Type–select Web Application.
- Callback URL–enter the redirect URL you copied from Amazon Quick (for example, https://us-east-1.quicksight.aws.amazon.com/sn/oauthcallback).
Complete the Connector in Amazon Quick
Return to the Amazon Quick connector setup and enter the following settings: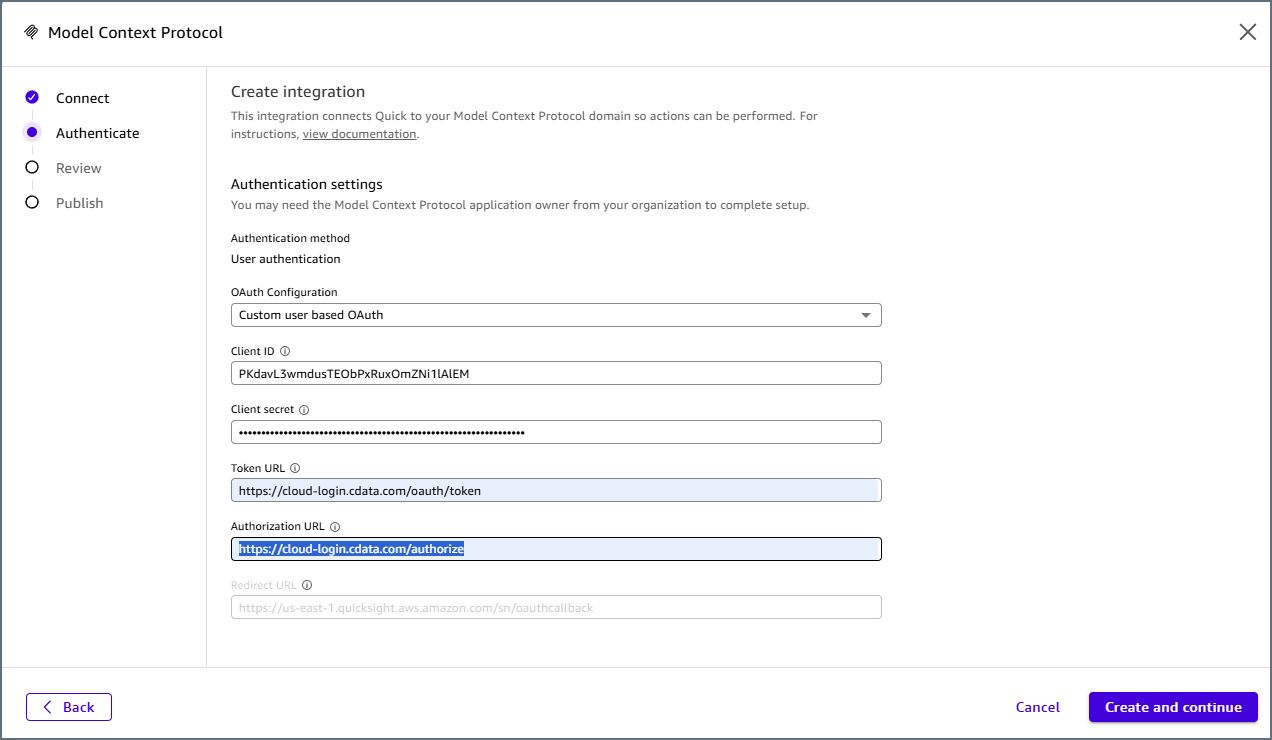
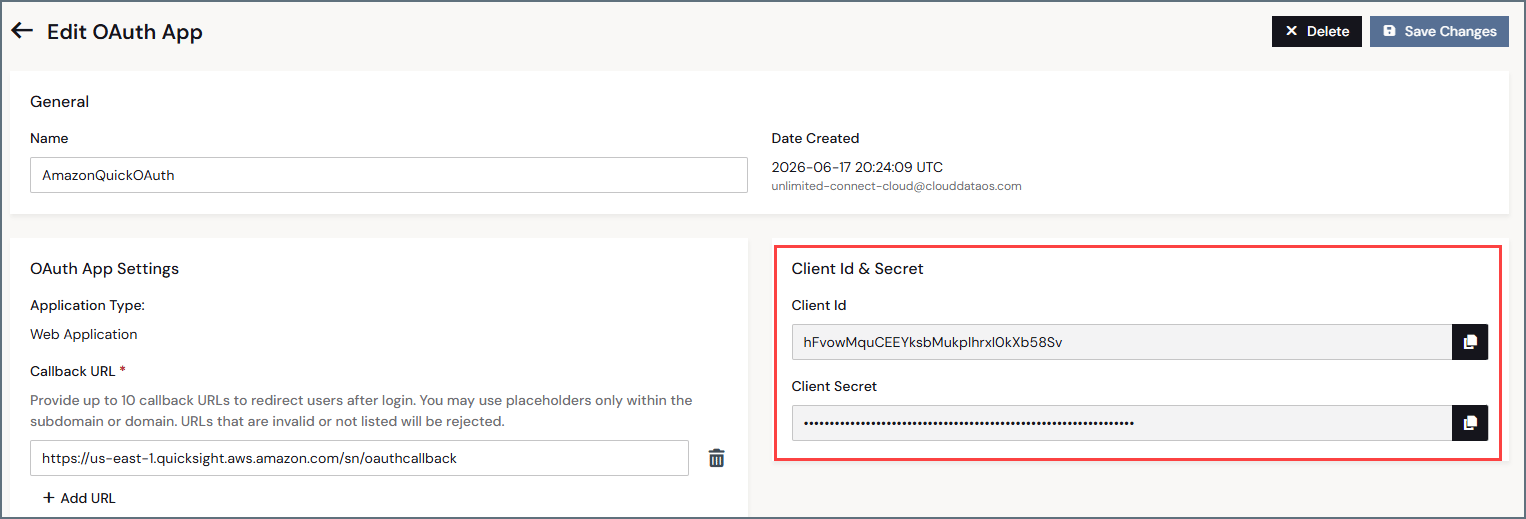
- Client ID and Client Secret–from the OAuth application created above.
- Token URL–enter https://cloud-login.cdata.com/oauth/token.
- Authorization URL–enter https://cloud-login.cdata.com/authorize.
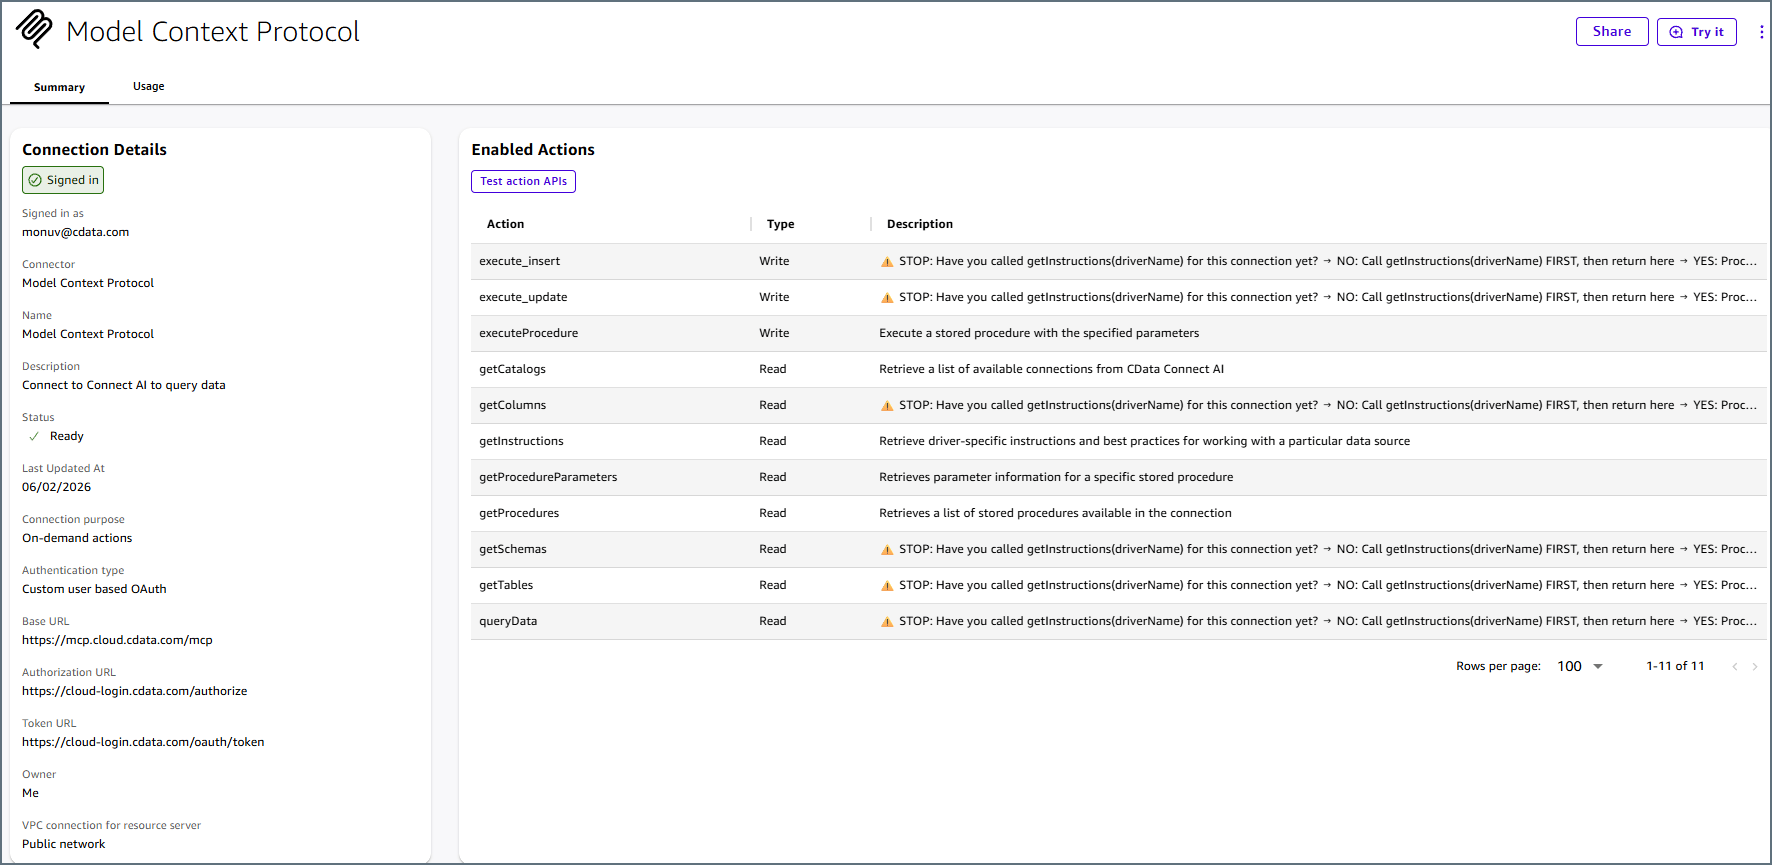
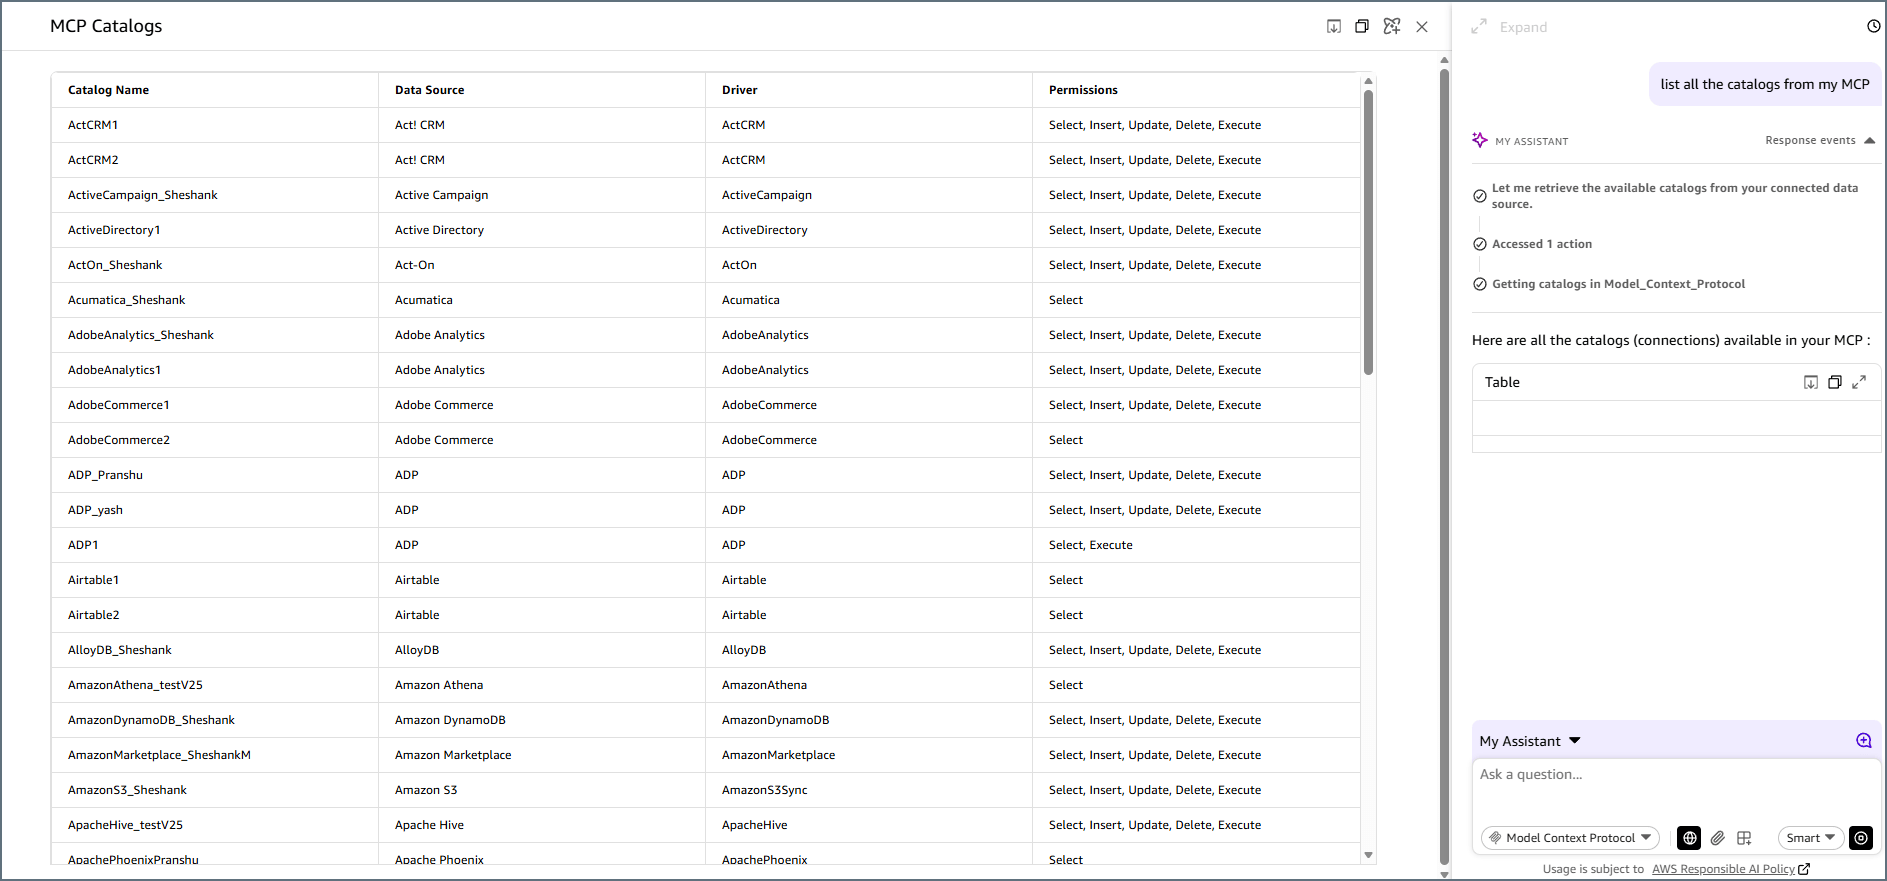
Use the Connector in an Agent
After you publish the connector, you can add it to any Amazon Quick agent and call its tools to query.