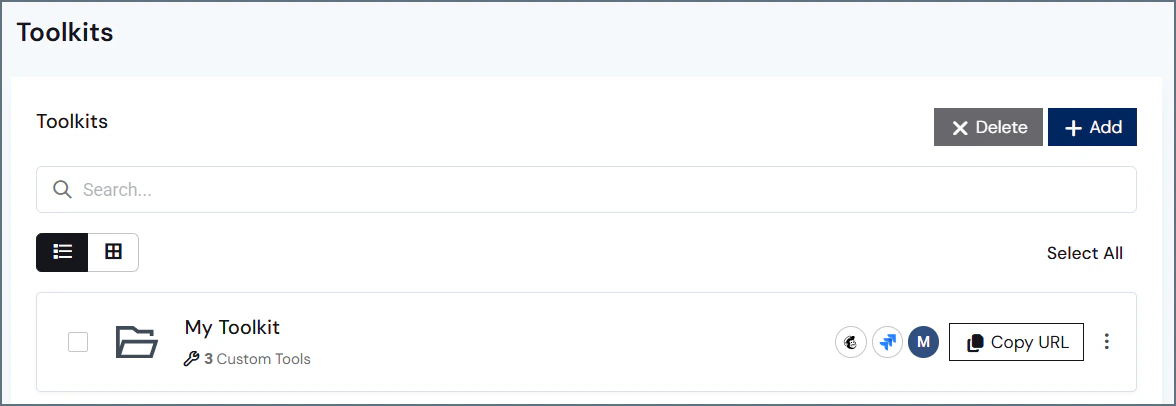
- The name of the available toolkits.
- The number of custom tools each toolkit contains.
- An icon of the data sources contained within each toolkit.
- A Copy URL button for copying the URL to the AI agent.
- A menu icon enabling you to edit, copy, or delete the toolkit.
Prerequisites
- MCP toolkits are available to Growth+ customers only.
- Only Admin users can create and configure custom tools.
- To add connection tools, you need to set up one or more connections. See Sources for more information.
- To add workspace tools, you need to set up one or more workspaces. See Workspaces for more information.
Custom Tool Types
There are two main tool types you can add to your toolkit: connection tools and workspace tools. In the edit screen of the toolkit, an icon represents connection tools, and a folder icon represents workspace tools.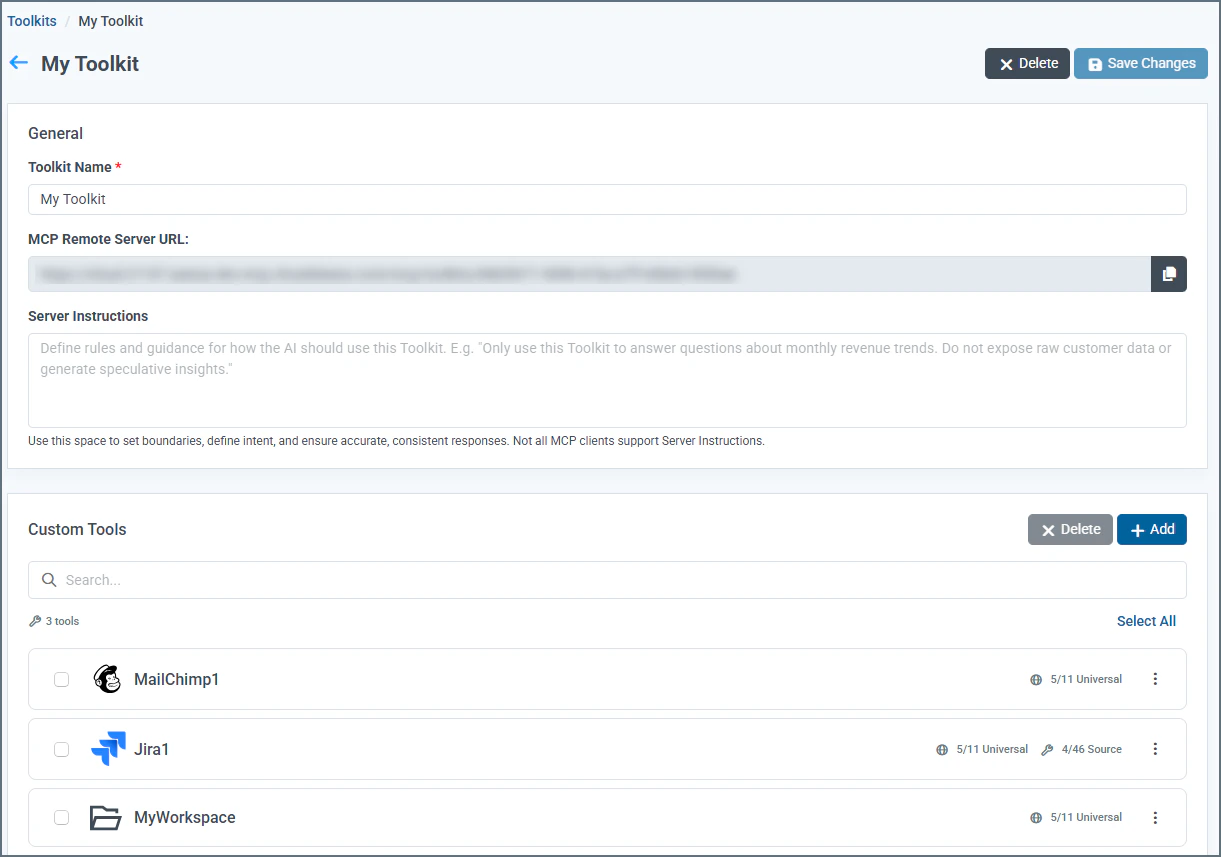
- Connection Tools–these tools apply to one or more connections. Within the connection tool, you can activate universal tools and source tools. You can also create custom tools for repeatable SQL queries and operations. Note that once connection(s) are assigned to a connection tool, they cannot be assigned to another connection tool.
- Workspace tools–these are tools that perform an action specific to the assets in your workspace. Within the workspace tool, you can activate universal tools. You can also create custom SQL tools.
- Universal Tools–these are data exploration and manipulation operations built into Connect AI. They expose operations such as
getSchemas,getTables, andexecuteProcedure. They are available for both connection and workspace tools. If you activate the tool, the tool includes every asset in the connection(s) or every asset in the workspace. Click an individual tool to view the description, annotations, and parameters of the tool. Click the information button for a complete explanation of the annotations. Note that universal tools can have dependencies: enabling one tool may require another tool to be enabled. - Source Tools (connection tools only)–you can configure actions such as get, search, and create for each asset in a connection in order to optimize your query. For example, if you have a Jira connection, you can enable tools to search for, create, update, and delete issues. You can edit each tool to add AI instructions. You can also view required and optional parameters.
- Custom SQL Tools–you can create custom SQL tools for repeatable queries and operations. You can add optional or required parameters that are input to the SQL query.
Add a New Toolkit
Enter the name of the toolkit, and click Confirm. The new toolkit appears on the main Toolkits page.
Add the Toolkit Name. The MCP Remote Server URL is autogenerated. This is the URL that you copy and paste into your MCP client application.
Add Server Instructions to the MCP server, setting general toolkit boundaries such as “Use customer data only. Do not use external data.”
Not all MCP clients support server instructions.
Add a Custom Tool to a Toolkit
Follow the steps in the wizard to add connection(s) or the workspace where the tool should reside. Click Confirm. The tool appears in your toolkit editor.
Select the tool to edit it. The tool editor contains the following tabs: Universal Tools, Source Tools (connection tools only), and Custom Tools.
In the Universal Tools tab, enable the universal tools for the connection or workspace. Select a tool to view a description of the tool, the tool’s annotations, and the tool’s parameters. Some tools have dependencies with other tools and must be enabled together.
(Connection tools only) In the Source Tools tab, enable the tools to be used for the source(s). Select a tool to view a description of the tool and the tool’s optional and required parameters. If desired, add AI Instructions (MCP Context). This is where you can set boundaries and define the intent of the tool. Here are some guidelines for writing effective AI instructions for a custom tool:
- Be clear and specific about the tool’s purpose. Define what the tool does and what inputs it accepts.
- Set clear boundaries. Explicitly state what the tool should and should not do.
- Test your instructions against a wide variety of inputs.
The Custom Tools tab is for advanced users. See Add a Custom SQL Tool for details on how to create custom SQL tools for your toolkit.
Add a Custom SQL Tool
Custom tools can help you improve response accuracy in your AI agent. To add a custom SQL tool: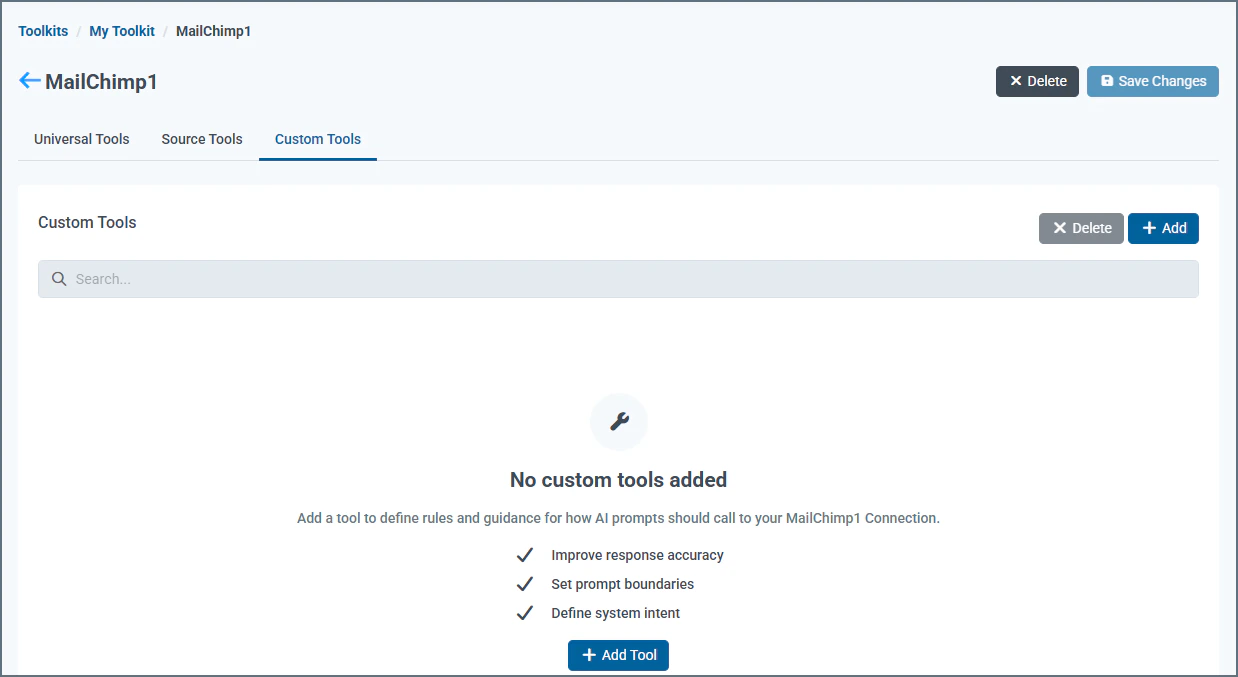
In the custom SQL editor, you can edit the tool name and add AI instructions. You can set boundaries for the type of data that can be returned.
Create a SQL statement. The documentation contains a complete SQL Reference for guidance.
Optionally, add parameters to the SQL statement. If you add parameters to the SQL statement, you must add the parameter name in the Parameters section of the tool’s definition.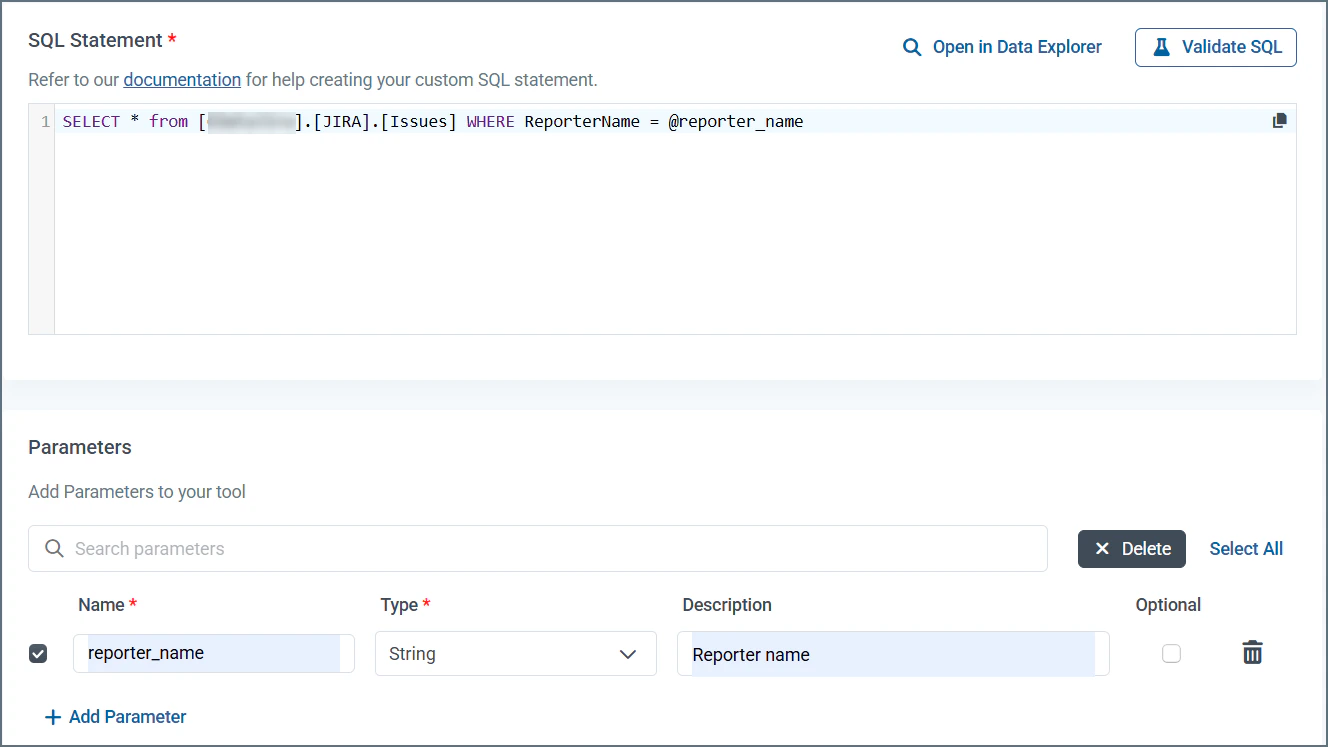
If you use standard SQL for the SQL statement, any parameters you add must be required parameters, or the query fails. See Use SQL Custom Templates for instructions on creating queries with optional parameters.
Use SQL Custom Templates
Instead of standard SQL, you can use custom SQL templates to create a SQL statement in the custom SQL tool. Custom templates allow you to have optional parameters, or a combination of optional and required parameters. The following two examples follow the SQL template for Bullhorn CRM for aSELECT statement. Refer to the data model for your data source to obtain the accepted parameters for the data source.
The following example shows a custom SQL template with both required and optional parameters:
@first_name and @last_name are required. The rest of the parameters are optional. In the query, you can include any of the optional parameters, or none.
In this SQL template example, all parameters are optional individually, but the template requires that at least one be provided.
WHERE 1=1 lets you safely append AND clauses without worrying about whether any conditions come before them.