

- Currently supports Azure Key Vault. Support for additional key vault providers is planned.
- Available for Business tier in Connect AI only.
- Not available for Connect AI Embed.
Azure Key Vault Prerequisites
Before configuring Connect AI, complete the following steps in the Azure Portal.Create an Azure Key Vault
1
In the Azure Portal, search for Key vaults and click Create.
2
Select your Subscription, Resource group, Key vault name, and Region.
3
Click Review + create.
4
After the vault is created, open it and note the Vault URI from the Overview page. It follows the pattern 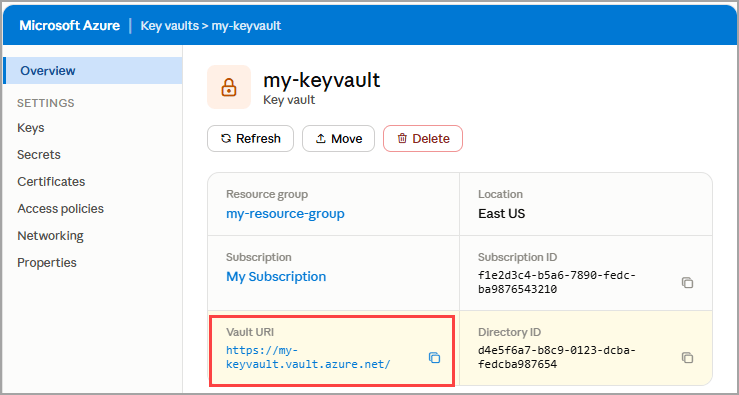
https://<vault-name>.vault.azure.net/.Register an Application in Microsoft Entra ID
Connect AI authenticates to your key vault using a registered application (service principal).1
In the Azure Portal, navigate to Microsoft Entra ID > Manage > App registrations > New registration.
2
Enter a Name for the application and click Register.
3
On the app’s Overview page, note the Application (client) ID and the Directory (tenant) ID.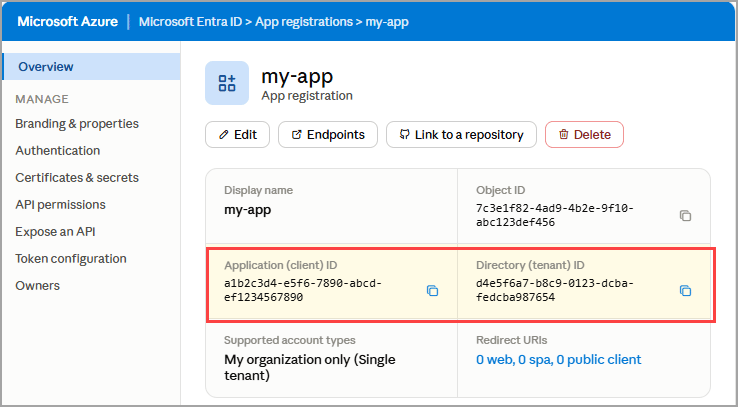
4
Go to Manage > Certificates & secrets > New client secret. Enter a description, select an expiration, and click Add.
5
Copy the secret Value immediately. It is not shown again after you leave the page.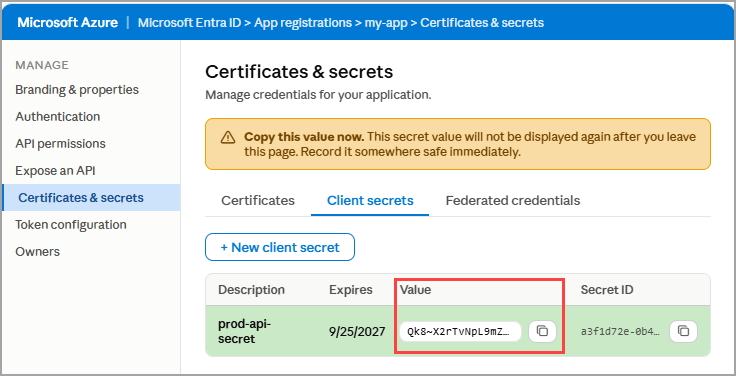
Grant the Application Access to the Key Vault
1
Open your key vault in the Azure Portal and go to Access policies > Create.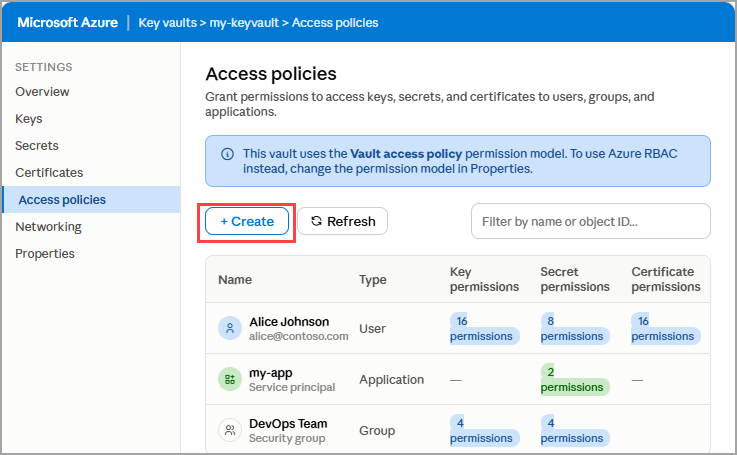
2
Under Secret permissions, select Get and List.
3
Under Principal, search for and select the application you registered, then click Next.
4
Click Next through the Application tab (no changes required).
5
Review the policy and click Create. This allows Connect AI to read secrets from the vault.
6
Back on the Access policies page, verify that your access policy is listed.
Create a New Key Vault
1
Click + Add Vault. The Add Azure Key Vault dialog appears.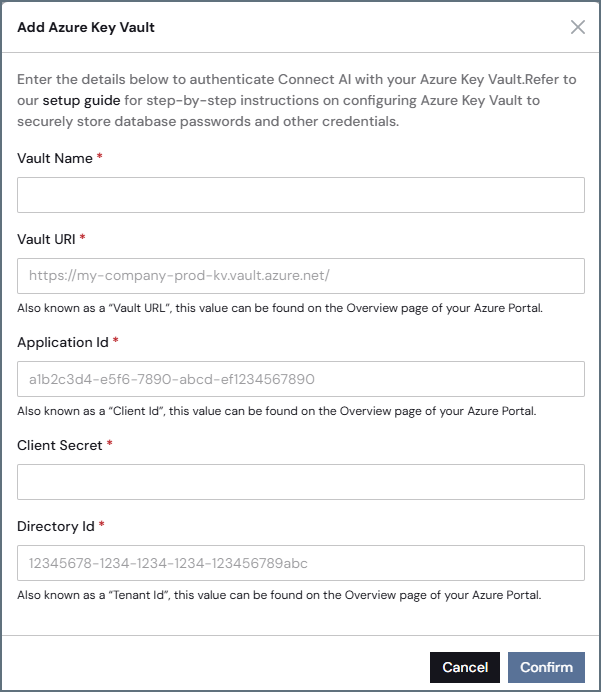
2
Enter a Vault Name to identify this vault in Connect AI. This does not have to match the Azure vault name.
3
Enter the Vault URI. This is the URI from the Overview page of your key vault in the Azure Portal (for example, https://my-vault.vault.azure.net/). This is in the Create an Azure Key Vault step of the prerequisites.
4
Enter the Application Id, also known as the Client Id. This is the Application (client) ID from the Overview page of your app registration in Microsoft Entra ID (In the Register an Application in Microsoft Entra ID step in the prerequisites).
5
Paste the Client Secret value you copied when you registered the application in Microsoft Entra ID (in the Register an Application in Microsoft Entra ID step in the prerequisites).
6
Enter the Directory Id, also known as the Tenant Id. This is the Directory (tenant) ID from the Overview page of your app registration in Microsoft Entra ID (in the Register an Application in Microsoft Entra ID step in the prerequisites)
7
Click Confirm to save your credentials. If successfully saved, the new key vault appears in the list of key vaults, along with the Key Vault URL and Creation Date.