


Create a Custom OAuth Application
To create a custom OAuth application:1
Click + Create App. The Create OAuth App dialog appears.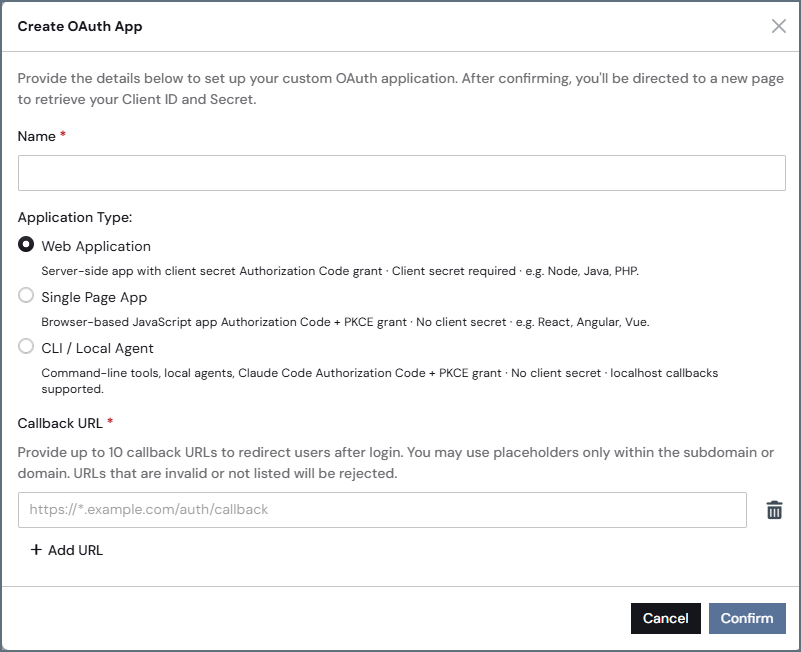
2
Enter the Name of the OAuth app.
3
Select the Application Type for your OAuth application.
For service and automated applications, use Service Accounts instead.
- Web Application–select this option for service-side apps with a client secret Authorization Code grant. A client secret is required.
- Single Page App–select this option for browser-based Authorization Code + PKCE grant. No client secret is required.
- CLI/Local Agent–select this option for command-line tools. No client secret is required.
4
Go to your client application and create a new application registration there. The client application will provide a callback URL.
5
Return to the Create OAuth App dialog in Connect AI and paste the Callback URL from the client application. This URL redirects users after login. You can provide up to 10 callback URLs for your OAuth app.
6
Click Confirm. Connect AI creates the OAuth app and generates a Client Id and Client Secret for the client application. Copy these values.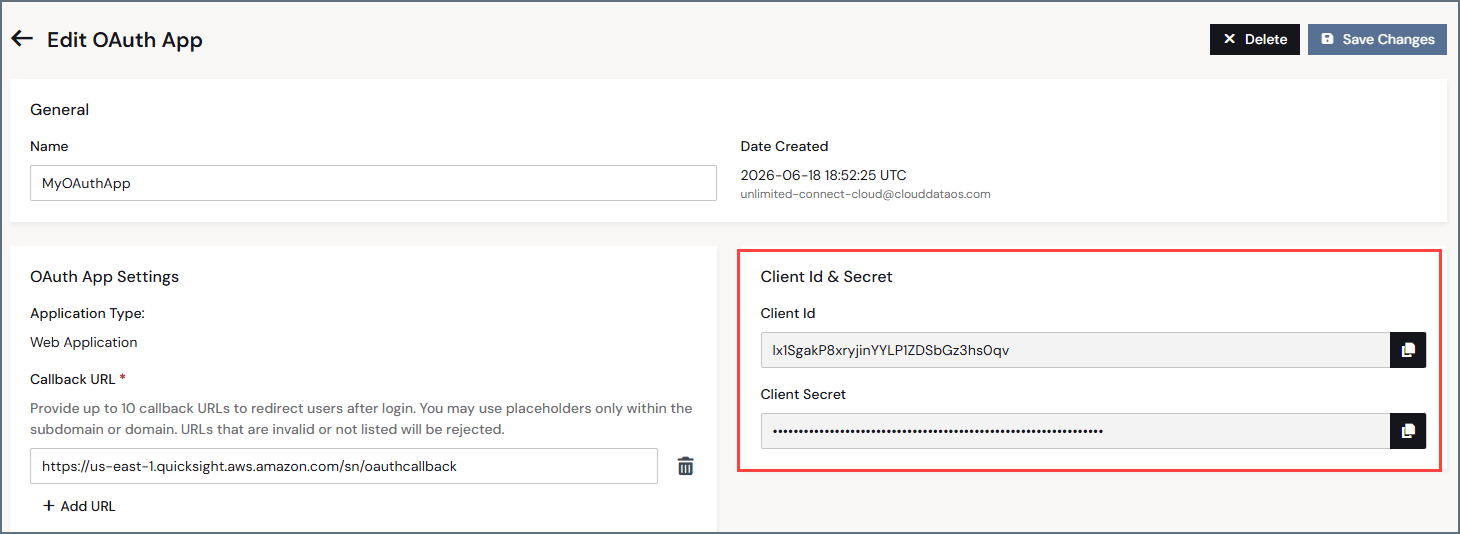
7
Return to the client application and paste the Client Id and Client Secret in the appropriate fields. For example, in Gemini Enterprise:
8
The new OAuth app appears in the list of apps. Click the edit icon () to edit the app and add more callback URLs for other client applications, if needed.