

- Access roles are being replaced by policies. System roles remain available and continue to determine administrative privileges. You can assign policies to users, system roles, and SCIM groups (if SCIM groups are provisioned). See Roles and SCIM Groups for more information.
- Only Administrators can add or modify policies. Each policy applies to a single workspace.
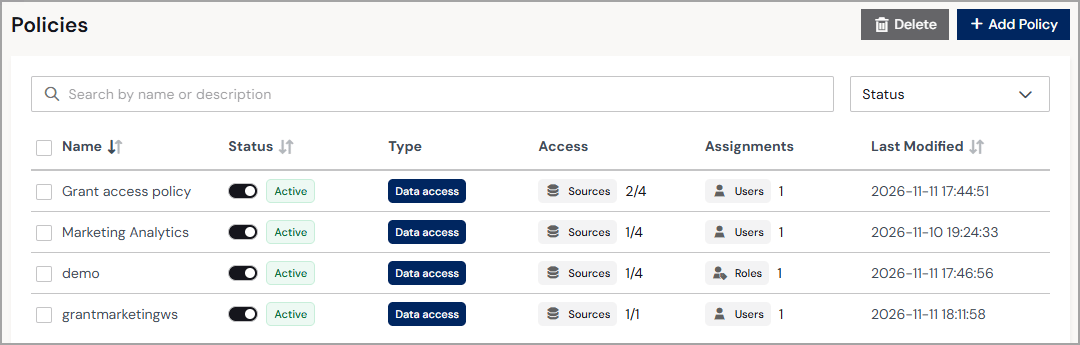
- A search bar to search for a policy by name.
- A status filter to filter for Active or Inactive policies.
- A row for every policy in your account:
- Name is the policy name.
- Status is the status of the policy (Active or Inactive). Use the toggle in the Status column to set a policy to Active or Inactive. Deactivating a policy takes effect within about a minute.
- Type is the type of policy (only Data access is currently available).
- Access is the type of access that the policy grants, including Sources and Virtual Schemas, and the number of each source and schema in the policy.
- Assignments is the type of assignment to the policy, including Users and Roles (system roles), and the number assigned to the policy.
- Last Modified is the date and time the policy was last modified.
Add a Policy
1
In the Policies tab of the Roles & Policies page, click + Add Policy.
2
In Step 1: Details, enter the Policy Name.
3
(Optional) Enter a short Description of the policy that appears in the Policies list.
4
Select a Policy Type (only Data access is currently available).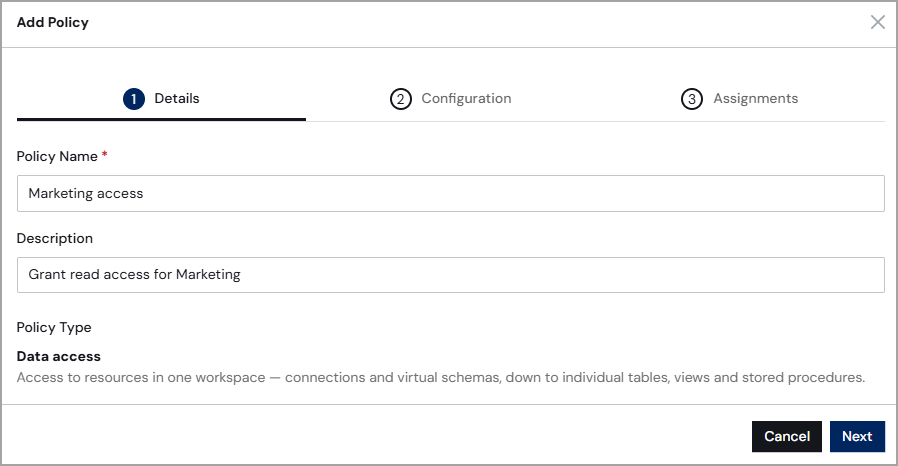
5
Click Next.
6
In Step 2: Configuration, select a Workspace to apply the policy to. Click the Sources and Virtual Schemas tabs to view the data sources and virtual schemas for the selected workspace.
7
Toggle on the sources and virtual schemas that the policy can access. You can fine-tune access to tables, views, and stored procedures after you create the policy.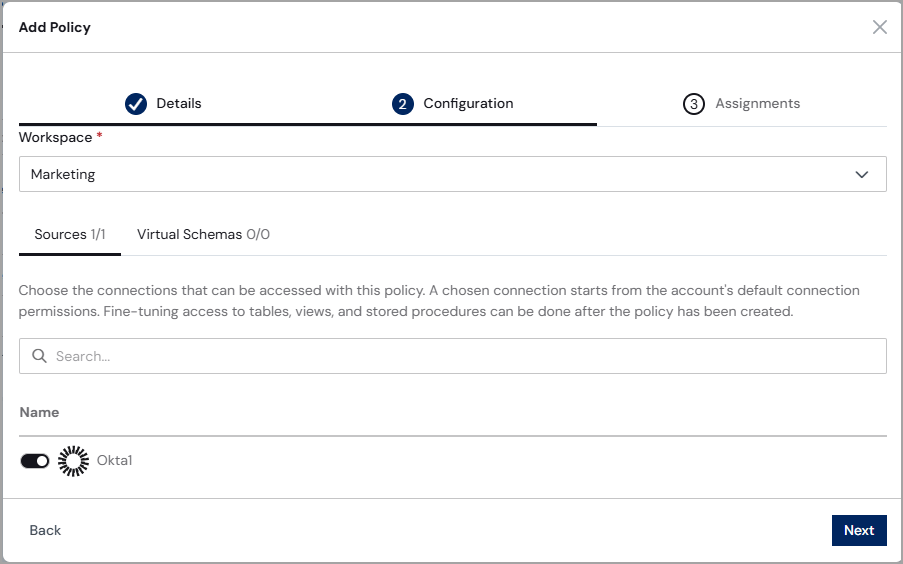
8
Click Next.
9
In Step 3: Assignments, select the users, system roles, and groups (if SCIM groups are enabled) to assign to the policy. Everyone who holds an assigned role or belongs to an assigned group gets the access that the policy grants. The Administrator role does not appear in the Roles tab because it already has full access. You must assign each active policy to at least one user, system role, or group.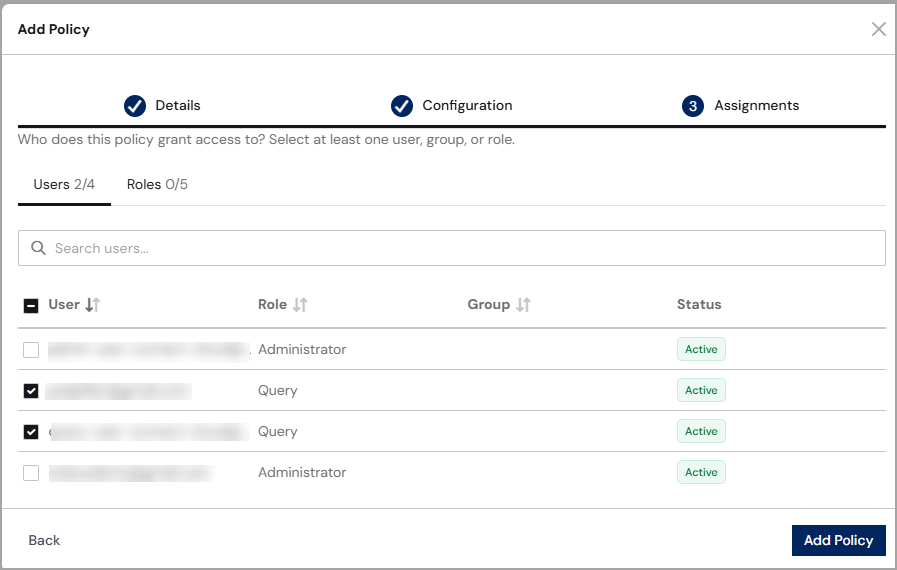
10
Click Add Policy. The new policy appears in the Policies list.
Edit a Policy
After you create a policy, you can edit the policy to fine-tune the tables, views, and stored procedures that the policy allows. You can also edit the Policy Name, Description, source and virtual schema access, and policy assignments. A policy’s edit page has a Details section at the top, followed by the following tabs: Source Access, Virtual Schema Access, and Assignments. To fine-tune a policy for sources and virtual schemas:1
Click a policy to open its edit page.
2
Click the Source Access tab. For each source that is toggled on, select the Schema (if there is more than one). Then choose the individual tables, views, and stored procedures that the policy grants access to. You can also select the level of access for each entity. See Access Levels.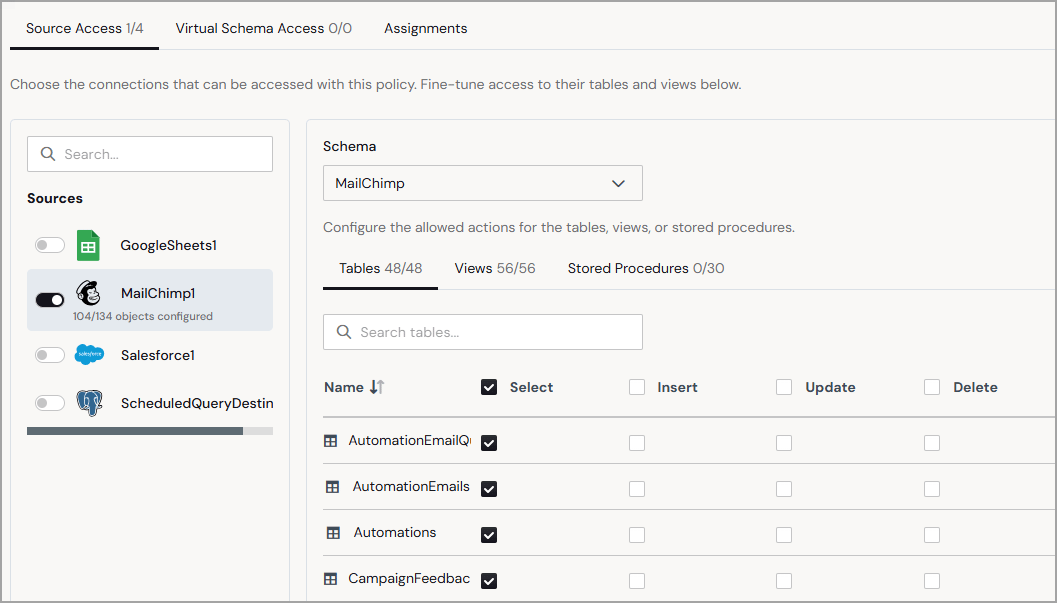
If the Default Connection & Virtual Schema Permissions setting is Select Only, Select is selected for each table and view by default. You can deselect tables and views that do not apply. Stored procedures are never selected by default. See Security for details.
3
Click the Virtual Schema Access tab. For each virtual schema that is toggled on, choose the individual tables, views, and stored procedures that the policy grants access to. You can also select the level of access for each entity. See Access Levels.
4
Click Save at the top of the policy’s edit page to save the policy changes.
1
Click a policy to open its edit page.
2
In the Details section at the top of the page, edit the Policy Name or Description.
3
Click the Assignments tab and select or clear the users and system roles assigned to the policy.
4
Click Save at the top of the policy’s edit page to save the policy changes.
Access Levels
For each table and view, you can grant any combination of the following access levels:- Read–Query and read data.
- Create–Add new records.
- Write–Modify existing records.
- Delete–Remove records.
Insert, update, and delete access on a view depends on whether the underlying data source supports those operations through the view.
How Policies Combine
Policies are additive. When more than one active policy applies to a user, the user has the combined access granted by all of those policies. For example, if one policy grants select access to a table and another policy grants insert access to the same table, the user has both select and insert access.Delete a Policy
1
In the Policies list, select the policy you want to delete.
2
In the policy’s edit page, click Delete Policy.
3
Click Delete in the dialog to confirm.