- データソースが正しく接続されているかどうかを確認する
- データソースで利用できるカラムとデータ型を調べる
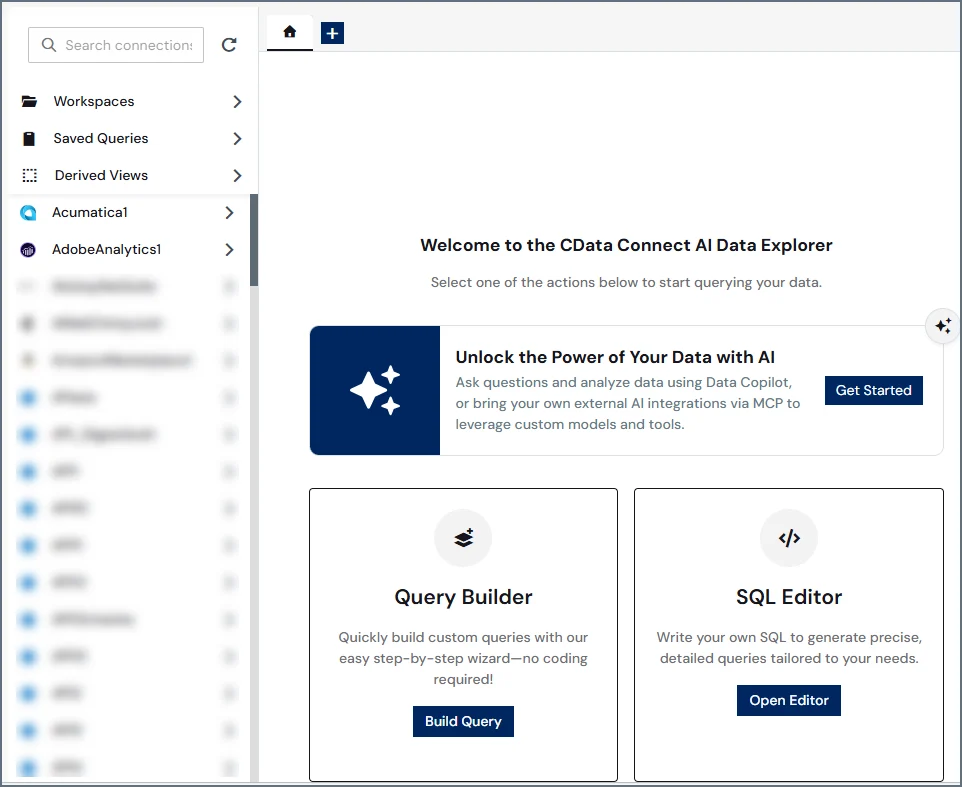
- SQL Editor またはQuery Builder を使用して、データソースから特定のデータを検索する
SQL Editor の使用
SQL Editor を使って、クエリを作成・編集・保存することができます。Query Builder を使用してクエリを作成する手順については、Query Builder を参照してください。
SQL Editor でのクエリの作成
Data Explorer でSQL Editor を使用してクエリを実行するには、次の手順に従います:1
コネクションまたはワークスペース内のテーブルまたはビューを選択するか、保存済みクエリまたはDerived View を選択します。利用可能なすべての項目が左のカラムに表示されます。
- 実線のテーブルアイコンは、テーブルを示します。
- 破線の四角いアイコンは、ビューを示します。
- アイテムの右側にある青い二重ドキュメントアイコンは、アイテムがキャッシュされていることを示します。詳しくは、Caching を参照してください。
2
クエリするデータを選択します。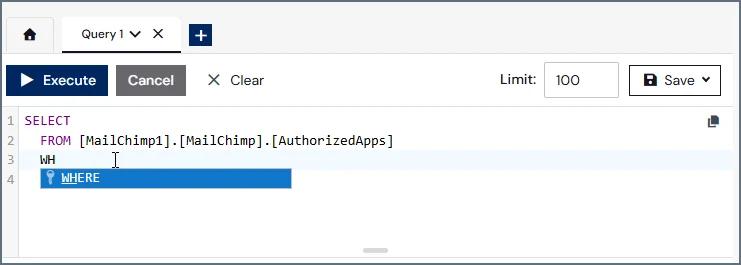
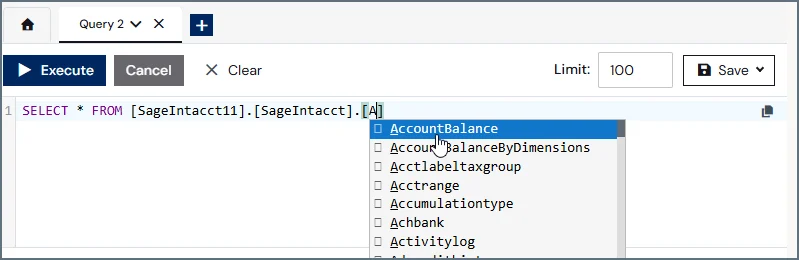
- テーブルまたはビュー全体のSQLクエリを表示するには、そのテーブルまたはビューをクリックします。または、テーブルまたはビューの横にある三点リーダーをクリックしてOpen を選択します。SQLクエリが右側に表示されます。カラムの詳細はSQLクエリの下に表示されます。このクエリは実行するまで読み取り専用です。
- テーブルまたはビューの横にある三点リーダーをクリックしてQuery を選択すると、そのテーブルまたはビューを基にした新しいクエリを作成できます。実行前にクエリを編集できます。
- データソースの種類によっては、よく使われるクエリのSQLテンプレートが含まれています。これらのクエリは、接続名を展開するとCommon Queries の下に表示されます。クエリ名の横にある三点リーダーをクリックしてQuery をクリックすると、クエリを表示できます。必要に応じて、実行前にクエリを編集できます。
3
Limit フィールドに、返したい結果の数を設定します。デフォルトではリミットは100です。リミットは自由に設定できますが、このフィールドには必ず値を入力してください。(SQL LIMIT 句は使用しないでください。)
4
Execute をクリックしてクエリを実行します。クエリを実行すると、Results セクションに読み込み中のアイコンと経過時間が表示されます。読み込み中のアイコンは、クエリのタブにも表示されます。経過時間が5分を超える場合は、CData サポートまでお問い合わせください。
5
クエリの実行が終了すると、クエリエディタの下に結果が表示されます。Details セクションにはクエリによって返されたメタデータが表示され、Results セクションにはクエリによって返されたデータが表示されます。ページ下部のフィールドで、ページをスクロールしたり、1ページあたりの検索結果数を調整したりできます。また、テーブルの詳細および結果のカラム幅を調整することもできます。クエリでエラーが発生した場合、クエリの上にエラーメッセージが表示されます。エラーアイコンは、クエリのタブにも表示されます。エラーの詳細については、Learn More をクリックしてください。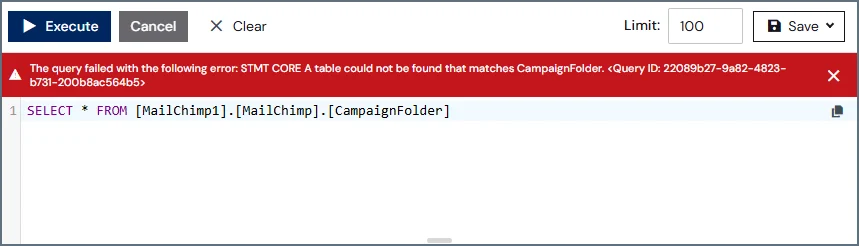
クエリの編集
読み取り専用のクエリを実行すると、Query 1 のような名前の新しいタブが表示されます。その後、クエリを変更して新しい名前で保存できます。- クエリエディタにクエリパラメータを入力し、手動でクエリを変更。
- Clear を選択し、表示されるプロンプトでOK をクリックしてクエリエディタをクリア。
クエリの保存
Data Explorer では、クエリを保存しておくことができ、後からクエリパラメータを再入力することなくクエリを呼び出すことができます。 クエリを作成し正常に実行すると、Data Explorer ペインの上部にあるSave ボタンが利用可能になります。クエリを保存して後でアクセスするには、以下の手順に従います。1
Save > Save as Saved Query をクリックします。Save Query ダイアログが表示されます。
2
クエリの名前を入力し、Confirm をクリックします。
3
Data Explorer Saved Queries メニューが開き、新しく保存したクエリがリストに表示されます。
保存されたクエリの使用
保存されたクエリは、Data Explorer のナビゲーションペインにあるSaved Queries フォルダから利用でき、保存されたDerived View はDerived Views フォルダで利用できます。保存されたクエリを実行するには、クエリ名の横にある三点リーダー(縦)をクリックし、Query を選択します。保存されたクエリの内容がQuery Editor に入力され、Execute をクリックして結果を取得できます。 三点リーダー(縦)をクリックすると、保存されたクエリの名前を変更したり削除したりすることもできます。ワークスペースへの追加
Data Explorer を使用して、アセットをワークスペースに追加できます。1
ワークスペースに追加するテーブルまたはビューをクリックします。Connect AI では、ワークスペースのコンテンツをアセットと呼びます。
2
アセットの横にある三点リーダーをクリックして、Add to Workspace を選択します。
3
アセットを移動するワークスペースを選択して、Confirm をクリックします。
Derived View の設定
Data Explorer のDerived Views 機能を使用すると、コネクションから動的に入力されたデータ結果を返すクエリを作成して保存できます。保存したDerived View はインテグレーションからクエリでき、コネクション内のデータが変更されると結果が自動的に更新されます。Derived View を作成または変更できるのはConnect AI の管理者のみです。クエリユーザーは、管理者が作成した保存済みのDerived View をクエリできます。
Derived View の作成
新しいDerived View を作成するには、次の手順に従ってください:1
Query Builder またはSQL Editor でクエリを作成します。クエリを実行すると、Save ボタンが表示されます。Save > Save as Derived View をクリックします。Create Derived View ダイアログが表示されます。
2
View Name フィールドにDerived View の名前を入力します。これは、保存されたDerived Views のリストに表示される名前です。
3
Confirm をクリックし、Derived View を保存します。
インテグレーションからDerived View へのアクセス
インテグレーションツールからDerived View にクエリを発行する場合、Connection またはDatabase の値をCData に設定します。次の構文は、Derived View にアクセスするための正しい完全修飾構文を示しています:Data Explorer からDerived View へのアクセス
Derived View を作成すると、Data Explorer のDerived Views のリストに表示されます。リスト内のエントリの横にある三点リーダー(縦)をクリックして、オプションのリストを開くことができます。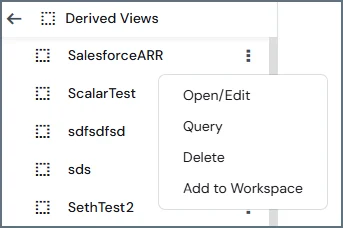
- Open/Edit を選択すると、Derived View がクエリエディタで開き、ビューを編集できます。
- Delete を選択すると、リストから Derived View を削除します。
- Query を選択すると、クエリを実行します。Derived View の内容が Data Explorer のクエリビューに表示され、Execute をクリックしてクエリ結果を表示できます。
- Add to Workspace を選択すると、Derived View をワークスペースに追加します。ワークスペースを選択するための Add to Workspace ダイアログが表示されます。
Derived View の編集
Derived View のクエリを編集するには、上記で説明した方法のいずれかを使用してアクセスします。Derived View を開いた状態で、クエリフィールド内のテキストを必要に応じて編集し、Data Explorer 上部のSave Changes をクリックします。 Derived View の名前を変更するには、リスト内のエントリの横にある三点リーダー(縦)をクリックしてRename を選択します。表示されたダイアログに新しい名前を入力し、Confirm をクリックします。Derived View の削除
Derived View を削除するには、リスト内のエントリの横にある三点リーダー(縦)をクリックしてDelete を選択します。表示される確認ダイアログで、再びDelete をクリックします。Derived View を削除しても、ソース内のデータには影響ありません。
スケジュールクエリの作成
クエリをスケジュールクエリとして保存できます。スケジュールクエリは、ユーザーが定義した間隔で実行されます。 スケジュールクエリを作成するには:1
Query Builder またはSQL Editor を使用して、クエリを作成します。
2
Save > Save as Scheduled Query をクリックします。
3
次に、実行頻度など、スケジュールクエリの詳細を入力します。詳しくは、Scheduled Queries を参照してください。
ワークスペースへの追加
Data Explorer を使用して、アセットをワークスペースに追加できます。1
ワークスペースに追加するテーブルまたはビューをクリックします。Connect AI では、ワークスペースのコンテンツをアセットと呼びます。
2
アセットの横にある三点リーダーをクリックして、Add to Workspace を選択します。
3
アセットを移動するワークスペースを選択して、Confirm をクリックします。
キャッシュジョブの追加
Data Explorer を使用して、テーブルまたはビューのデータをキャッシュできます。キャッシュを使用すると、ライブデータを取得する代わりにデータベースからキャッシュされたデータを取得でき、パフォーマンスが向上します。詳細については、Caching を参照してください。 キャッシュジョブを追加するには:1
キャッシュするテーブルまたはビューをクリックします。
2
アセットの横にある三点リーダーをクリックして、Add Cache Job を選択します。Edit Job ページにリダイレクトされます。
3
キャッシュジョブを編集の手順に従います。