Prerequisites
Before you can configure and use GitHub Copilot with Connect AI, you must do the following:1
Connect a data source to your Connect AI account. See Sources for more information.
2
Install and enable GitHub Copilot in Visual Studio Code (or any IDE supporting GitHub Copilot).
3
Settings ページでPersonal Access Token(PAT)を生成します。PAT をコピーし、認証時にパスワードとして使用します。
Create the Configuration File
- Create a folder named
.vscodein your project repository. Within this folder, create a file namedmcp.jsonand add the following configuration. ReplaceBasic <your_base64_encoded_email_PAT>withBasicand the Base64-encoded value ofusername:PAT(the PAT was generated in the prerequisites).
Start the MCP Server
1
Click Start within your IDE to start the MCP server. If the MCP server starts without error, it displays Running.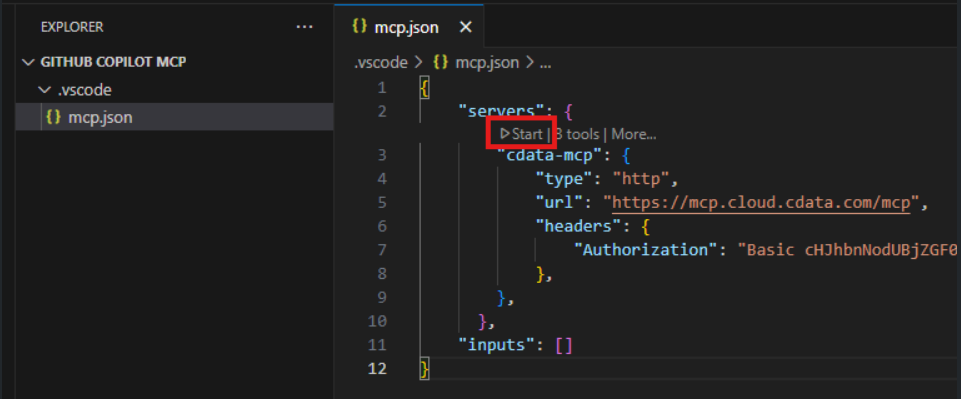
2
Toggle Chat in the title bar to display the Chat pane on the right.
3
Click Add Context in the bottom of the Chat pane. In the search bar, select Tools. Then search for CData. Add cdata-mcp All Tools.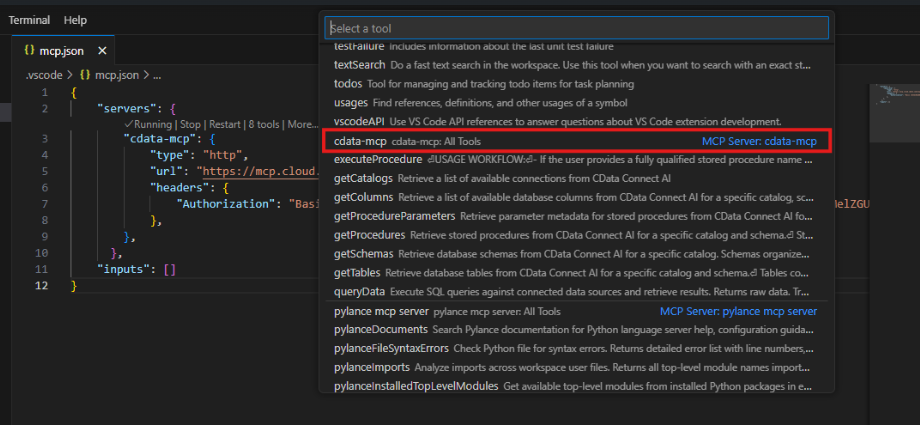
Chat with GitHub Copilot
You can now chat with GitHub Copilot and issue contextual prompts. As a test, you can provide the MCP server with a simple prompt, such as a list of tables for a particular connection. GitHub Copilot uses the Connect AI tools such asgetCatalogs, getSchemas, and getTables to retrieve data from the connected data source.
