Prerequisites
Before you can configure and use Cloud Data Fusion with Connect AI, you must first connect a data source to your Connect AI account. See Sources for more information. You must also generate a Personal Access Token (PAT) on the Settings page. Copy this down, as it acts as your password during authentication.Connect to Connect AI
To establish a connection from Cloud Data Fusion to Connect AI, follow these steps.1
Download and install the Connect AI JDBC driver.a. Open the Integrations page of Connect AI.b. Search for JDBC or Cloud Data Fusion.c. Click Download and select your operating system.d. When the download is complete, run the setup file.e. When the installation is complete, the JAR file can be found in the installation directory.
2
Log in to Cloud Data Fusion.
3
Click the green ”+” in the top right to add an entity.
4
Under Driver, click Upload.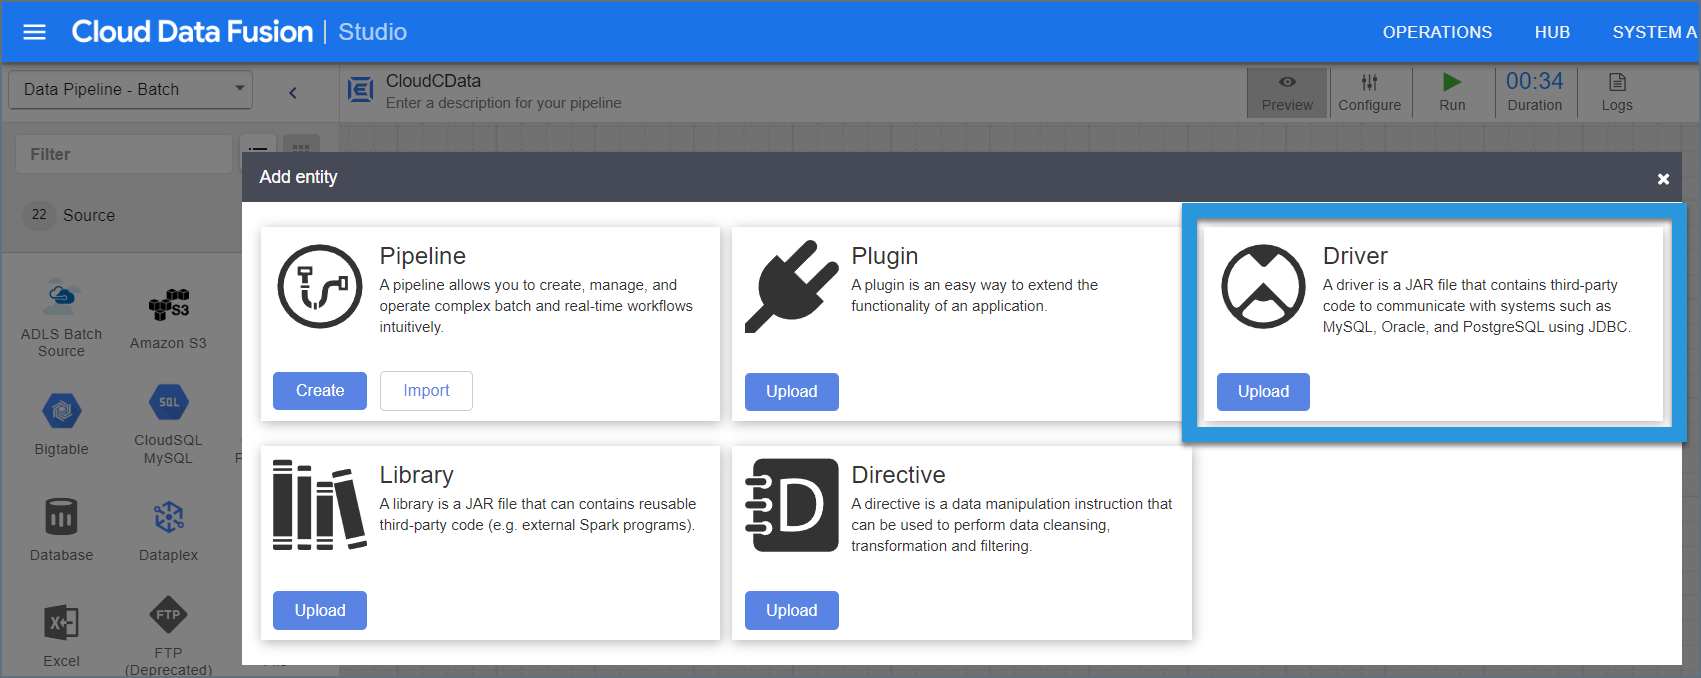
5
Upload the Connect AI JDBC driver.
6
Enter the driver settings.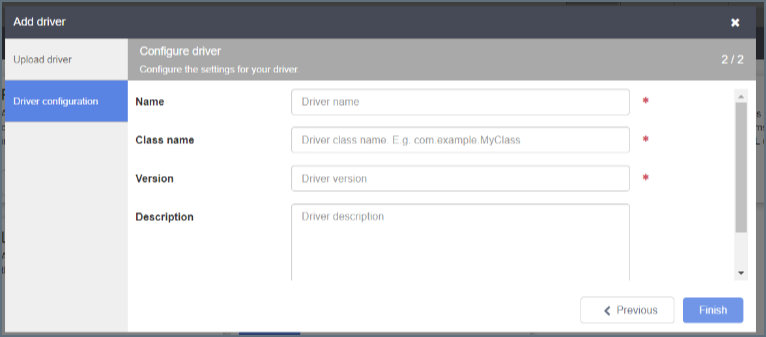
- Name—the name of the driver
- Class name—enter cdata.jdbc.connect.ConnectDriver
- Version—the driver version
- Description—(optional) a description for the driver
7
Click Finish.
8
Enter source configuration settings.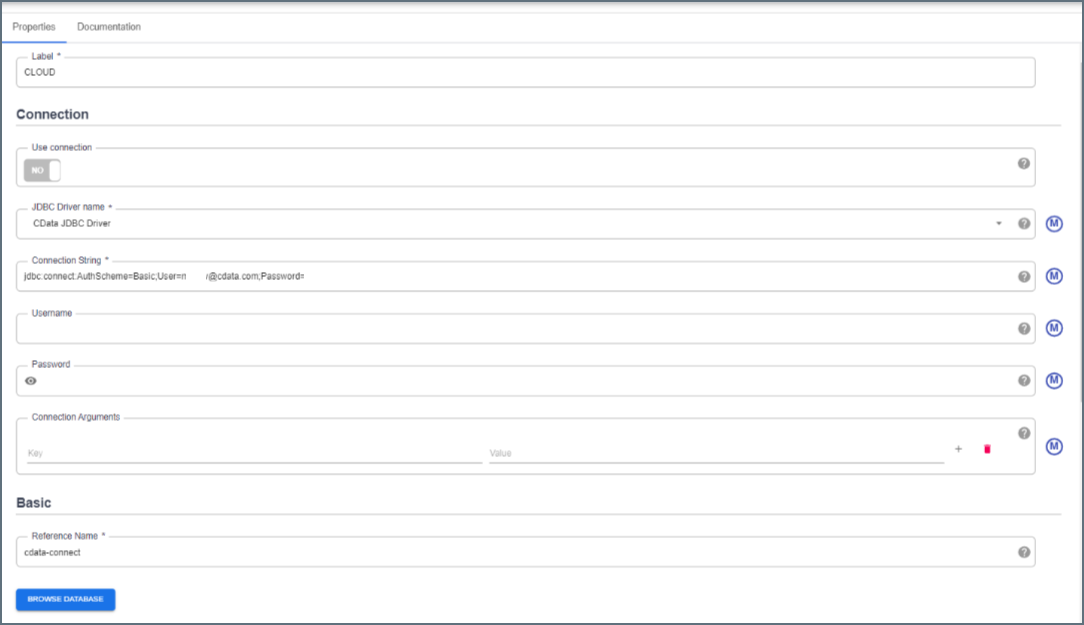
- Label—to identify the connection
- JDBC driver name—enter the JDBC driver name. This is to identify the driver configured in Step 6.
- Connection string—the JDBC connection string. It is formatted like
jdbc:connect:AuthScheme=Basic;User=[User];Password=[Password];. Fill in this string with the following parameters. - User—Connect AI のユーザー名を入力します。ユーザー名は、Connect AI の画面の右上に表示されています。例:
[email protected] - Password—Settings ページで生成したPAT を入力します。
9
Click Validate in the top right.
10
If the connection succeeds, you can manage the pipeline by editing it through the UI.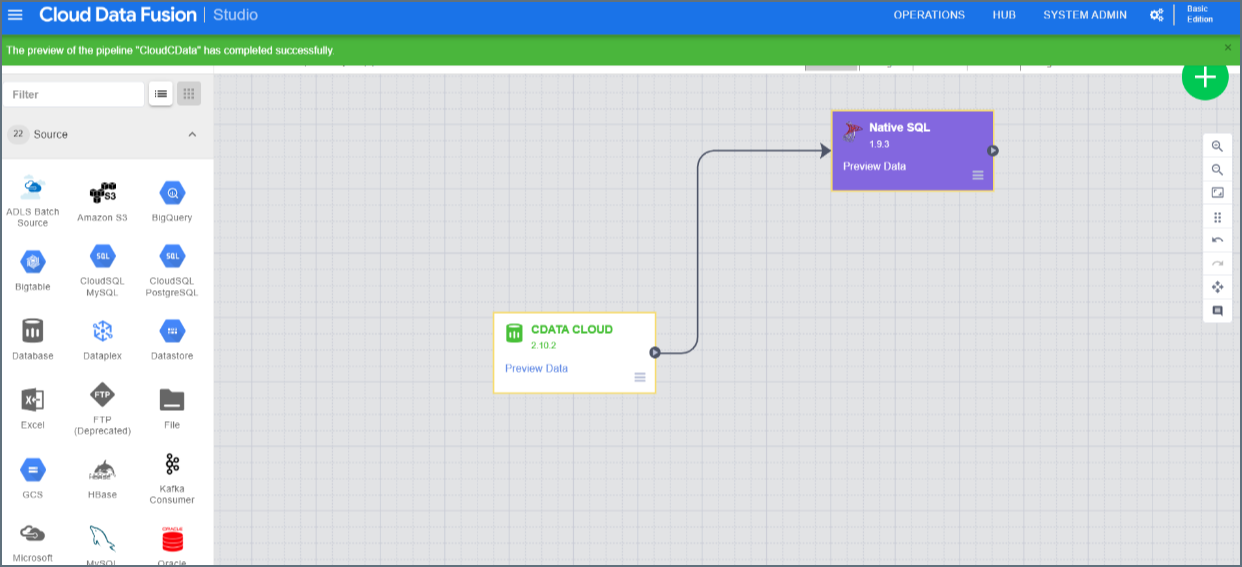
Troubleshooting
Please be aware that there is a known issue with Cloud Data Fusion whereint types from source data are automatically cast as long.