Prerequisites
This page assumes:- You are an ISV, or an operator working on behalf of an ISV, building backend automation against Connect AI Embed.
- The n8n instance is hosted and operated by the ISV (self-hosted or n8n Cloud), not by end-users of your application.
- You have a process for generating and rotating OAuth JWT bearer tokens signed by the parent (OEM) account. The same token issuance and rotation discipline you use for other Embed integrations applies here.
Connect to Connect AI
Follow these steps to connect to Connect AI Embed in n8n:1
Sign in to your ISV-operated n8n instance: either n8n.io (n8n Cloud) or a self-hosted deployment. End-users of your application should never be issued credentials to this instance.
2
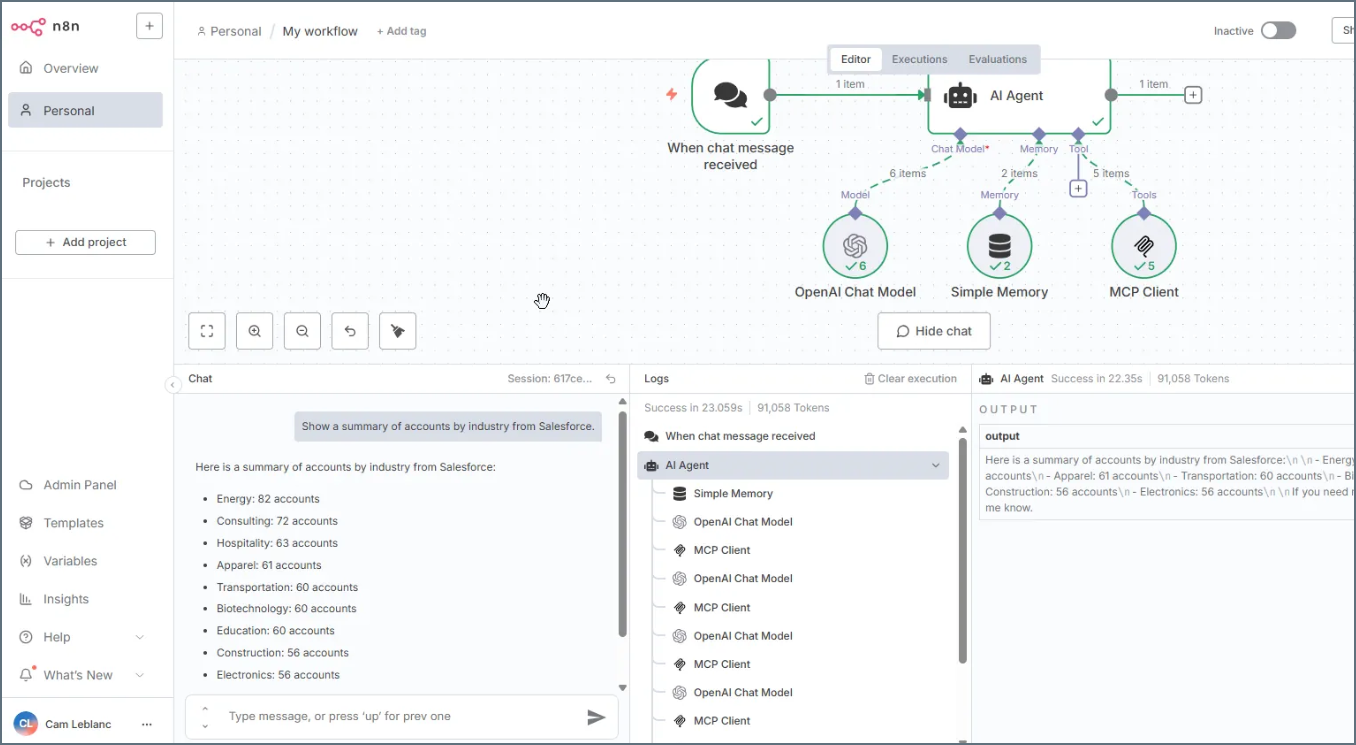
Create a workflow in n8n that uses the MCP client tool. The example below is an ISV-operated backend workflow that uses the MCP server as part of a larger automation. OpenAI is used as the Chat Model and Simple Memory as the Memory.
3
Configure the MCP Client node in the Workflow: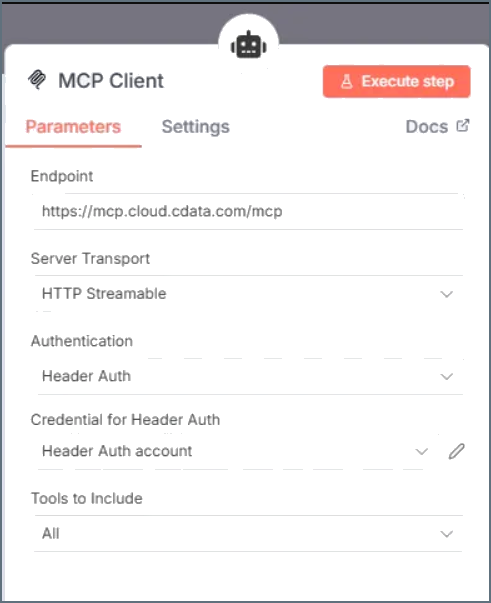
- Endpoint–enter https://mcp.cloud.cdata.com/mcp.
- Server Transport–select HTTP Streamable.
- Authentication–select Header Auth.
4
Edit the Header Auth account. In the Connection tab, set the following properties to use Basic Authentication: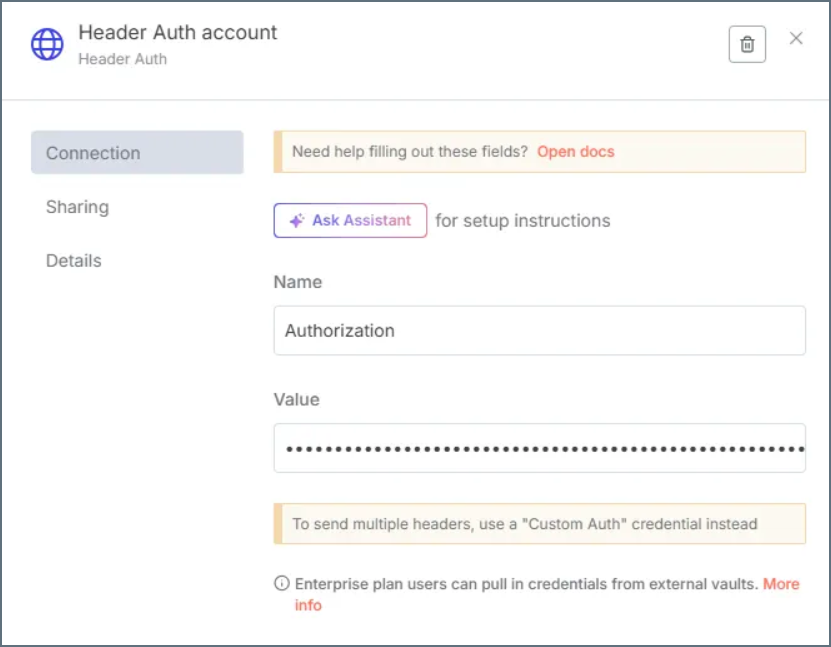
- Name–enter Authorization.
- Value–enter the value in the form Bearer OAUTH_JWT_TOKEN.
5
(Optional) Give the AI Agent context. This establishes the AI Agent’s role and provides context for the conversation through the System Message parameter in the AI Agent node. By providing a system message that explicitly informs the agent about its role as an MCP Server expert and lists the available tools, you can enhance the agent’s understanding and response accuracy.The following is an example System Message:
6
Now that you created the Workflow in n8n and connected the MCP Client, you can interact with your data. The MCP Client node allows you to send queries and receive responses from the data source in real time.
7
Open the Workflow in n8n and execute it to start interacting with your data. You can ask questions, retrieve data, and perform actions on your data using the MCP Client node: