- Parent Account—CData がお客様の組織のために作成します。ISV として、Parent Account を使用して、Connect AI Embed インターフェースまたはAPI を介してSub-Account の作成、表示、モニタリングを含む、Connect AI Embed のデプロイメント全体を管理します。
- Sub-Account—お客様の各顧客に対して1つのSub-Account が作成されます。Sub-Account 内で、エンドユーザーはデータソースに接続し、データをクエリできます。付与したアクセス権限により、各エンドユーザーが作成、編集、または削除できる内容が決まります。
Connect AI Embed クイックスタート
以下は、Connect AI Embed を設定する概要です。主に5つのステップがあります。ステップ1:Parent Account の作成
Connect AI Embed のParent Account の管理者は、秘密鍵とそれに対応する公開鍵で構成される JSON Web Token(JWT)を作成します。秘密鍵は、Connect AI Embed と統合される製品のセキュリティ要件に従って保管する必要があります。
管理者は、管理アカウントを登録するために、Privacy-Enhanced Mail(PEM)形式の公開鍵証明書を提供します。Connect AI のサポートチケットを開くことで公開鍵を登録できます。
ステップ2:Sub-Account の作成
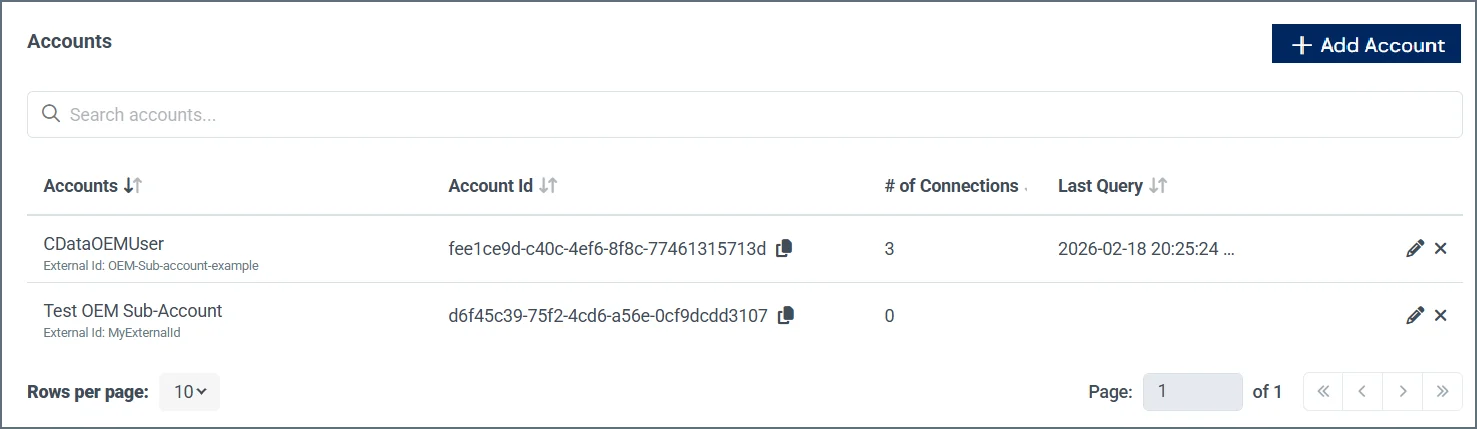
Parent Account を作成したら、次の2つの方法のいずれかでSub-Account を作成できます:- Accounts ページで +Add account をクリックします。Sub-Account の Account Name および External ID を入力し、Confirm をクリックします。
- Connect AI Embed API の Create Account を使用してSub-Account を作成します。Parent Account の作成 で作成したJWT と、Sub-Account のExternal ID を指定する必要があります。
ステップ3:コネクション設定の構成(オプション)
Connect AI Embed では、Sub-Account 全体でコネクション設定を一元的に構成する2つの方法を提供します。- Connection Overrides:Parent Account レベルでコネクション設定を一度構成し、すべてのSub-Account に自動的にプッシュします。これにより、スケール時のテナントごとのメンテナンスが不要になります。構成手順については、Settings ドキュメントの Sources セクションを参照してください。
- Branded OAuth Apps:データソースプロバイダーに独自のOAuth アプリケーションを登録し、お客様の顧客がCData ではなく自社のブランドで認証できるようにします。Sub-Account ユーザーがSalesforce または他のOAuth ソースに接続すると、CData ではなく自社のアプリケーション名が表示されます。構成手順については、Settings ドキュメントの Sources セクションを参照してください。
これでエンドユーザーはカスタム認証情報を使用できるようになります。
ステップ4:コネクションの構成
Sub-Account のエンドユーザーは、Web ページで Add Connection をクリックします。バックエンドでは、Web サイトが Create Connection を呼び出し、Connect AI Embed のWeb ページへのリダイレクトURL を生成します。エンドユーザーは、Salesforce コネクションなどの特定のタイプのコネクションを構成し、コネクションを保存してテストできます。エンドユーザーが完了すると、Connect AI Embed がコネクションのリストを含むWeb ページへリダイレクトします。詳細については Connection Flow を参照してください。ステップ5:AI を使用したデータのクエリ
データソースが接続されると、アプリケーションはAI を使用して自然言語でエンドユーザーのデータを操作できます。Connect AI Embed のMCP サーバーは、AI エージェントと顧客の接続されたアカウント(Jira やSalesforce など)を橋渡しします。各Sub-Account のコネクションは分離されており、あるSub-Account のAI ワークフローは他のSub-Account のデータにアクセスできません。サーバーで生成されたconnection_ids クレームを含むJWT が、各リクエストを正しいエンドユーザーにスコープします。詳しくは MCP を参照してください。
データをクエリするために、以下のConnect AI ドライバーのいずれかを使用することもできます:
さらに、Connect AI Embed はフル機能の REST API を提供します。HTTP リクエストを作成できる任意のREST 互換アプリケーションまたは統合ツールで、データを直接クエリできます。