> ## Documentation Index
> Fetch the complete documentation index at: https://docs.cloud.cdata.com/llms.txt
> Use this file to discover all available pages before exploring further.
# LangGraph
> LangGraph は大規模言語モデル(LLM)を活用したアプリケーションを開発するためのフレームワークです。
## 前提条件
LangGraph を Connect AI と連携させる前に、以下の準備が必要です。
* Connect AI アカウントにデータソースを接続します。詳細については、[ソース](/ja/Sources) を参照してください。
* [設定](/ja/Settings#personal-access-tokens)ページでパーソナルアクセストークン(PAT)を生成します。認証時のパスワードとして使用するため、コピーして保管してください。
* OpenAI API キーを取得します:[https://platform.openai.com/](https://platform.openai.com/)。
* LangChain および LangGraph パッケージをインストールするために Python >= 3.10 が必要です。
## Python ファイルの作成
LangGraph MCP 用のフォルダーを作成します。
フォルダー内に `langraph.py` という Python ファイルを作成します。
以下のテキストを `langraph.py` に貼り付けます。Base64 エンコードされた Connect AI ユーザー名と PAT(前提条件で取得)を指定する必要があります。
```bash expandable theme={null}
"""
Simple LangGraph + MCP + OpenAI Integration
Pure LangGraph implementation without LangChain
"""
import asyncio
from typing import Any
from langgraph.graph import StateGraph, START, END
from langgraph.prebuilt import create_react_agent
from langchain_mcp_adapters.client import MultiServerMCPClient
from langchain_openai import ChatOpenAI
from langchain_core.messages import BaseMessage, HumanMessage, AIMessage, ToolMessage
from typing_extensions import TypedDict, Annotated
import operator
class AgentState(TypedDict):
"""State for the LangGraph agent"""
messages: Annotated[list[BaseMessage], operator.add]
async def main():
# Configuration
MCP_BASE_URL = "https://mcp.cloud.cdata.com/mcp"
MCP_AUTH = "YOUR_BASE64_ENCODED_EMAIL:PAT"
OPENAI_API_KEY = "YOUR_OPENAI_API_KEY"
# Step 1: Connect to MCP server
print("🔗 Connecting to MCP server...")
mcp_client = MultiServerMCPClient(
connections={
"default": {
"transport": "streamable_http",
"url": MCP_BASE_URL,
"headers": {"Authorization": f"Basic {MCP_AUTH}"} if MCP_AUTH else {},
}
}
)
# Step 2: Load all available tools from MCP
print("📦 Loading MCP tools...")
all_mcp_tools = await mcp_client.get_tools()
tool_names = [tool.name for tool in all_mcp_tools]
print(f"✅ Found {len(tool_names)} tools: {tool_names}\n")
# Step 3: Initialize OpenAI LLM
print("🤖 Initializing OpenAI LLM...")
llm = ChatOpenAI(
model="gpt-4o",
temperature=0.2,
api_key=OPENAI_API_KEY
)
# Step 4: Create LangGraph agent
print("⚙️ Creating LangGraph agent...\n")
agent = create_react_agent(llm, all_mcp_tools)
# Step 5: Create the graph
builder = StateGraph(AgentState)
builder.add_node("agent", agent)
builder.add_edge(START, "agent")
builder.add_edge("agent", END)
graph = builder.compile()
# Step 6: Run agent with your query
user_prompt = "List down the first record from the Activities table from ActCRM1"
print(f"❓ User Query: {user_prompt}\n")
print("🔄 Agent is thinking and using tools...\n")
initial_state = {
"messages": [HumanMessage(content=user_prompt)]
}
result = await graph.ainvoke(initial_state)
# Step 7: Print final response
final_response = result["messages"][-1].content
print(f"✨ Agent Response:\n{final_response}")
if __name__ == "__main__":
asyncio.run(main())
```
## LangChain および LangGraph パッケージのインストール
プロジェクトのルートターミナルで `pip install -U langgraph langchain langchain-openai langchain-mcp-adapters typing-extensions` を実行します。
## Python スクリプトの実行
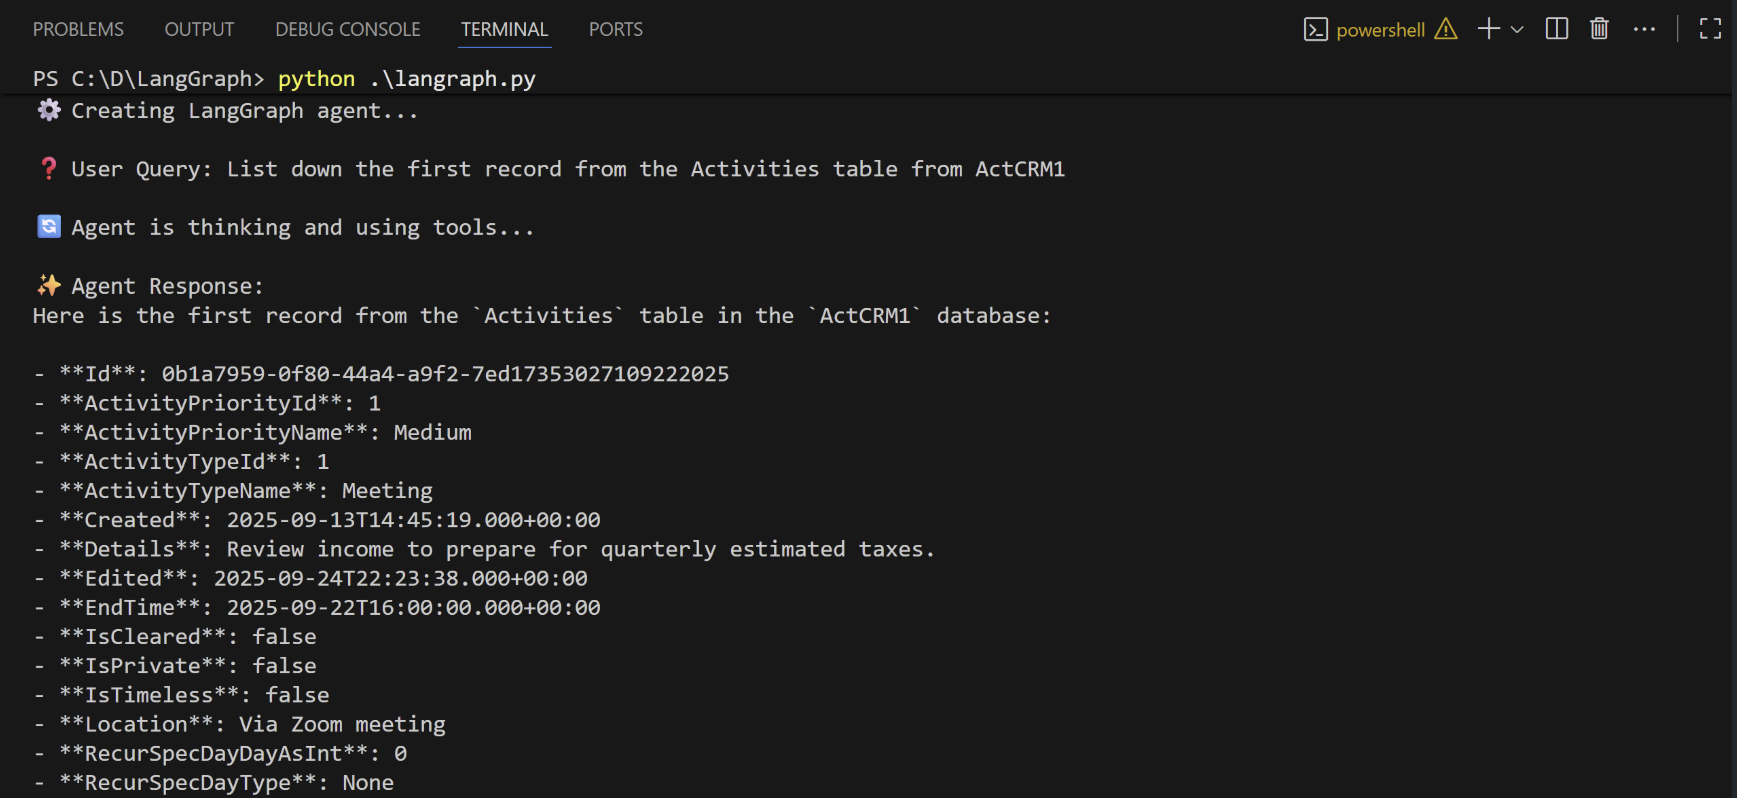
インストールが完了したら、`python langraph.py` を実行してスクリプトを実行します。
スクリプトは、LLM が接続されたデータをクエリするために必要な Connect AI MCP ツールを検出します。
エージェントにプロンプトを提供します。エージェントが応答を返します。