> ## Documentation Index
> Fetch the complete documentation index at: https://docs.cloud.cdata.com/llms.txt
> Use this file to discover all available pages before exploring further.
# Crystal Reports
> This page outlines two different ways to connect to Connect AI from Crystal Reports: through OData or through the JDBC driver. After installation, Crystal Reports can pull data from sources that you have connected to your Connect AI account.
The OData method of connecting is simpler and faster than the JDBC method.
## Prerequisites
Before you can configure and use Crystal Reports with Connect AI through either method, you must first connect a data source to your Connect AI account. See [Sources](/ja/Sources) for more information.
You must also generate a Personal Access Token (PAT) on the [Settings](/ja/Settings#personal-access-tokens) page. Copy this down, as it acts as your password during authentication.
**For OData connectivity only:** Create a [Workspace](/ja/Workspaces). Later, you will use the **OData Service URL** on that page (*\`[https://cloud.cdata.com/api/odata/\{workspace\\\_name}](https://cloud.cdata.com/api/odata/\{workspace\\_name})*) with the relevant workspace name to establish the connection.
## Connect to Connect AI via OData
To establish a connection from Crystal Reports to Connect AI via OData, follow these steps.
If necessary, download and install Crystal Reports from the SAP website.
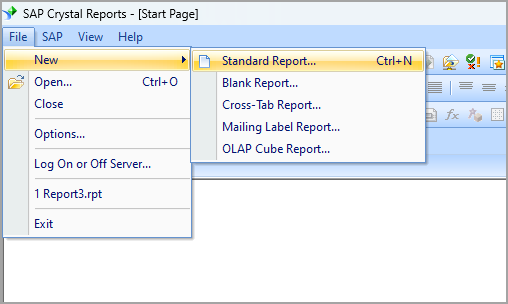
In Crystal Reports, select **File** > **New** > **Standard Report**.
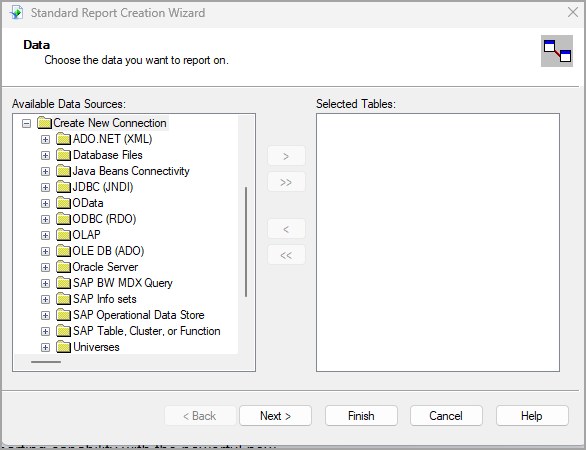
 In the **Standard Report Creation Wizard**, select **OData** as your data source.
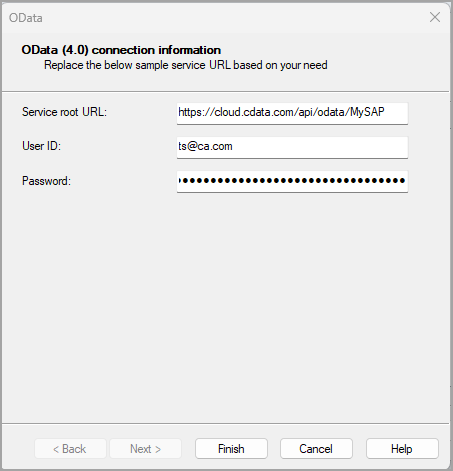
 This opens the **OData** connectivity dialog.
In the **OData** dialog, enter the following information:
* **Service root URL**–*[https://cloud.cdata.com/api/odata/\{workspace\\\_name}](https://cloud.cdata.com/api/odata/\{workspace\\_name})*
* **User ID**–Connect AI のユーザー名を入力します。ユーザー名は、Connect AI の画面の右上に表示されています。例:*[test@cdata.co.jp](mailto:test@cdata.co.jp)*
* **Password**–[Settings](/ja/Settings#personal-access-tokens) ページで生成したPAT を入力します。
This opens the **OData** connectivity dialog.
In the **OData** dialog, enter the following information:
* **Service root URL**–*[https://cloud.cdata.com/api/odata/\{workspace\\\_name}](https://cloud.cdata.com/api/odata/\{workspace\\_name})*
* **User ID**–Connect AI のユーザー名を入力します。ユーザー名は、Connect AI の画面の右上に表示されています。例:*[test@cdata.co.jp](mailto:test@cdata.co.jp)*
* **Password**–[Settings](/ja/Settings#personal-access-tokens) ページで生成したPAT を入力します。
 Click **Finish**.
The tables in the selected workspace now appear as an available data source under OData.
Click **Finish**.
The tables in the selected workspace now appear as an available data source under OData.
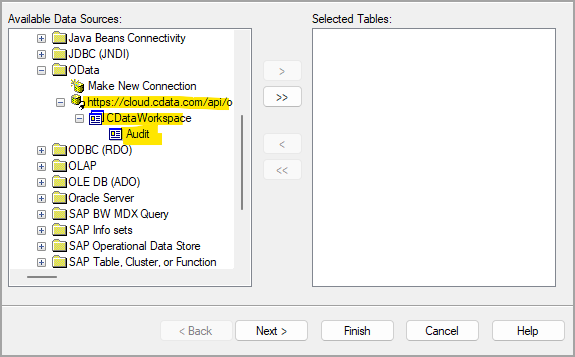 Select the tables and columns for your report.
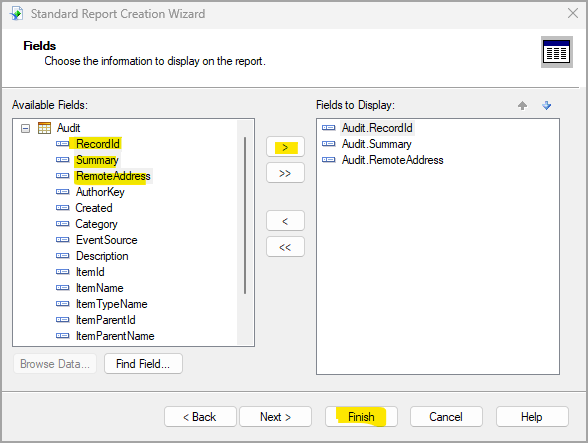 Click **Finish** to generate the report.
## Connect to Connect AI via JDBC Driver
To establish a connection from Crystal Reports to Connect AI through the JDBC driver, follow these steps.
If necessary, download and install Crystal Reports from the SAP website.
Download and install the Connect AI JDBC driver.
a. Open the **Integrations** page of Connect AI.
b. In the **Dev Tools** section, click **JDBC**.
c. Download and run the setup file.
d. When the installation is complete, locate the JDBC Connect JAR file in the JDBC driver's installation directory, for example, `C:\Program Files\CData\JDBC Driver for CData Connect\lib`.
e. Copy the JDBC Connect JAR file.
Find the installation directory for Crystal Reports, for example, `C:\Program Files (x86)\SAP BusinessObjects\SAP BusinessObjects Enterprise XI 4.0\java\lib`.
Paste the JDBC Connect JAR file into the Crystal Reports installation directory.
Go to the parent `java` folder (for example, `C:\Program Files (x86)\SAP BusinessObjects\SAP BusinessObjects Enterprise XI 4.0\java`). This folder should contain a `CRConfig` file.
Click **Finish** to generate the report.
## Connect to Connect AI via JDBC Driver
To establish a connection from Crystal Reports to Connect AI through the JDBC driver, follow these steps.
If necessary, download and install Crystal Reports from the SAP website.
Download and install the Connect AI JDBC driver.
a. Open the **Integrations** page of Connect AI.
b. In the **Dev Tools** section, click **JDBC**.
c. Download and run the setup file.
d. When the installation is complete, locate the JDBC Connect JAR file in the JDBC driver's installation directory, for example, `C:\Program Files\CData\JDBC Driver for CData Connect\lib`.
e. Copy the JDBC Connect JAR file.
Find the installation directory for Crystal Reports, for example, `C:\Program Files (x86)\SAP BusinessObjects\SAP BusinessObjects Enterprise XI 4.0\java\lib`.
Paste the JDBC Connect JAR file into the Crystal Reports installation directory.
Go to the parent `java` folder (for example, `C:\Program Files (x86)\SAP BusinessObjects\SAP BusinessObjects Enterprise XI 4.0\java`). This folder should contain a `CRConfig` file.
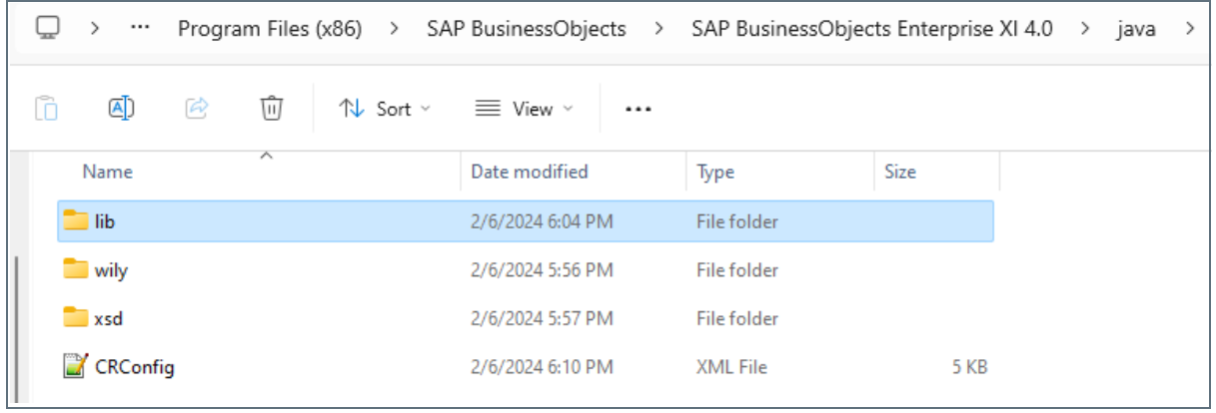 Open `CRConfig` in a text editor.
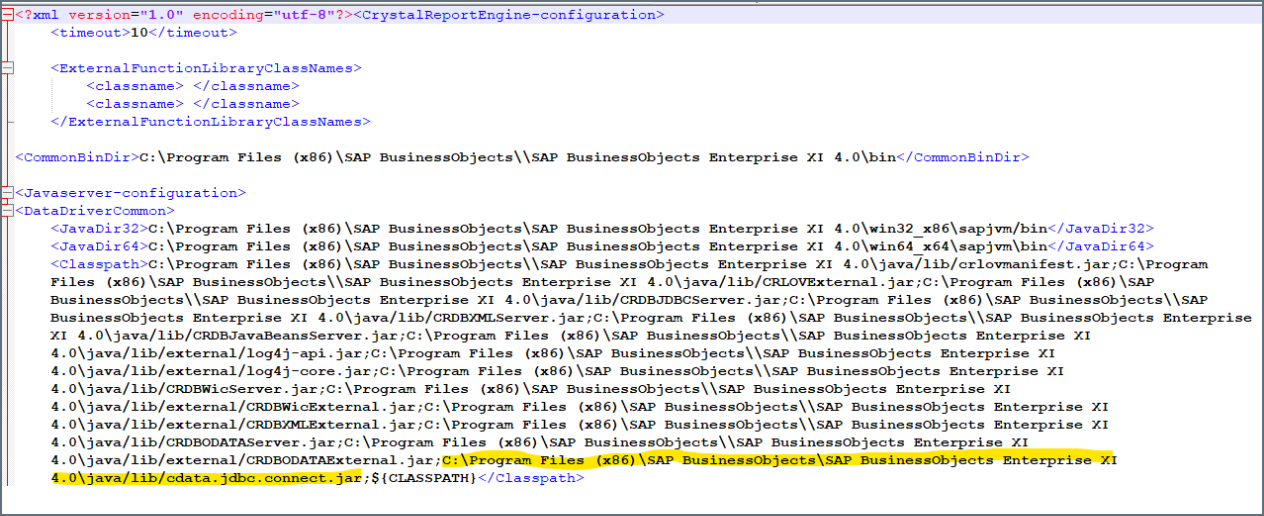
Add the path to the JDBC Connect JAR file in the `` of the `CRConfig` file, for example, `C:\Program Files (x86)\SAP BusinessObjects\SAP BusinessObjects Enterprise XI 4.0\java\lib`.
Open `CRConfig` in a text editor.
Add the path to the JDBC Connect JAR file in the `` of the `CRConfig` file, for example, `C:\Program Files (x86)\SAP BusinessObjects\SAP BusinessObjects Enterprise XI 4.0\java\lib`.
 Log in to Crystal Reports and start a blank report.
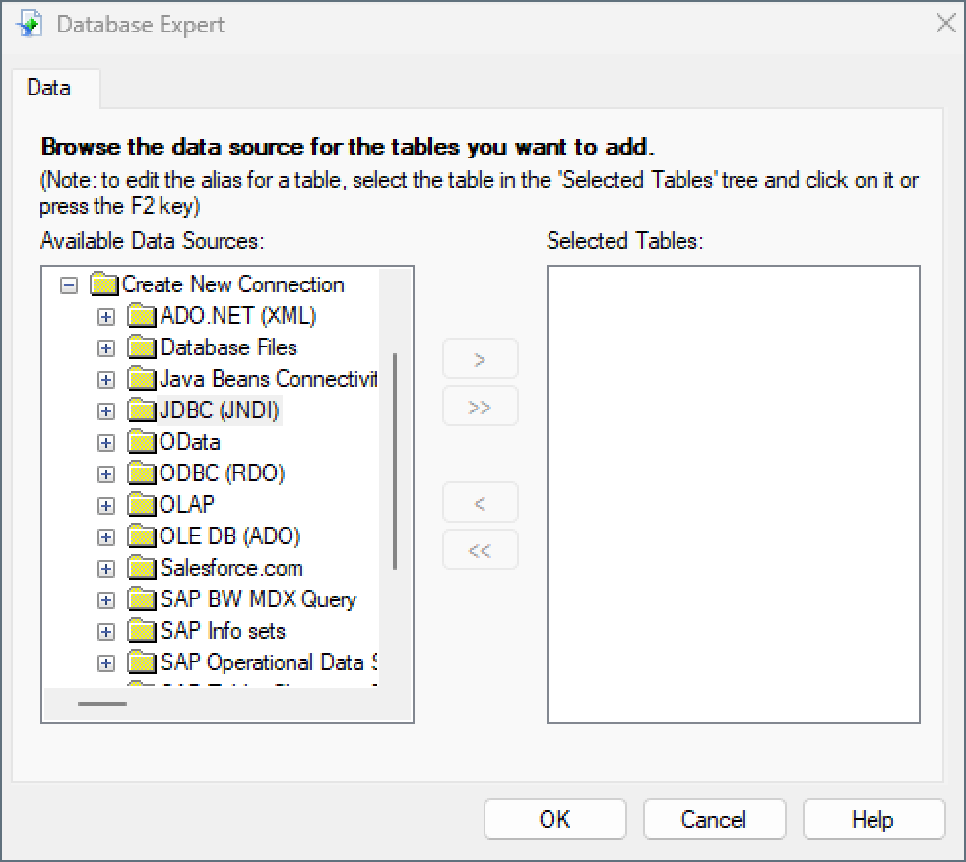
In the **Database Expert** dialog, click **Create New Connection**.
Select the **JDBC** data source and the tables you want to add. Click **OK**.
Log in to Crystal Reports and start a blank report.
In the **Database Expert** dialog, click **Create New Connection**.
Select the **JDBC** data source and the tables you want to add. Click **OK**.
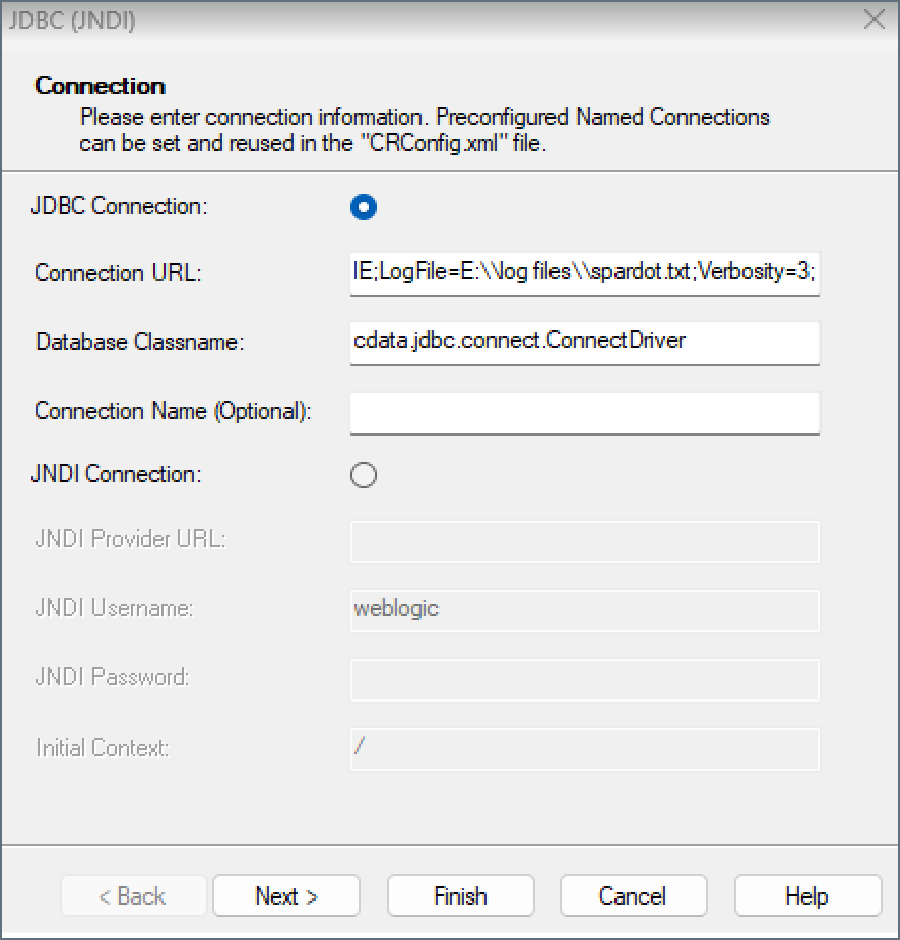
 In the **Connection** dialog, enter the **Connection URL** and **Database Classname**.
 Click **Finish**. The **Database Expert** dialog displays all available connections.
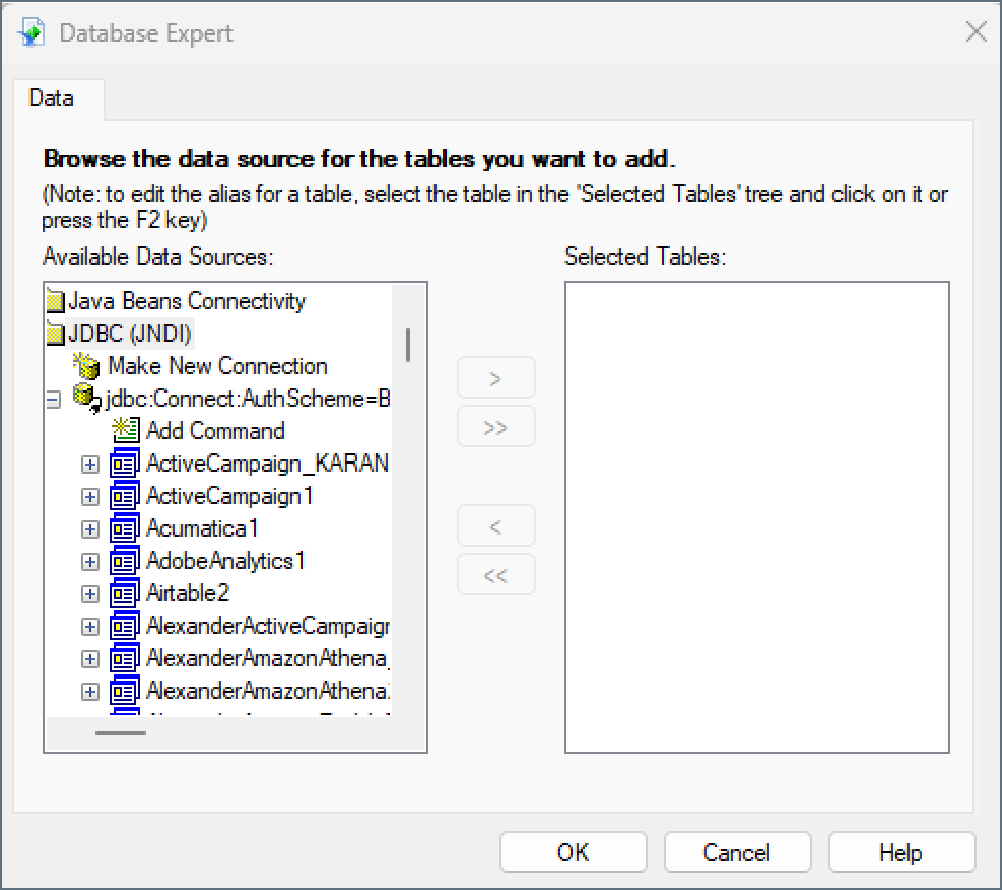 You can now create reports with the connected data.