> ## Documentation Index
> Fetch the complete documentation index at: https://docs.cloud.cdata.com/llms.txt
> Use this file to discover all available pages before exploring further.
# Azure Data Factory
> This page outlines the steps to connect Azure Data Factory to Connect AI. You can use either Connect AI Virtual SQL Server API or the Connect AI OData endpoint to connect. Note that the Virtual SQL Server API performs better for large datasets, while OData performs well with smaller datasets.
## Prerequisites for Connecting via Virtual SQL Server API
Before you connect via Virtual SQL Server API, you must first do the following:
* Connect a data source to your Connect AI account. See [Sources](/ja/Sources) for more information.
* Generate a Personal Access Token (PAT) on the [Settings](/ja/Settings#personal-access-tokens) page. Copy this down, as it acts as your password during authentication.
## Connect to Connect AI via Virtual SQL Server API
To establish a connection from Azure Data Factory to the Connect AI Virtual SQL Server API, follow these steps.
Login to Azure Data Factory.
If you have not yet created a Data Factory:
* Click **Create** and enter your configuration information in each tab.
* When you are finished entering information, click **Review + create** and then **Create** to save the Data Factory.
Open Azure Data Factory Studio and select your Data Factory.
In the **Factory Resources** section, highlight the **Datasets** option.
Click the three dots to open the Dataset actions and select **New Dataset**.
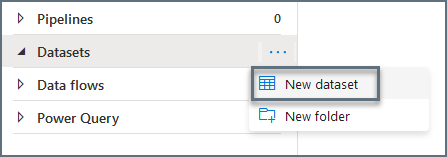 In the search bar, enter *SQL Server* and select it when it appears.
Enter a name for the server. In the **Linked service** field, select **New**.
Enter the connection settings.
* **Name**—enter a name of your choice.
* **Server name**—enter the Virtual SQL Server endpoint and port separated by a comma: *tds.cdata.com*,*14333*
* **Database name**—接続したいConnect AI データソースのConnection Name を入力します。例:*Salesforce1*
* **User Name**—Connect AI のユーザー名を入力します。ユーザー名は、Connect AI の画面の右上に表示されています。例:*[test@cdata.co.jp](mailto:test@cdata.co.jp)*
* **Password**—select **Password** (not **Azure Key Vault**) and [Settings](/ja/Settings#personal-access-tokens) ページで生成したPAT を入力します。
Click **Create**.
Select your new connection in the **Linked service** field.
Select your desired table and click **OK**.
You can now use this Dataset when creating Data flows in Azure Data Factory.
## Prerequisites for Connecting via OData Endpoint
Before you connect to Connect AI via the OData endpoint, you must first do the following:
* Connect a data source to your Connect AI account. See [Sources](/ja/Sources) for more information.
* Create a [Workspace](/ja/Workspaces). Later, you will use the **OData Service URL** on that page (*`https://cloud.cdata.com/api/odata/{workspace_name}`*) with the relevant workspace name to establish the connection.
* Generate a Personal Access Token (PAT) on the [Settings](/ja/Settings#personal-access-tokens) page. Copy this down, as it acts as your password during authentication.
## Connect to Connect AI via OData Endpoint
To connect to Connect AI using the OData protocol, follow these steps.
Login to Azure Data Factory.
Click **New** > **Dataset**.
In the search bar, enter *SQL Server* and select it when it appears.
Enter a name for the server. In the **Linked service** field, select **New**.
Enter the connection settings.
* **Name**—enter a name of your choice.
* **Server name**—enter the Virtual SQL Server endpoint and port separated by a comma: *tds.cdata.com*,*14333*
* **Database name**—接続したいConnect AI データソースのConnection Name を入力します。例:*Salesforce1*
* **User Name**—Connect AI のユーザー名を入力します。ユーザー名は、Connect AI の画面の右上に表示されています。例:*[test@cdata.co.jp](mailto:test@cdata.co.jp)*
* **Password**—select **Password** (not **Azure Key Vault**) and [Settings](/ja/Settings#personal-access-tokens) ページで生成したPAT を入力します。
Click **Create**.
Select your new connection in the **Linked service** field.
Select your desired table and click **OK**.
You can now use this Dataset when creating Data flows in Azure Data Factory.
## Prerequisites for Connecting via OData Endpoint
Before you connect to Connect AI via the OData endpoint, you must first do the following:
* Connect a data source to your Connect AI account. See [Sources](/ja/Sources) for more information.
* Create a [Workspace](/ja/Workspaces). Later, you will use the **OData Service URL** on that page (*`https://cloud.cdata.com/api/odata/{workspace_name}`*) with the relevant workspace name to establish the connection.
* Generate a Personal Access Token (PAT) on the [Settings](/ja/Settings#personal-access-tokens) page. Copy this down, as it acts as your password during authentication.
## Connect to Connect AI via OData Endpoint
To connect to Connect AI using the OData protocol, follow these steps.
Login to Azure Data Factory.
Click **New** > **Dataset**.
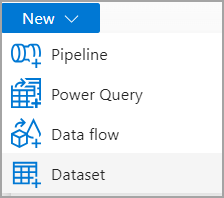 A **New dataset** dialog appears.
In the search bar, enter *OData*.
A **New dataset** dialog appears.
In the search bar, enter *OData*.
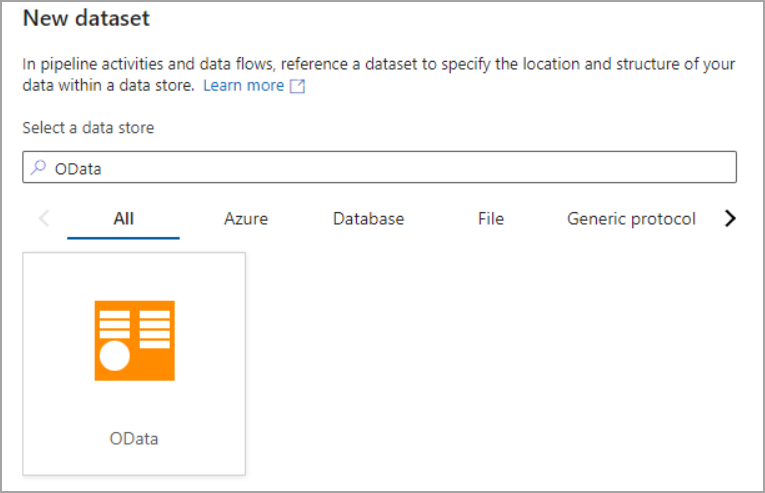 Select **OData** and click **Continue**.
In the **Set properties** dialog, name your OData Resource and for **Linked service**, click **New**. A **New linked service** dialog appears.
Enter the following settings for OData:
* **Name**—enter a name of your choice.
* **Service URL**—enter *`https://cloud.cdata.com/api/odata/{workspace_name}`*.
* **Authentication type**—select **Basic Authentication**.
* **User name**—Connect AI のユーザー名を入力します。ユーザー名は、Connect AI の画面の右上に表示されています。例:*[test@cdata.co.jp](mailto:test@cdata.co.jp)*
* **Password**—select **Password** (not **Azure Key Vault**) and [Settings](/ja/Settings#personal-access-tokens) ページで生成したPAT を入力します。
Select **OData** and click **Continue**.
In the **Set properties** dialog, name your OData Resource and for **Linked service**, click **New**. A **New linked service** dialog appears.
Enter the following settings for OData:
* **Name**—enter a name of your choice.
* **Service URL**—enter *`https://cloud.cdata.com/api/odata/{workspace_name}`*.
* **Authentication type**—select **Basic Authentication**.
* **User name**—Connect AI のユーザー名を入力します。ユーザー名は、Connect AI の画面の右上に表示されています。例:*[test@cdata.co.jp](mailto:test@cdata.co.jp)*
* **Password**—select **Password** (not **Azure Key Vault**) and [Settings](/ja/Settings#personal-access-tokens) ページで生成したPAT を入力します。
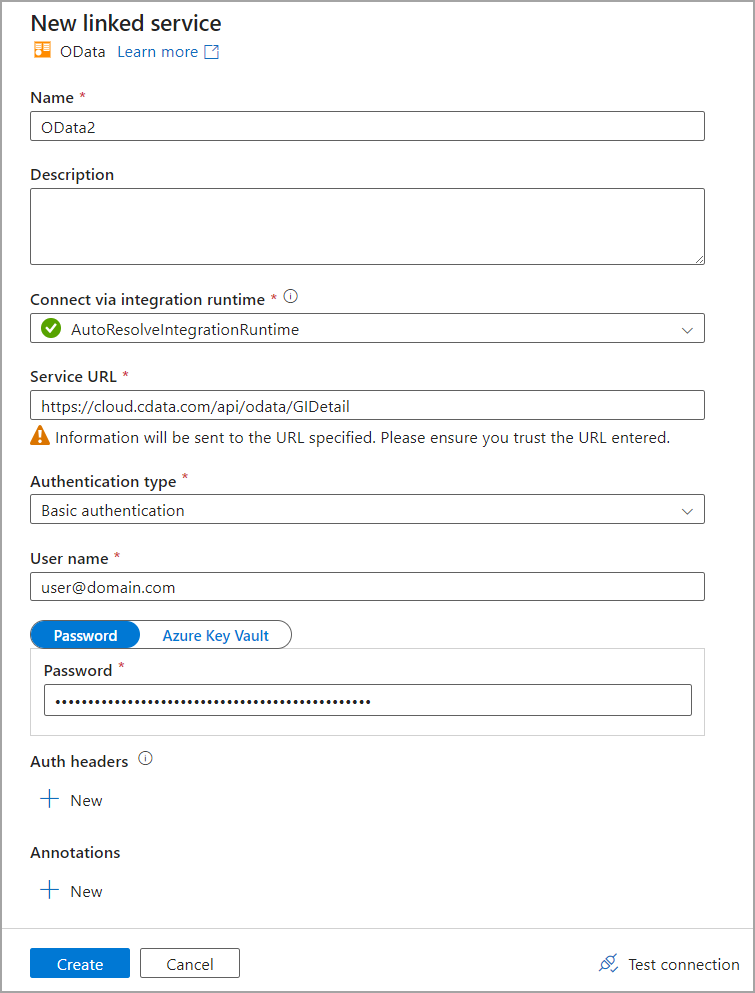 Click **Create**. This loads the details for your specific table or dataset that you want to query.
In the tab for your new dataset, select the path for the data you want to view.
Click **Create**. This loads the details for your specific table or dataset that you want to query.
In the tab for your new dataset, select the path for the data you want to view.
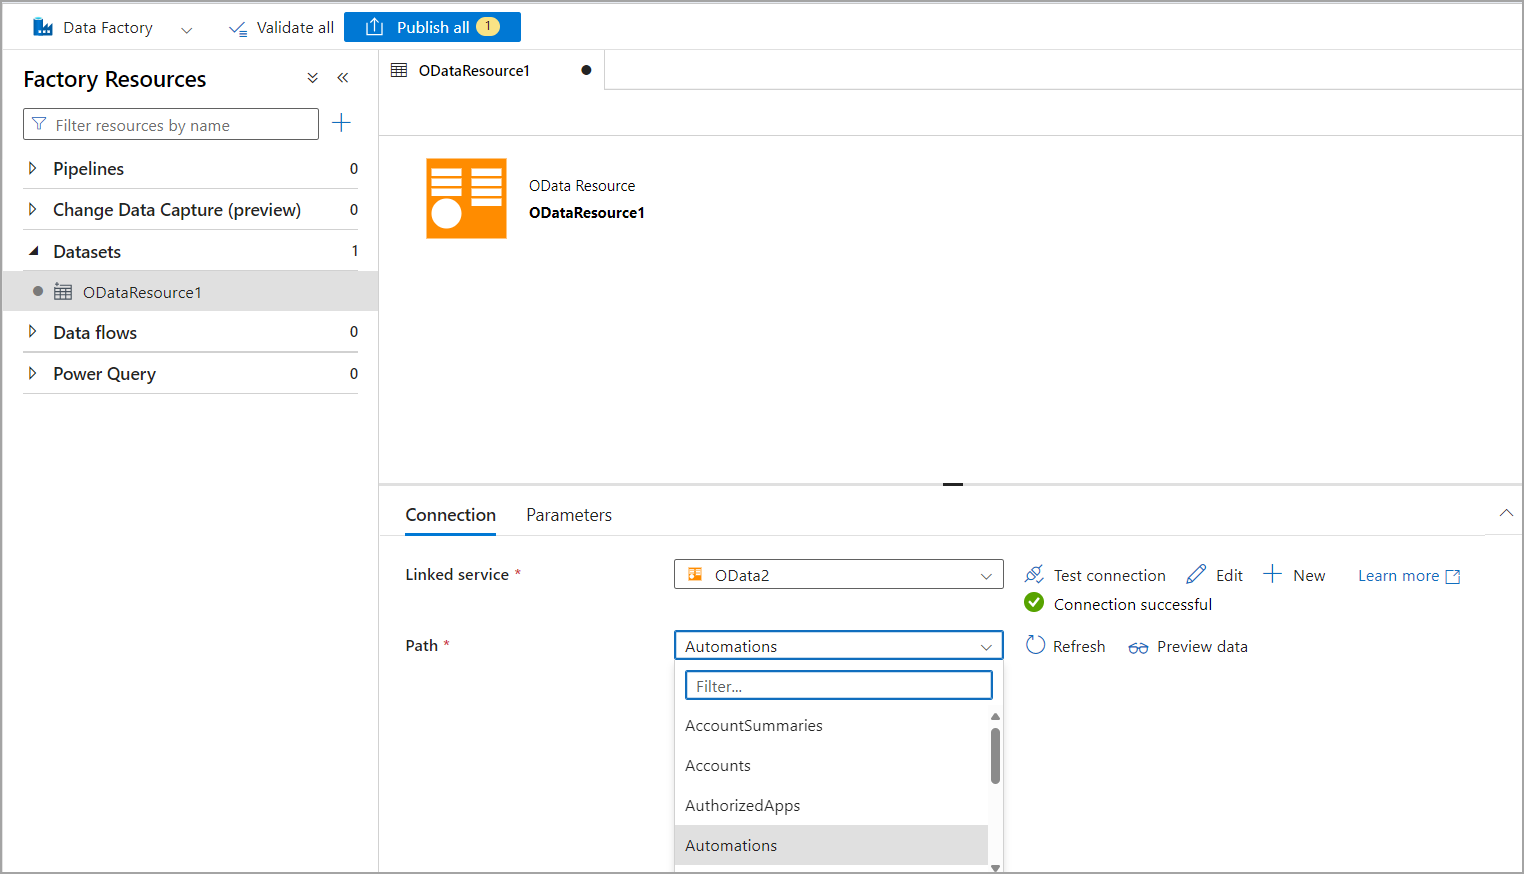 Click **Preview data** to view the data.