> ## Documentation Index
> Fetch the complete documentation index at: https://docs.cloud.cdata.com/llms.txt
> Use this file to discover all available pages before exploring further.
# AWS App Studio
> AWS App Studio is an AWS service that enables application development using generative AI. When connected to Connect AI, AWS App Studio lets you develop applications using SaaS data.
This page outlines the steps to connect AWS App Studio to your Connect AI account.
## Prerequisites
Before you connect, you must first do the following:
* Connect a data source to your Connect AI account. See [Sources](/ja/Sources) for more information.
* [Add a workspace](/ja/Workspaces#add-a-workspace) to Workspaces.
* [Add assets](/ja/Workspaces#workspace-assets) to your workspace.
* Generate a Personal Access Token (PAT) on the [Settings](/ja/Settings#personal-access-tokens) page. Copy this down, as it acts as your password during authentication.
## Connect to Connect AI via OpenAPI
To establish a connection from AWS App Studio to Connect AI via OpenAPI, follow these steps.
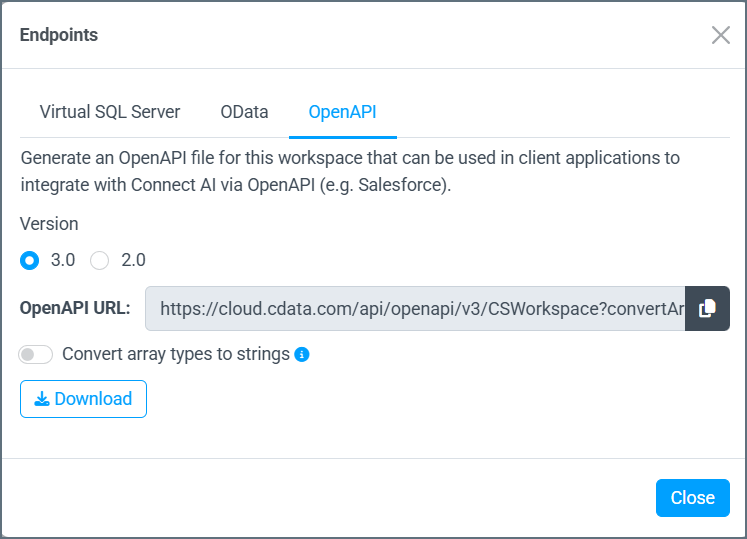
In **Workspaces** in Connect AI, select a workspace and download the OpenAPI specification for the workspace. See [OpenAPI](/ja/API/OpenAPI) for more information.
You must use OpenAPI version 3.0.
 Log in to AWS App Studio.
Open the Admin hub.
Click **Create Connector**.
In the **Select a connector** page, select **OpenAPI Connector**.
In the **OpenAPI Connector Configuration** page, configure the following:
* **Name**—enter a name of your choice for the connection.
* **Description**—if desired, enter a description for the connection.
* **Base URL**—the URL of the OpenAPI Specification file.
* **Authentication method**—select **Basic**.
* **Username**—Connect AI のユーザー名を入力します。ユーザー名は、Connect AI の画面の右上に表示されています。例:*[test@cdata.co.jp](mailto:test@cdata.co.jp)*
* **Password**—[Settings](/ja/Settings#personal-access-tokens) ページで生成したPAT を入力します。
* **OpenAPI Specification file**—import the OpenAPI Specification file you downloaded from Connect AI.
Save the connector.
## Use the OpenAPI Connection in AWS App Studio
Open the Builder hub.
Click **Create app** and give the application a name.
Click **Add automation**.
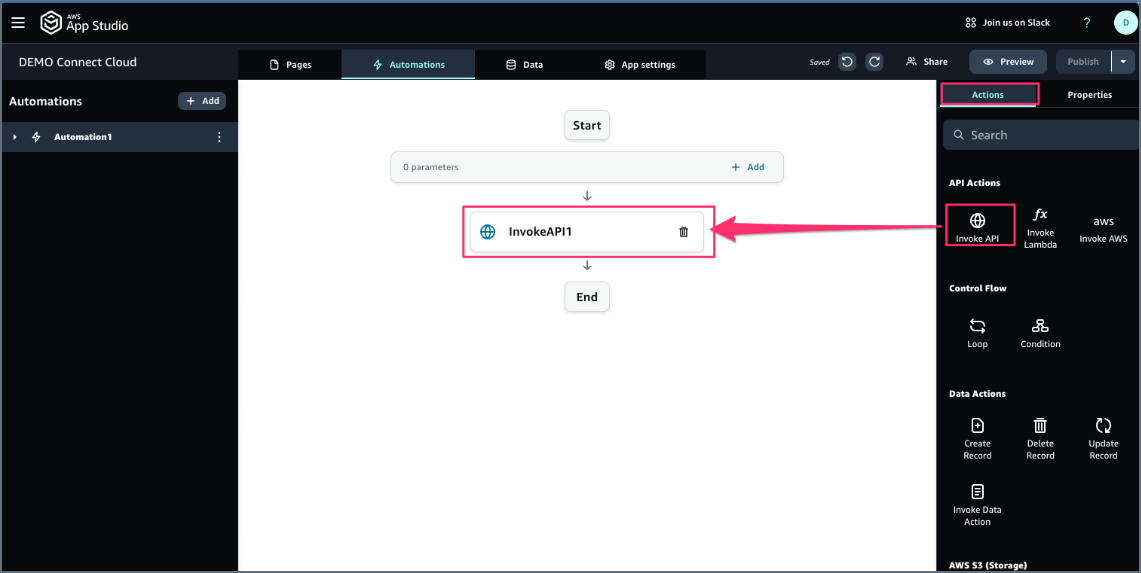
In the **Actions** tab to the right of the application creation screen, click **Invoke API** and add it to a flow.
Log in to AWS App Studio.
Open the Admin hub.
Click **Create Connector**.
In the **Select a connector** page, select **OpenAPI Connector**.
In the **OpenAPI Connector Configuration** page, configure the following:
* **Name**—enter a name of your choice for the connection.
* **Description**—if desired, enter a description for the connection.
* **Base URL**—the URL of the OpenAPI Specification file.
* **Authentication method**—select **Basic**.
* **Username**—Connect AI のユーザー名を入力します。ユーザー名は、Connect AI の画面の右上に表示されています。例:*[test@cdata.co.jp](mailto:test@cdata.co.jp)*
* **Password**—[Settings](/ja/Settings#personal-access-tokens) ページで生成したPAT を入力します。
* **OpenAPI Specification file**—import the OpenAPI Specification file you downloaded from Connect AI.
Save the connector.
## Use the OpenAPI Connection in AWS App Studio
Open the Builder hub.
Click **Create app** and give the application a name.
Click **Add automation**.
In the **Actions** tab to the right of the application creation screen, click **Invoke API** and add it to a flow.
 In the **Properties** tab to the right of the application creation screen, select the OpenAPI connector you created.
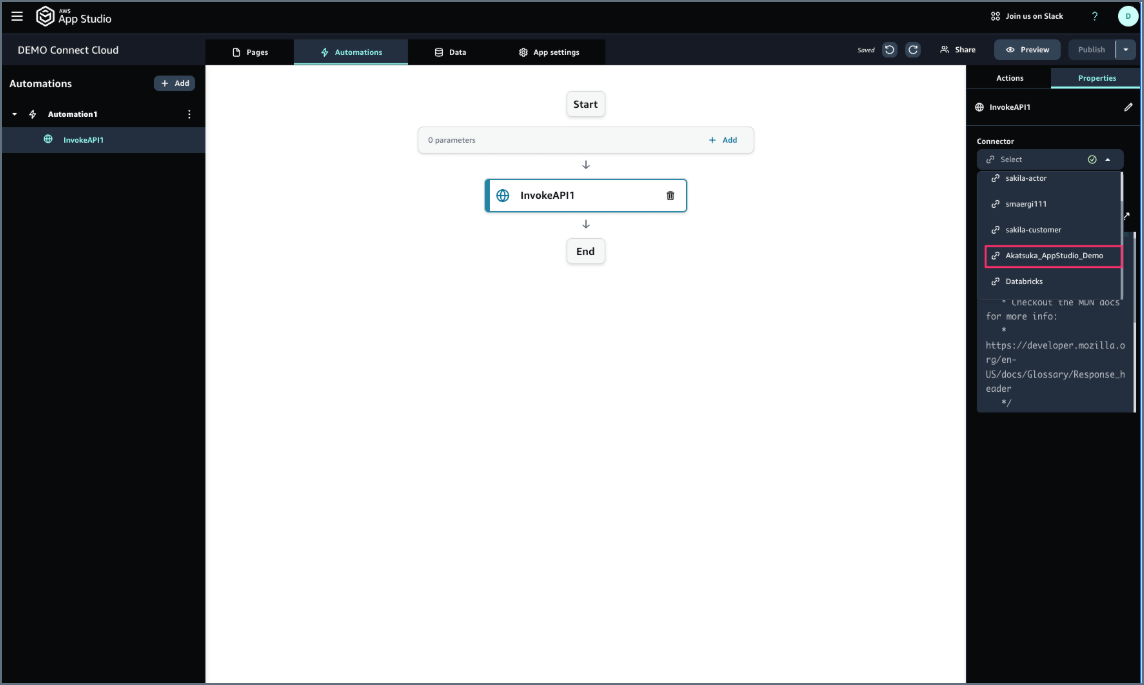 Confirm the contents of the OpenAPI connector.
Once the flow is successfully completed, you can test the outputs for your flow.
Confirm the contents of the OpenAPI connector.
Once the flow is successfully completed, you can test the outputs for your flow.