> ## Documentation Index
> Fetch the complete documentation index at: https://docs.cloud.cdata.com/llms.txt
> Use this file to discover all available pages before exploring further.
# Azure Analysis Services
> This page outlines the steps to connect Azure Analysis Services to Connect AI. You can use either Connect AI Virtual SQL Server API or the Connect AI OData endpoint to connect. Note that the performance of Azure Analysis Services is much slower with an OData connection.
## Prerequisites for Connecting via Virtual SQL Server API
Before you connect via Virtual SQL Server API, you must first do the following:
* Create a server in Azure Analysis Services to which you will deploy your data from Connect AI.
* An on-premises data gateway is required when one or more Azure Analysis Services servers in the same region connect to on-premises data sources. To install and configure an on-premises gateway to access data sources, refer to the Microsoft documentation: [Install an On-Premises Gateway](https://learn.microsoft.com/en-us/azure/analysis-services/analysis-services-gateway-install?tabs=azure-portal).
* Connect a data source to your Connect AI account. See [Sources](/ja/Sources) for more information.
* Generate a Personal Access Token (PAT) on the [Settings](/ja/Settings#personal-access-tokens) page. Copy this down, as it acts as your password during authentication.
## Connect to Connect AI via Virtual SQL Server API
To establish a connection from Azure Analysis Services to the Connect AI Virtual SQL Server API, follow these steps.
These steps involve creating a tabular model project through Visual Studio and deploying the model to Azure Analysis Services. For further instructions on using Azure Analysis Services, please refer to Microsoft documentation.
### Step 1: Prepare Visual Studio
Open Visual Studio. In the navigation bar, select **Extensions** > **Manage Extensions**.
In the search bar, enter *Microsoft Analysis Services Projects 2022*. When it appears in the list, click **Download**.
When the installer file finishes downloading, close Visual Studio and double-click the extension installation file to install it.
Follow the installation prompts. When the installation finishes, restart Visual Studio.
### Step 2: Create the Data Model Project
In Visual Studio, create a new project.
Select **Analysis Services Tabular Project**.
In **Configure your new project**, enter a name for your project in the **Project name** field.
Specify a location for the project files and set **Framework** to the latest available value.
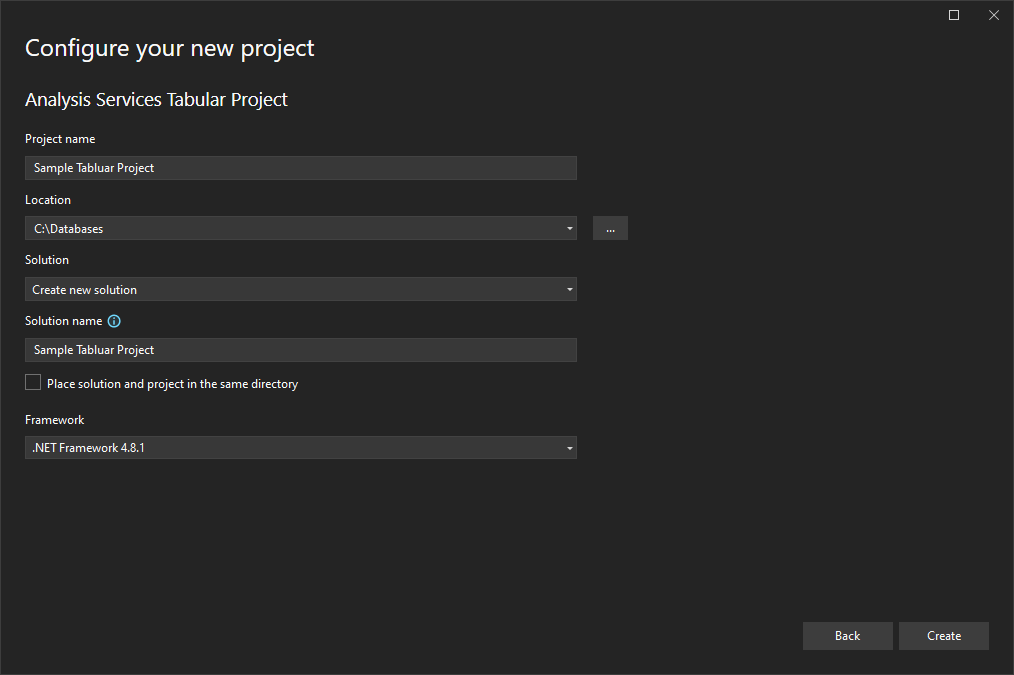 Click **Create**. The **Tabular model designer** dialog opens.
Select **Workspace server** and enter the address of your Azure Analysis Services server (for example, `asazure://eastus.azure.windows.net/myAzureServer`).
Set **Compatibility Level** to **SQL Server 2022 / Azure Analysis Services (1600)**.
The rest of this guide is written for this compatibility level. If you select a different compatibility level, the steps below may not apply, and you might encounter issues when connecting to your data.
Click **Create**. The **Tabular model designer** dialog opens.
Select **Workspace server** and enter the address of your Azure Analysis Services server (for example, `asazure://eastus.azure.windows.net/myAzureServer`).
Set **Compatibility Level** to **SQL Server 2022 / Azure Analysis Services (1600)**.
The rest of this guide is written for this compatibility level. If you select a different compatibility level, the steps below may not apply, and you might encounter issues when connecting to your data.
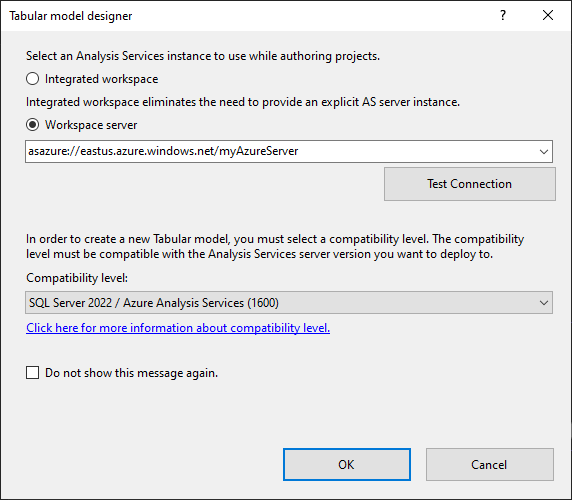 Click **Test Connection** and sign in to your server.
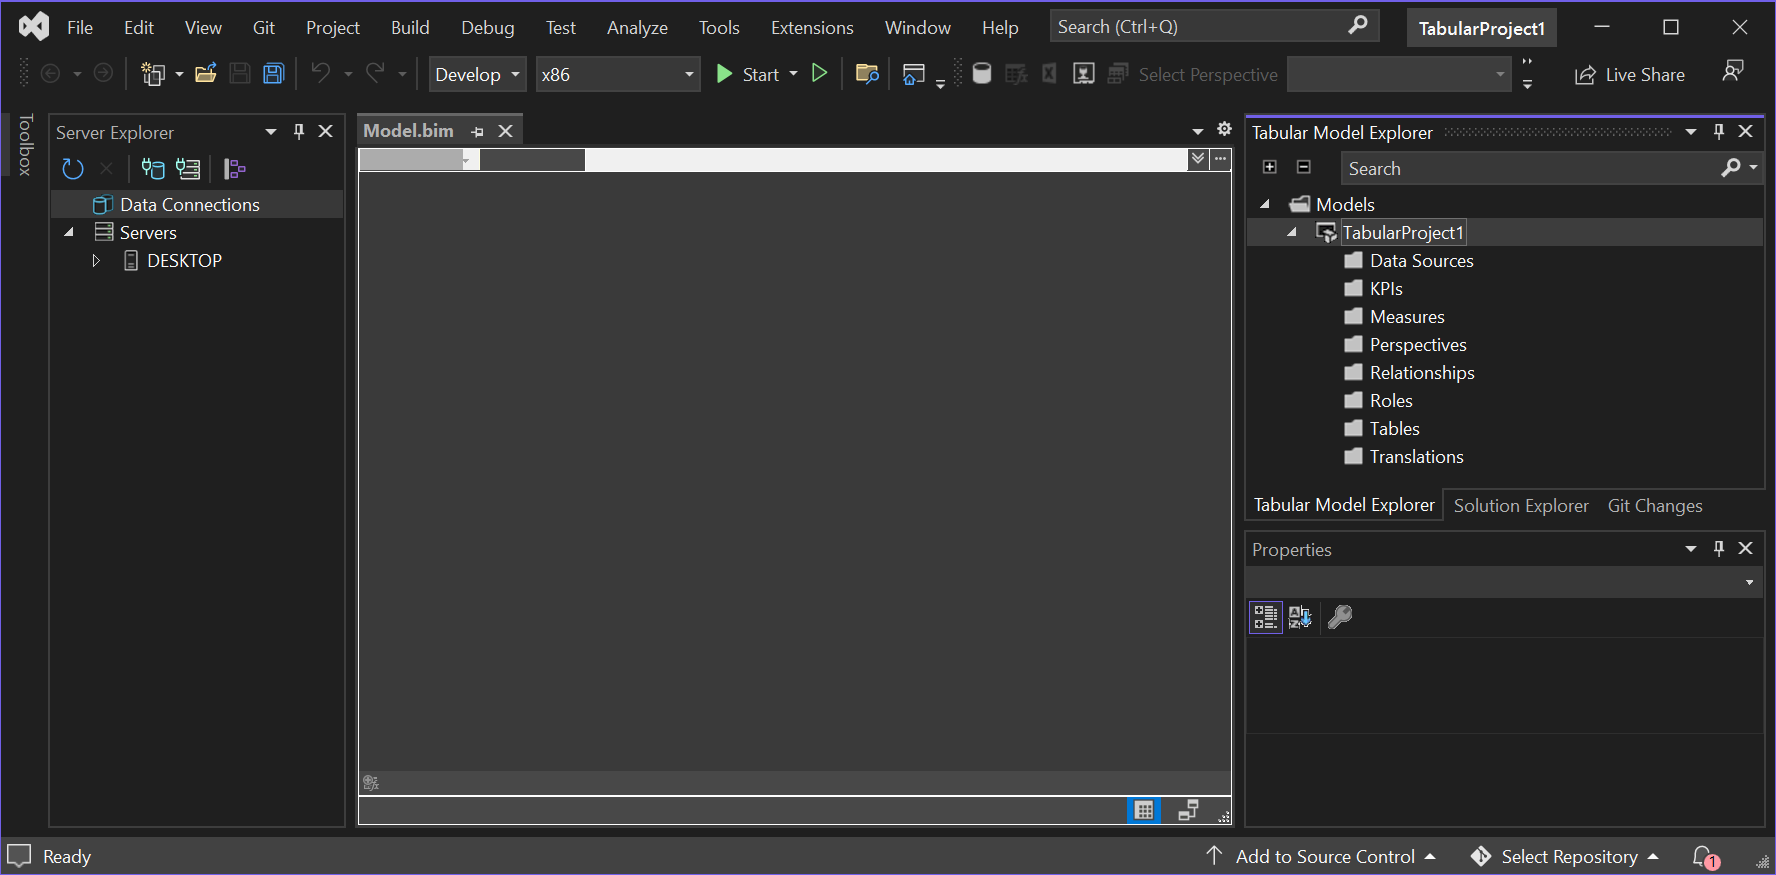
Click **OK** to create the project. Your Visual Studio window should resemble the following screenshot:
Click **Test Connection** and sign in to your server.
Click **OK** to create the project. Your Visual Studio window should resemble the following screenshot:
 ### Step 3: Import Data
In Visual Studio, in **Tabular model Explorer**, right-click **Data Sources** and select **Import From Data Source**.
### Step 3: Import Data
In Visual Studio, in **Tabular model Explorer**, right-click **Data Sources** and select **Import From Data Source**.
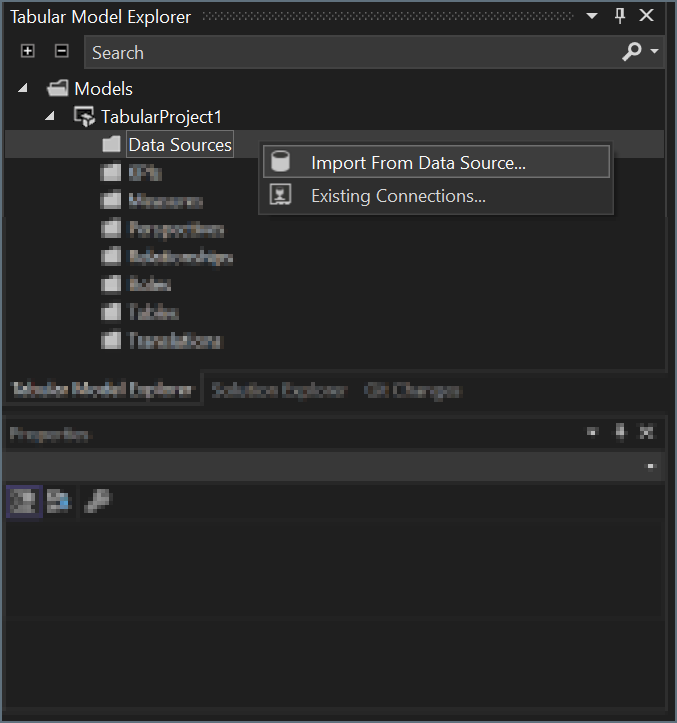 In **Table Import Wizard**, select **SQL Server database** and click **Connect**.
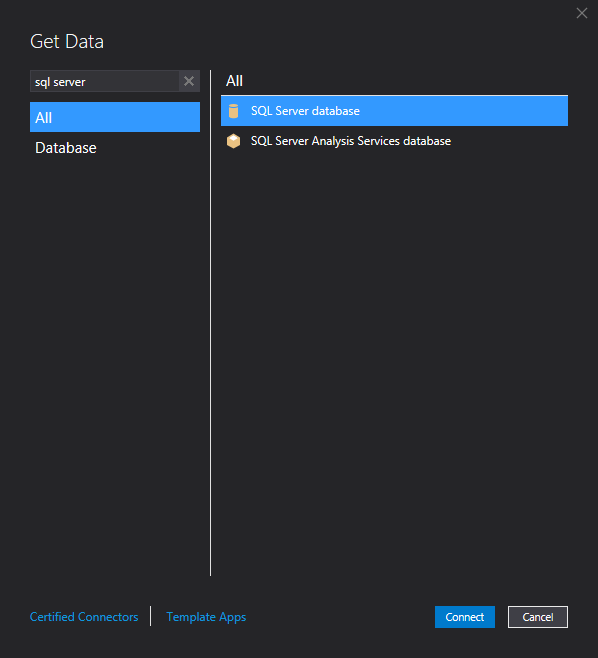 In the **Server** field, enter the Virtual SQL Server endpoint and port separated by a comma: *tds.cdata.com*,*14333*.
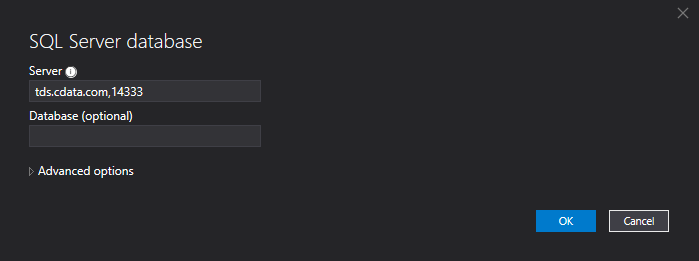 Click **OK**. In the new window, select **Database**.
Enter the following information:
* **User name**—Connect AI のユーザー名を入力します。ユーザー名は、Connect AI の画面の右上に表示されています。例:*[test@cdata.co.jp](mailto:test@cdata.co.jp)*
* **Password**—[Settings](/ja/Settings#personal-access-tokens) ページで生成したPAT を入力します。
Click **OK**. In the new window, select **Database**.
Enter the following information:
* **User name**—Connect AI のユーザー名を入力します。ユーザー名は、Connect AI の画面の右上に表示されています。例:*[test@cdata.co.jp](mailto:test@cdata.co.jp)*
* **Password**—[Settings](/ja/Settings#personal-access-tokens) ページで生成したPAT を入力します。
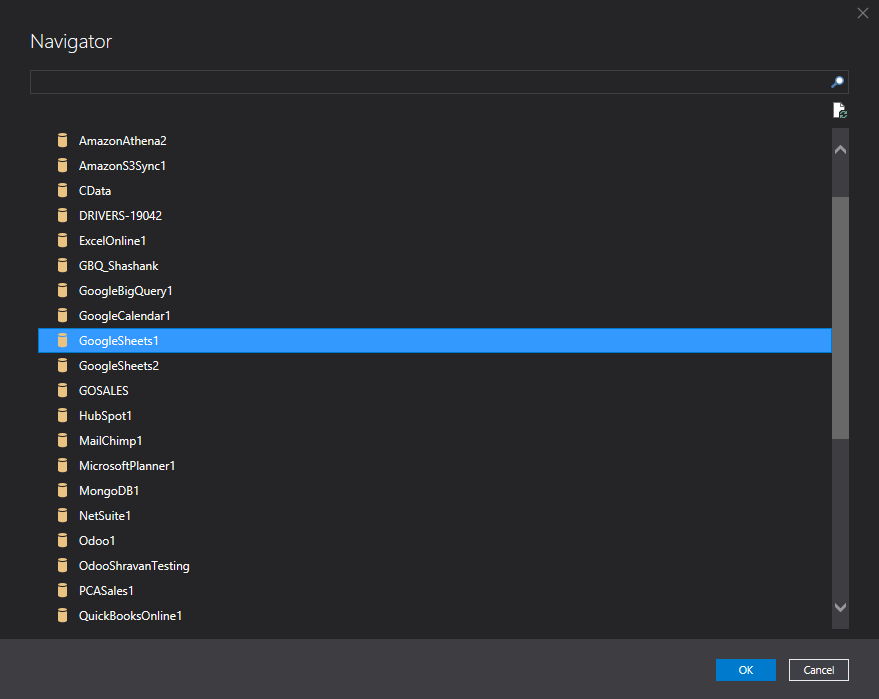
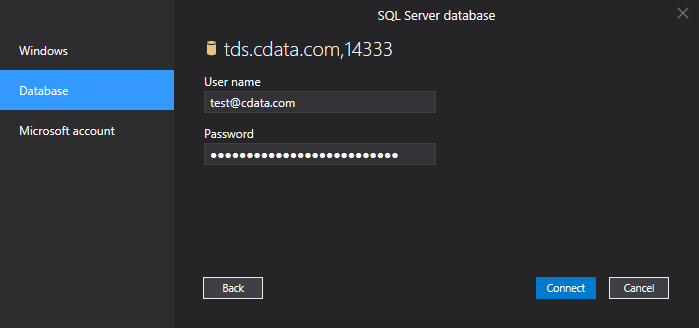 Click **Connect**. In the **Navigator** window that opens, select your desired data source and click **OK**.
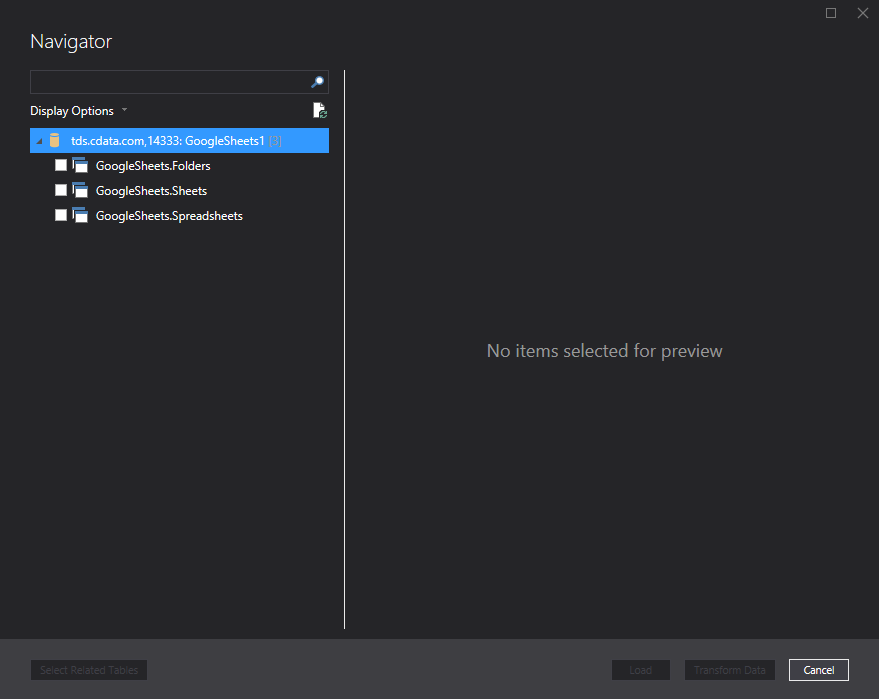
 **Navigator** refreshes and displays the tables in your data source. Select your tables and click **Load**.
 ### Step 4: Deploy the Project
In Visual Studio, select **Solution Explorer**.
### Step 4: Deploy the Project
In Visual Studio, select **Solution Explorer**.
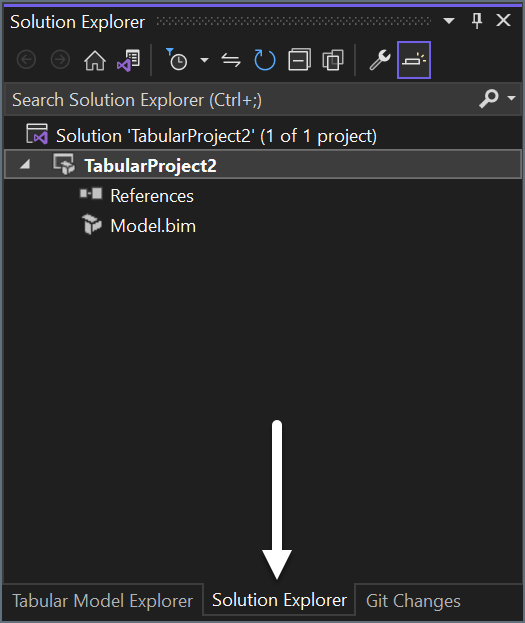 Right-click your project and select **Deploy**.
* For more information about deploying data, please see [this Microsoft help page](https://learn.microsoft.com/en-us/azure/analysis-services/analysis-services-deploy).
* For more information about on-premises data gateways, please see [this Microsoft help page](https://learn.microsoft.com/en-us/azure/analysis-services/analysis-services-gateway-install?tabs=azure-portal).
Once you deploy your data to Azure Analysis Services, you can use your data to create data models. For more information please see [Azure Analysis Services documentation](https://learn.microsoft.com/en-us/azure/analysis-services/).
## Prerequisites for Connecting via OData Endpoint
If you do not want to use a local gateway with Azure Analysis Services, you can use an OData endpoint to connect to Connect AI. However, the performance is slower than with a Virtual SQL Server connection.
* Connect a data source to your Connect AI account. See [Sources](/ja/Sources) for more information.
* Create a [Workspace](/ja/Workspaces). Later, you will use the **OData Service URL** on that page (*`https://cloud.cdata.com/api/odata/{workspace_name}`*) with the relevant workspace name to establish the connection.
* Generate a Personal Access Token (PAT) on the [Settings](/ja/Settings#personal-access-tokens) page. Copy this down, as it acts as your password during authentication.
## Connect to Connect AI via OData Endpoint
To connect to Connect AI using the OData protocol, follow these steps.
After creating a project in Azure Analysis Services, right-click the data source option and select **New Data Source**.
Right-click your project and select **Deploy**.
* For more information about deploying data, please see [this Microsoft help page](https://learn.microsoft.com/en-us/azure/analysis-services/analysis-services-deploy).
* For more information about on-premises data gateways, please see [this Microsoft help page](https://learn.microsoft.com/en-us/azure/analysis-services/analysis-services-gateway-install?tabs=azure-portal).
Once you deploy your data to Azure Analysis Services, you can use your data to create data models. For more information please see [Azure Analysis Services documentation](https://learn.microsoft.com/en-us/azure/analysis-services/).
## Prerequisites for Connecting via OData Endpoint
If you do not want to use a local gateway with Azure Analysis Services, you can use an OData endpoint to connect to Connect AI. However, the performance is slower than with a Virtual SQL Server connection.
* Connect a data source to your Connect AI account. See [Sources](/ja/Sources) for more information.
* Create a [Workspace](/ja/Workspaces). Later, you will use the **OData Service URL** on that page (*`https://cloud.cdata.com/api/odata/{workspace_name}`*) with the relevant workspace name to establish the connection.
* Generate a Personal Access Token (PAT) on the [Settings](/ja/Settings#personal-access-tokens) page. Copy this down, as it acts as your password during authentication.
## Connect to Connect AI via OData Endpoint
To connect to Connect AI using the OData protocol, follow these steps.
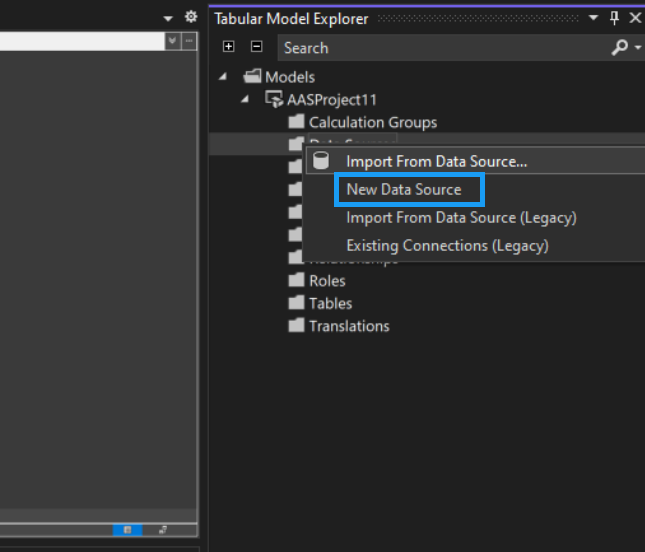
After creating a project in Azure Analysis Services, right-click the data source option and select **New Data Source**.
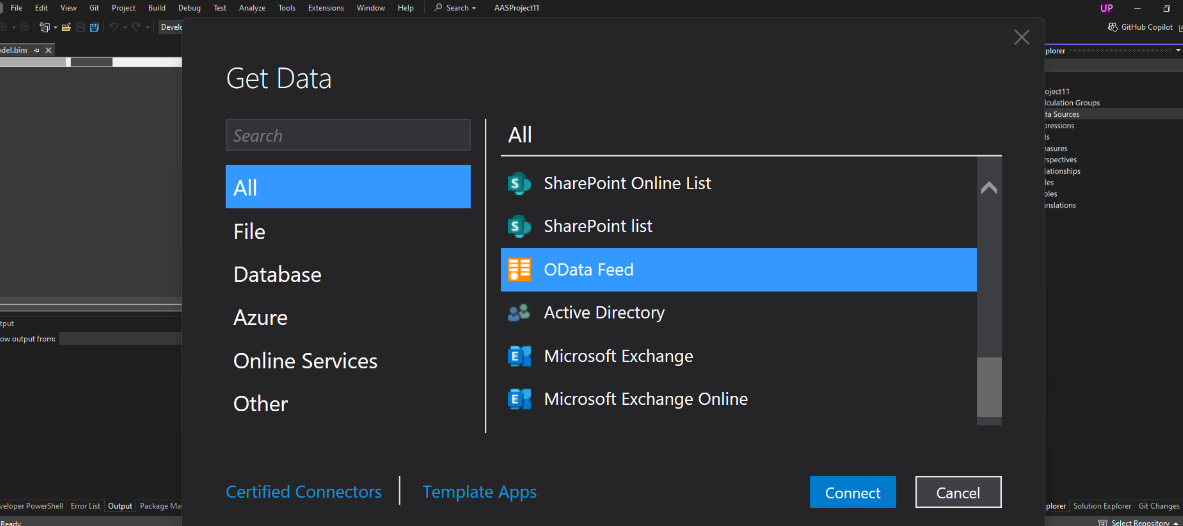
 Search for *OData Feed*.
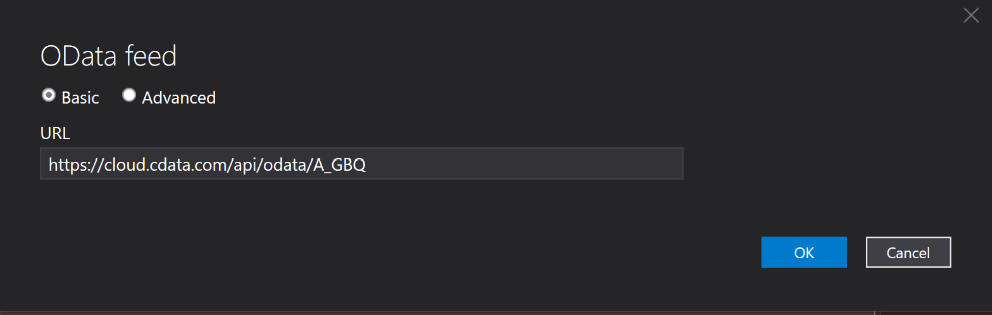
 In the **OData feed** dialog, enter the following URL: *[https://cloud.cdata.com/api/odata/\{workspace\\\_name}](https://cloud.cdata.com/api/odata/\{workspace\\_name})*. Then click **OK**.
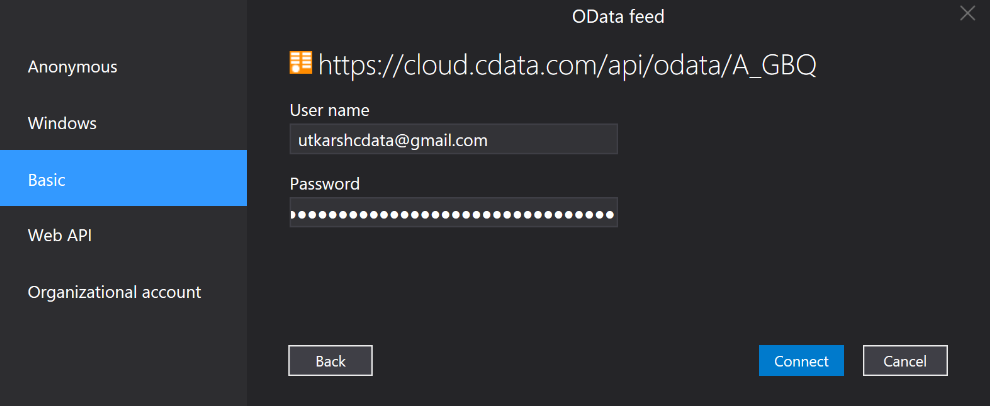
 Next, enter **Basic** credentials. The **User name** is your Connect AI user name, and the **Password** is the PAT from the prerequisites.
 Click **Connect** to test the new connection.
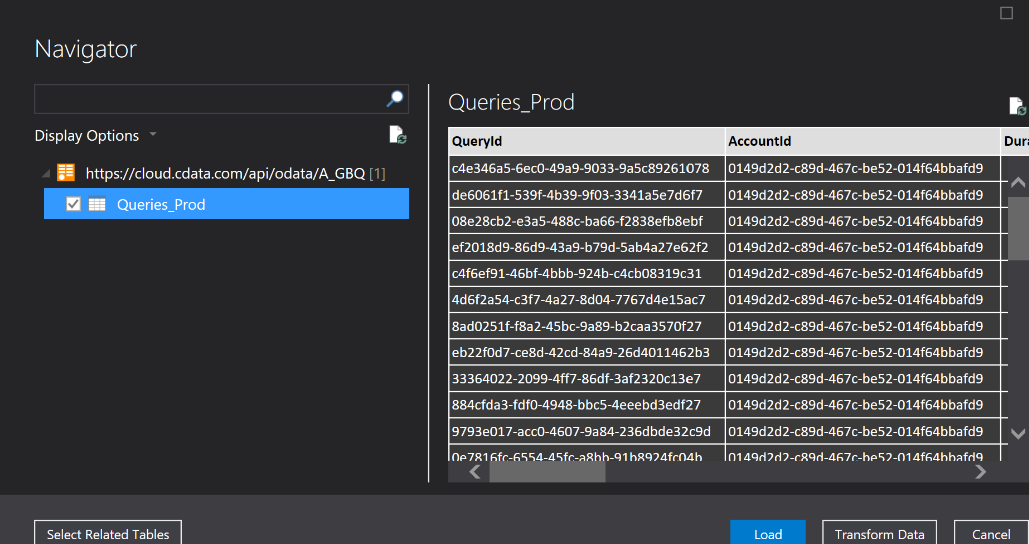
In the **Navigator**, select the desired table and click **Load**.
Click **Connect** to test the new connection.
In the **Navigator**, select the desired table and click **Load**.
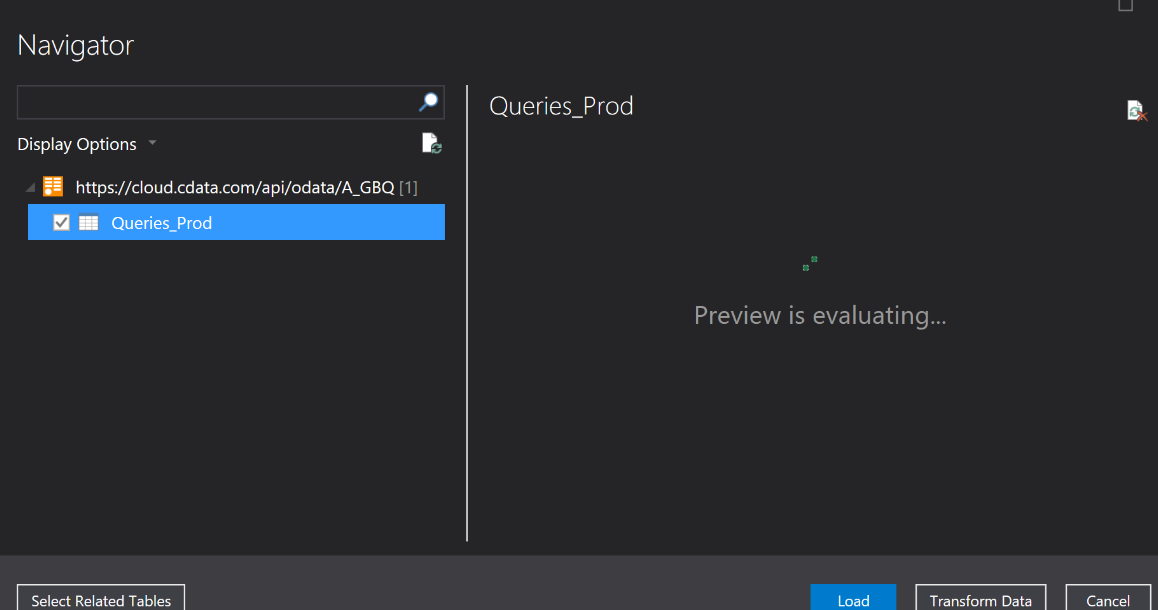 You can now view your data in the Navigator.