> ## Documentation Index
> Fetch the complete documentation index at: https://docs.cloud.cdata.com/llms.txt
> Use this file to discover all available pages before exploring further.
# Users
> The ***Users*** page enables you to manage the users on your Connect AI Embed account.
## About Users
A ***user*** is an account that can log in and administer Connect AI Embed, such as viewing and managing accounts. Two types of Connect AI Embed users are available:
* **Administrators** have full access to all Connect AI Embed functions, including adding, deleting, and managing users and accounts.
* **Viewers** have read-only privileges across Connect AI Embed.
Every Connect AI Embed account must have at least one active administrator.
## Users List
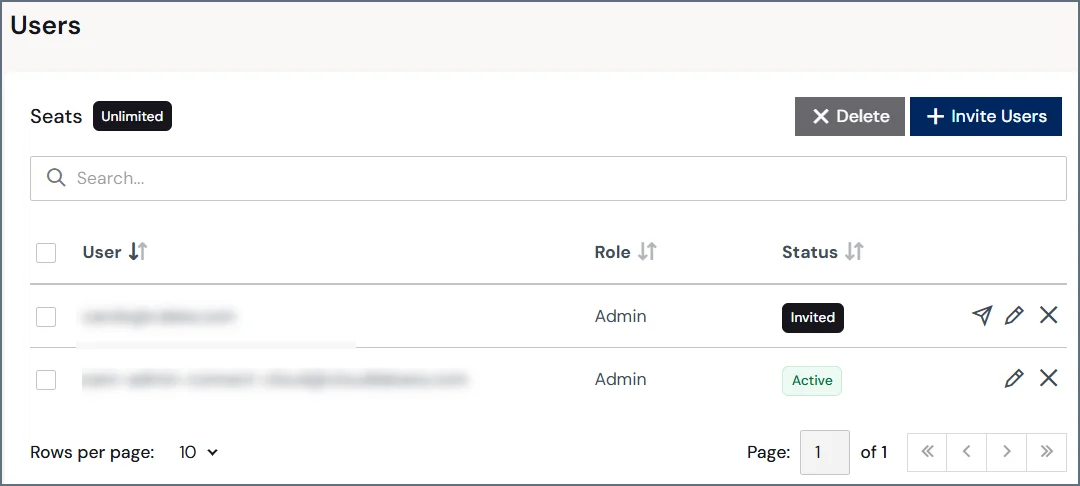
The **Users** list displays the following information:
* A button to [invite users](#invite-users).
* A row for every user on your Connect AI Embed account:
* **User** displays the email address that is associated with the user.
* **Role** indicates the user’s role (Administrator or Viewer).
* **Status** shows the state of the user’s account (**Active**, **Inactive**, or **Invited**).
* Buttons to edit and delete the user. If the user's status is **Invited**, there is also a button to resend their invitation.
 ## Invite Users
To add users to your Connect AI Embed account, follow these steps:
Click **Invite Users** to open the user invitation dialog.
Enter the email address of the user that you want to invite. To send multiple invitations at the same time, add a space between each email address.
## Invite Users
To add users to your Connect AI Embed account, follow these steps:
Click **Invite Users** to open the user invitation dialog.
Enter the email address of the user that you want to invite. To send multiple invitations at the same time, add a space between each email address.
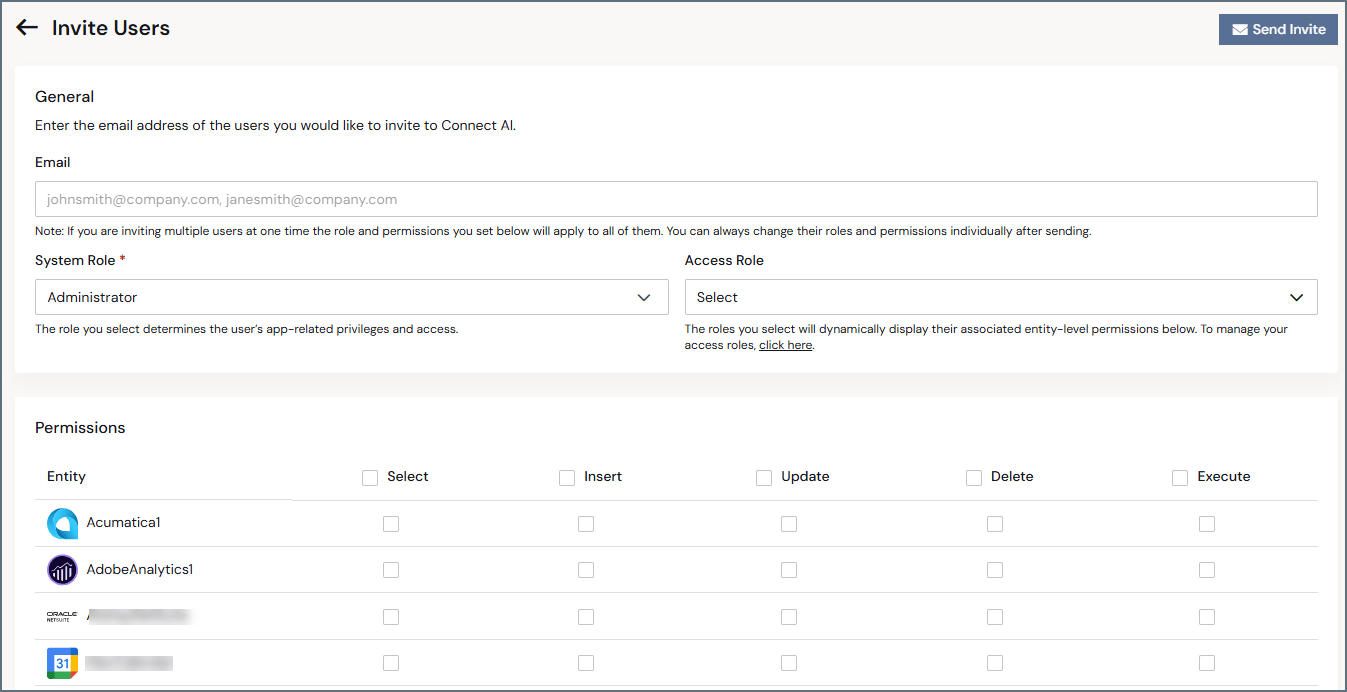 Click **Send Invite**. If a user is registered already to an email address that you enter, the dialog prompts you to enter a different email address.
### Accepting an Invitation
Follow these steps to set up access after receiving an invitation email:
Click **Accept Invite** in the invitation email to open the password creation page.
Create a password that meets the provided criteria. After you create a password, the login page appears.
Log in with your email address and your new password. After you log in, the sign-up page appears.
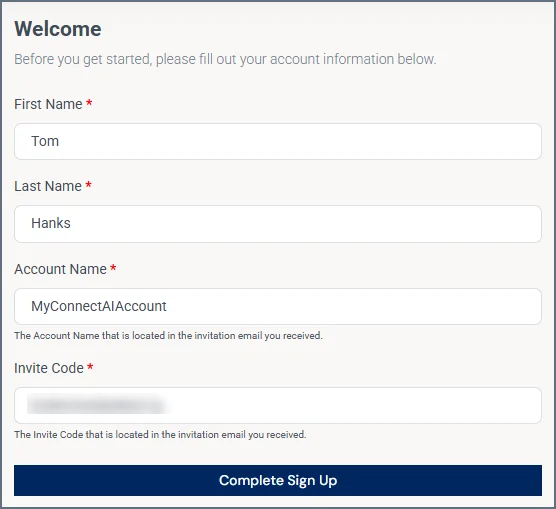
Enter your first name and the contact last name.
Enter the account name and the invite code from the invitation email. Then, click **Complete Sign Up**.
Click **Send Invite**. If a user is registered already to an email address that you enter, the dialog prompts you to enter a different email address.
### Accepting an Invitation
Follow these steps to set up access after receiving an invitation email:
Click **Accept Invite** in the invitation email to open the password creation page.
Create a password that meets the provided criteria. After you create a password, the login page appears.
Log in with your email address and your new password. After you log in, the sign-up page appears.
Enter your first name and the contact last name.
Enter the account name and the invite code from the invitation email. Then, click **Complete Sign Up**.
 Connect AI Embed supports Single Sign-On (SSO) through popular SSO providers. If SSO is enabled on your account, the invitation flow uses your SSO provider instead of the manual password process.
### Managing Invitations
If a user has a pending invitation that they have not accepted, their status displays as **Invited**. Click the resend button to send another invitation email, or click the delete button to delete the user.
## Edit User
Click a user in the list to open the **Edit User** page.
Connect AI Embed supports Single Sign-On (SSO) through popular SSO providers. If SSO is enabled on your account, the invitation flow uses your SSO provider instead of the manual password process.
### Managing Invitations
If a user has a pending invitation that they have not accepted, their status displays as **Invited**. Click the resend button to send another invitation email, or click the delete button to delete the user.
## Edit User
Click a user in the list to open the **Edit User** page.
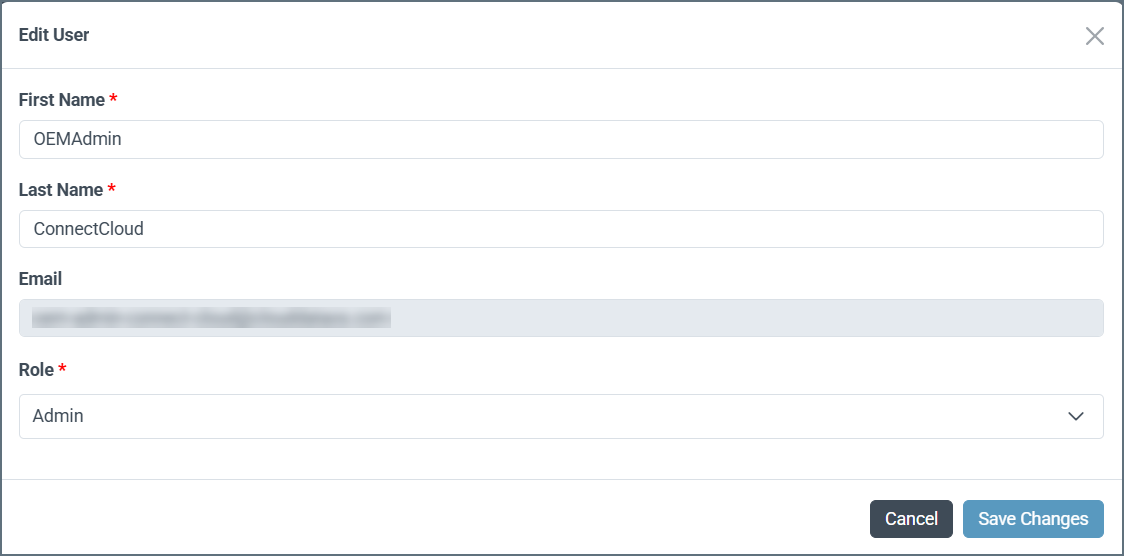 This page contains the following information:
* Editable **First Name** and **Last Name** fields.
* A non-editable **Email** field.
* A drop-down menu to select the user’s **Role** (**Administrator** or **Viewer**).
To save changes to the user, click **Save Changes**. To delete the user, click **Delete User**.
If the user is the last remaining Administrator on your account, they cannot be deleted.
This page contains the following information:
* Editable **First Name** and **Last Name** fields.
* A non-editable **Email** field.
* A drop-down menu to select the user’s **Role** (**Administrator** or **Viewer**).
To save changes to the user, click **Save Changes**. To delete the user, click **Delete User**.
If the user is the last remaining Administrator on your account, they cannot be deleted.