> ## Documentation Index
> Fetch the complete documentation index at: https://docs.cloud.cdata.com/llms.txt
> Use this file to discover all available pages before exploring further.
# Settings
> You can access your *Settings* page by clicking the Gear Icon in the upper-right corner of the dashboard and selecting **Settings**.
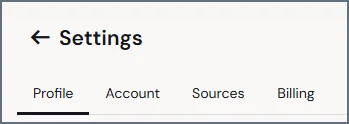
 The Settings page is divided into four tabs:
* [**Profile**](#profile)
* [**Account**](#account)
* [**Sources**](#sources)
* [**Billing**](#billing)
The Settings page is divided into four tabs:
* [**Profile**](#profile)
* [**Account**](#account)
* [**Sources**](#sources)
* [**Billing**](#billing)
 The following sections describe these tabs.
## Profile
The **Profile** tab opens by default when you access Settings. This tab contains settings for the account you are currently signed in with.
The following sections describe these tabs.
## Profile
The **Profile** tab opens by default when you access Settings. This tab contains settings for the account you are currently signed in with.
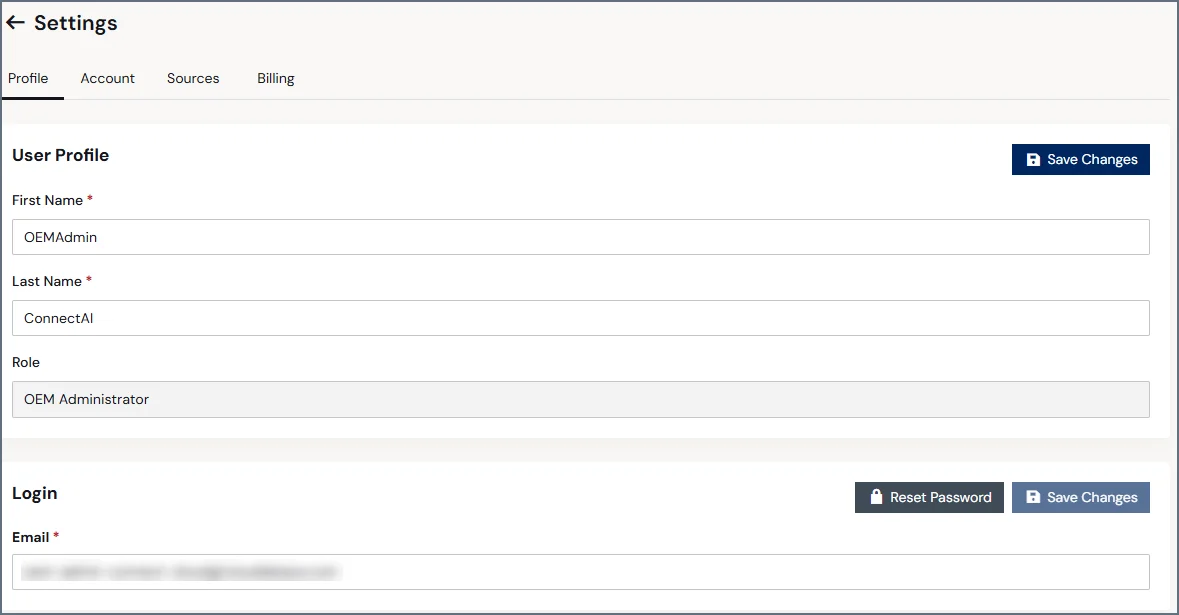 In the **User Profile** section, you can edit the first name and last name for the current user. You cannot edit the **Role**.
You can change the email that you use to log in by entering the new email and clicking **Save Changes**. If you want to reset your password, click **Reset Password**. This action sends a password reset email to the email address that appears in **Email**.
## Account
The **Account** tab provides access to account-wide settings and troubleshooting features.
In the **User Profile** section, you can edit the first name and last name for the current user. You cannot edit the **Role**.
You can change the email that you use to log in by entering the new email and clicking **Save Changes**. If you want to reset your password, click **Reset Password**. This action sends a password reset email to the email address that appears in **Email**.
## Account
The **Account** tab provides access to account-wide settings and troubleshooting features.
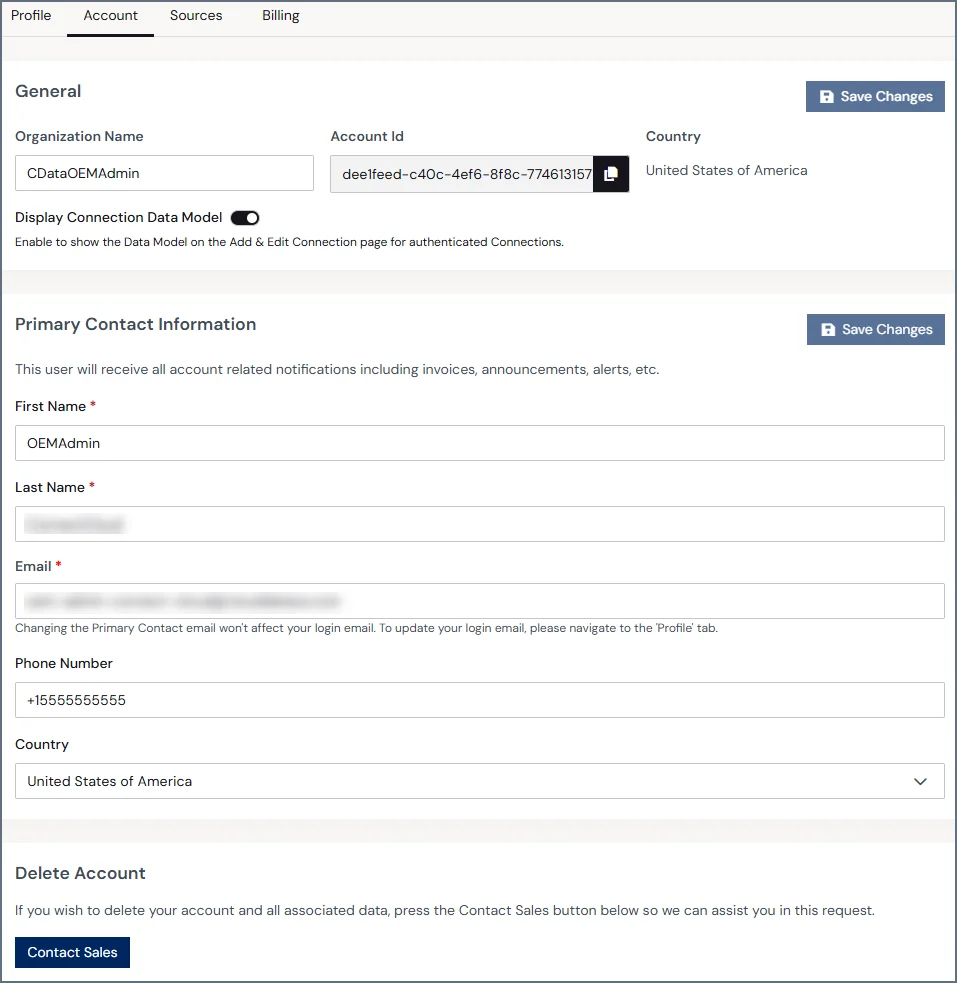 The sections of this page are described below.
### General
The **General** section lists the following global account information:
* Organization Name
* Account Id
* Country
Copy the Account Id to use in the API.
Toggle **Display Connection Data Model** to show the data model on the Add and Edit Connection page for authenticated connections.
### Primary Contact Information
This section contains the following fields that define the account’s primary contact for invoices, announcements, and other communication:
* First name
* Last name
* Email
* Phone Number
* Country
### Delete Account
If you want to delete your Connect AI Embed account and all of its data, click **Contact Sales** for assistance.
Account deletion is permanent. If you delete your account, you need to create a new account if you want to use Connect AI Embed in the future.
## Sources
By default, when your customers' end users authenticate to an OAuth data source (such as Salesforce or Google), they see CData's application name in the OAuth consent screen. **Connection Overrides** allow you to register your own OAuth application with each data source provider so that end users see your application name and branding instead.
This keeps the authentication experience consistent with your product and removes CData's name from your customers' view.
The **Sources** tab allows the administrator of the Connect AI Embed parent account to manage connection string properties for the sub-accounts, ensuring consistent configurations across sub-accounts and OAuth sign-in with your brand name.
The sections of this page are described below.
### General
The **General** section lists the following global account information:
* Organization Name
* Account Id
* Country
Copy the Account Id to use in the API.
Toggle **Display Connection Data Model** to show the data model on the Add and Edit Connection page for authenticated connections.
### Primary Contact Information
This section contains the following fields that define the account’s primary contact for invoices, announcements, and other communication:
* First name
* Last name
* Email
* Phone Number
* Country
### Delete Account
If you want to delete your Connect AI Embed account and all of its data, click **Contact Sales** for assistance.
Account deletion is permanent. If you delete your account, you need to create a new account if you want to use Connect AI Embed in the future.
## Sources
By default, when your customers' end users authenticate to an OAuth data source (such as Salesforce or Google), they see CData's application name in the OAuth consent screen. **Connection Overrides** allow you to register your own OAuth application with each data source provider so that end users see your application name and branding instead.
This keeps the authentication experience consistent with your product and removes CData's name from your customers' view.
The **Sources** tab allows the administrator of the Connect AI Embed parent account to manage connection string properties for the sub-accounts, ensuring consistent configurations across sub-accounts and OAuth sign-in with your brand name.
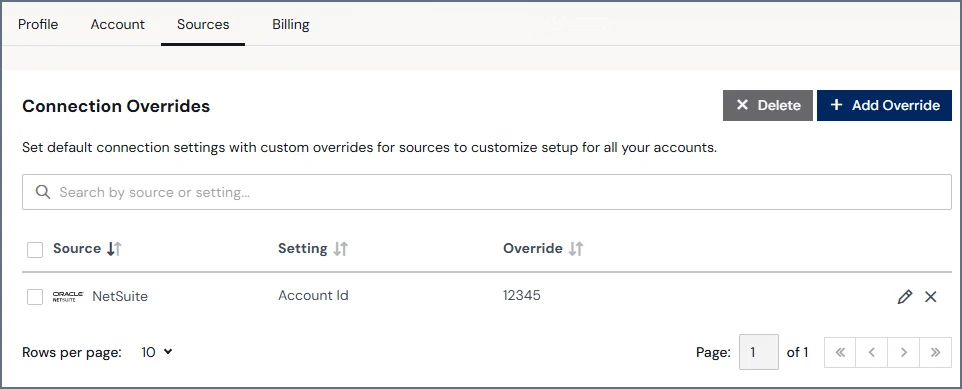 This tab consists of the following:
* The **Source Access Control** section allows administrators to choose which data sources your accounts can use when creating new connections. Administrators can limit end users to specific sources.
The **Source Access Control** section is only relevant if your sub-accounts are using the **Add Connection** page that displays all the sources.
* The **Connection Overrides** section allows administrators to add custom overrides to simplify account setup. For example, you can override an account's OAuth sign-in credentials so that end users must use their own organization's credentials rather than CData credentials. Click **Add Override** and then select the setting and the override value.
**Connection Overrides** contains the following information about each override:
* **Source**—the data source name.
* **Setting**—the connection setting to override.
* **Override**—the new value of the setting to use.
* **Job Actions**—the icons in the last column represent the actions you can perform on a job.
* **Edit (🖉)**—edit the override value. Note that you can only edit the value of the override, and you cannot edit the setting to be overridden.
* **Delete (🗙)**—delete the connection override for future connections. Note that existing connections remain unchanged.
Not all data sources have available setting overrides.
To add a connection override:
Click **+Add Override**.
Search for the data source you want to configure the override for.
Select the override setting and the override value.
Select whether the override should be applied to new connections only (the **Add Connection** page), or to all new and existing connections (the **Add Connection** and **Edit Connection** pages).
If you apply the override to all new and existing connections, you may be required to reauthenticate existing connections.
Click **Confirm**. The new connection override appears in the **Connection Overrides** section.
## Billing
The **Billing** tab provides information and controls for your account plan and usage.
This tab consists of the following:
* The **Source Access Control** section allows administrators to choose which data sources your accounts can use when creating new connections. Administrators can limit end users to specific sources.
The **Source Access Control** section is only relevant if your sub-accounts are using the **Add Connection** page that displays all the sources.
* The **Connection Overrides** section allows administrators to add custom overrides to simplify account setup. For example, you can override an account's OAuth sign-in credentials so that end users must use their own organization's credentials rather than CData credentials. Click **Add Override** and then select the setting and the override value.
**Connection Overrides** contains the following information about each override:
* **Source**—the data source name.
* **Setting**—the connection setting to override.
* **Override**—the new value of the setting to use.
* **Job Actions**—the icons in the last column represent the actions you can perform on a job.
* **Edit (🖉)**—edit the override value. Note that you can only edit the value of the override, and you cannot edit the setting to be overridden.
* **Delete (🗙)**—delete the connection override for future connections. Note that existing connections remain unchanged.
Not all data sources have available setting overrides.
To add a connection override:
Click **+Add Override**.
Search for the data source you want to configure the override for.
Select the override setting and the override value.
Select whether the override should be applied to new connections only (the **Add Connection** page), or to all new and existing connections (the **Add Connection** and **Edit Connection** pages).
If you apply the override to all new and existing connections, you may be required to reauthenticate existing connections.
Click **Confirm**. The new connection override appears in the **Connection Overrides** section.
## Billing
The **Billing** tab provides information and controls for your account plan and usage.
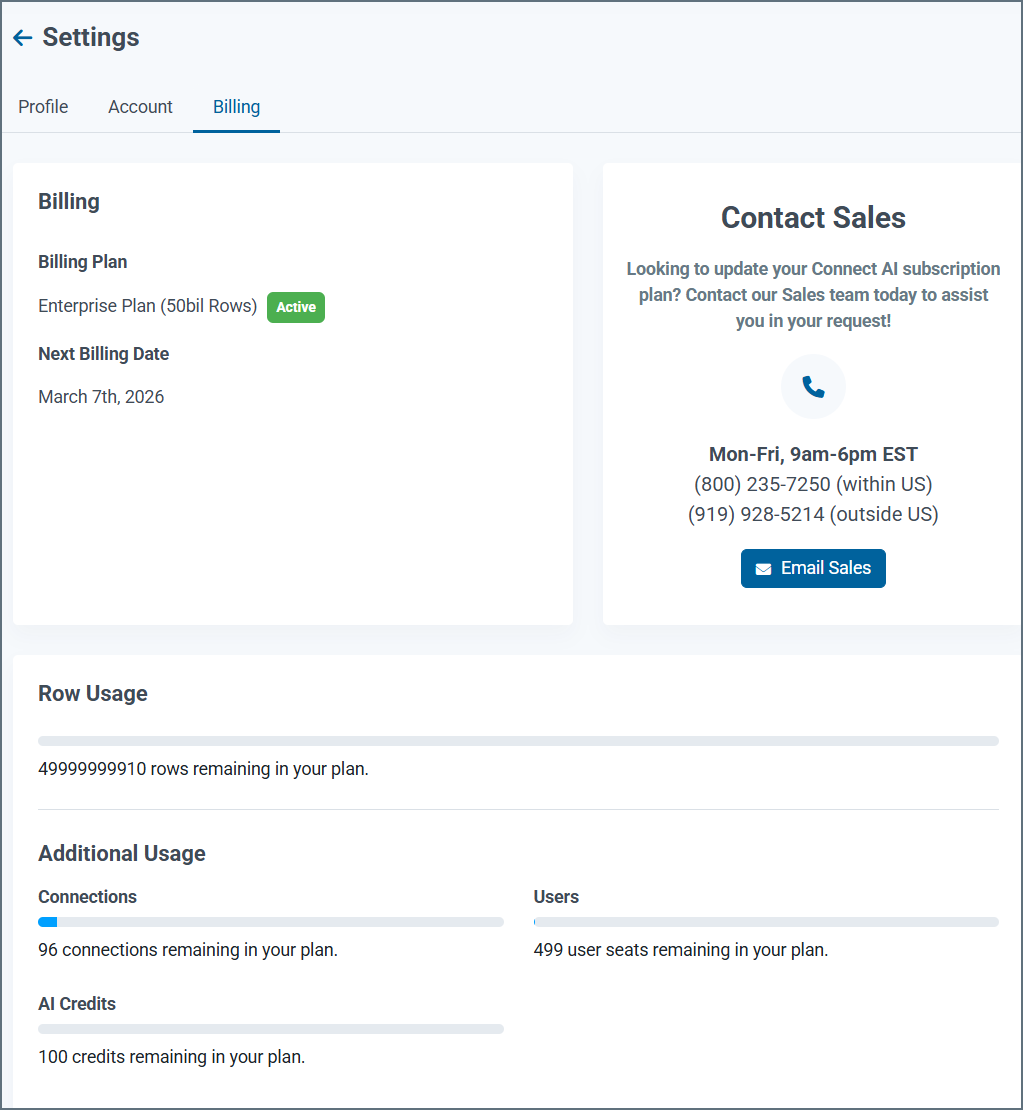 This tab consists of the following:
* The **Billing** section displays your plan information and next billing date.
* The **Your Plan Includes** section displays what is included in your current plan.
* The lower pane displays your remaining usage in the plan.
This tab consists of the following:
* The **Billing** section displays your plan information and next billing date.
* The **Your Plan Includes** section displays what is included in your current plan.
* The lower pane displays your remaining usage in the plan.