> ## Documentation Index
> Fetch the complete documentation index at: https://docs.cloud.cdata.com/llms.txt
> Use this file to discover all available pages before exploring further.
# Scheduled Queries
> ***Scheduled Queries*** jobs enable you to run saved queries on a given schedule.
With the Connect AI Scheduled Queries feature, you can save queries that you create in the Data Explorer as scheduled queries, or queries that run at regular intervals. You can use the [Query Builder](/en/QueryBuilder) to build the query or the SQL Editor to write a SQL query manually. You then save the query as a scheduled query. Next, you select the schedule for running the query. Finally, you select the target destination for saving the query. Connect AI supports the following destinations for Scheduled Queries:
* BigQuery
* Databricks
* PostgreSQL
* Redshift
* Smartsheet
* Snowflake
While you create scheduled queries in the Data Explorer, you manage them in the [**Jobs**](/en/Jobs) page.
The **Jobs** page contains a list of scheduled query jobs to run.
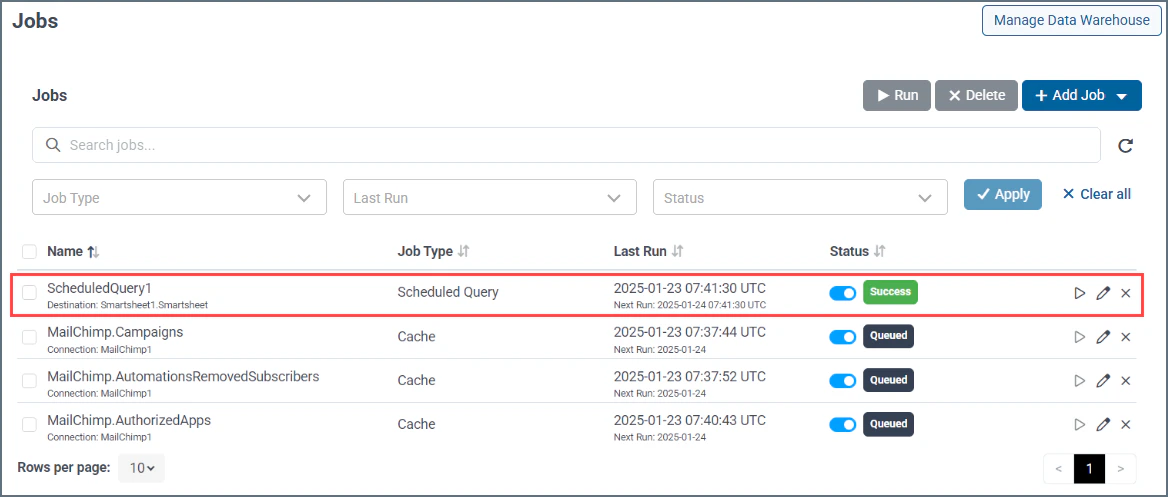 For each job, the **Jobs** page displays the scheduled query name and target destination, the last time the job was run, the date and time of the next run, and the status of the job. You can select multiple jobs to run immediately by selecting the jobs and clicking **Run** at the top of the page. You can also delete multiple jobs by selecting them and clicking **Delete** at the top of the page.
The **Jobs** page also allows you to disable a particular scheduled query job, if you want to pause the scheduled job but not delete it. Use the toggle switch in the **Status** column to enable or disable a job. You cannot run a job manually as long as it is disabled.
## Configure Scheduled Queries
Before you can use the Schedule Queries feature, you need to add a destination connection, schema, and table for your scheduled query. The destination table contains the results of your scheduled query. If you haven’t already done so, add your destination connection in the **Add Connection** page. Note that the connection type for the destination must be one of the following: BigQuery, Databricks, PostgreSQL, Redshift, Smartsheet, or Snowflake. Go to [Sources](/en/Sources) for details.
## Add a Scheduled Query Job
You can add a schedule query job in one of two ways: on the Jobs page or in the Data Explorer.
### On the Jobs Page
On the Jobs page, click **+Add Job** > **Scheduled Query**. This launches the Data Explorer.
For each job, the **Jobs** page displays the scheduled query name and target destination, the last time the job was run, the date and time of the next run, and the status of the job. You can select multiple jobs to run immediately by selecting the jobs and clicking **Run** at the top of the page. You can also delete multiple jobs by selecting them and clicking **Delete** at the top of the page.
The **Jobs** page also allows you to disable a particular scheduled query job, if you want to pause the scheduled job but not delete it. Use the toggle switch in the **Status** column to enable or disable a job. You cannot run a job manually as long as it is disabled.
## Configure Scheduled Queries
Before you can use the Schedule Queries feature, you need to add a destination connection, schema, and table for your scheduled query. The destination table contains the results of your scheduled query. If you haven’t already done so, add your destination connection in the **Add Connection** page. Note that the connection type for the destination must be one of the following: BigQuery, Databricks, PostgreSQL, Redshift, Smartsheet, or Snowflake. Go to [Sources](/en/Sources) for details.
## Add a Scheduled Query Job
You can add a schedule query job in one of two ways: on the Jobs page or in the Data Explorer.
### On the Jobs Page
On the Jobs page, click **+Add Job** > **Scheduled Query**. This launches the Data Explorer.
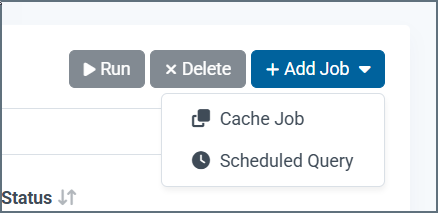 The Data Explorer opens a query containing the following message:
```bash theme={null}
/*Execute a query and save it as a Scheduled Query to continue set up of your job.*/
```
Now follow the instructions below for Data Explorer.
### In the Data Explorer
In Data Explorer, use the Query Builder or SQL Editor to build your query. See [Query Builder](/en/QueryBuilder) for detailed steps.
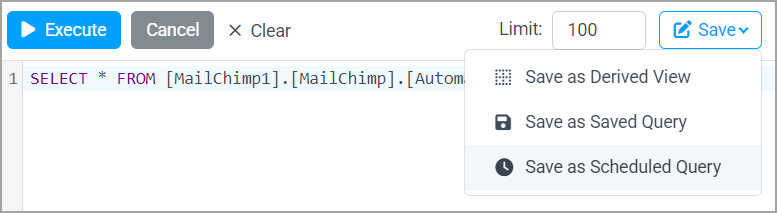
When you have finished creating and executing your query, click **Save** > **Save as Scheduled Query**.
The Data Explorer opens a query containing the following message:
```bash theme={null}
/*Execute a query and save it as a Scheduled Query to continue set up of your job.*/
```
Now follow the instructions below for Data Explorer.
### In the Data Explorer
In Data Explorer, use the Query Builder or SQL Editor to build your query. See [Query Builder](/en/QueryBuilder) for detailed steps.
When you have finished creating and executing your query, click **Save** > **Save as Scheduled Query**.
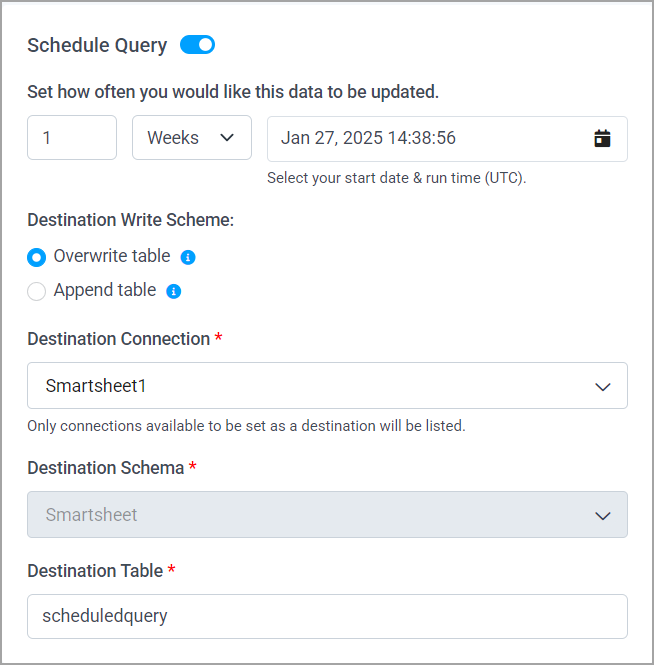
 The **Add Job** page appears.
In **Add Job**, enter the **Name** for your scheduled query.
Set a schedule for your query in hours, days, weeks, or months. Then set a start date and time in UTC. The default date is today's date.
Select whether to **Overwrite** or **Append** the current table in your destination connection. If the table exists, **Overwrite** deletes the current table and overwrites it with the new table. **Append** adds the latest query results to the current table.
Select a **Destination Connection**. Note that only connections of the type mentioned above (BigQuery, Databricks, PostgreSQL, Redshift, Smartsheet, and Snowflake) are available as a destination connection.
Select a **Destination Schema** if there is more than one schema. Otherwise, the default schema is used.
Enter the **Destination Table** name for table to be created.
The **Add Job** page appears.
In **Add Job**, enter the **Name** for your scheduled query.
Set a schedule for your query in hours, days, weeks, or months. Then set a start date and time in UTC. The default date is today's date.
Select whether to **Overwrite** or **Append** the current table in your destination connection. If the table exists, **Overwrite** deletes the current table and overwrites it with the new table. **Append** adds the latest query results to the current table.
Select a **Destination Connection**. Note that only connections of the type mentioned above (BigQuery, Databricks, PostgreSQL, Redshift, Smartsheet, and Snowflake) are available as a destination connection.
Select a **Destination Schema** if there is more than one schema. Otherwise, the default schema is used.
Enter the **Destination Table** name for table to be created.
 Click **Save Changes**. If the query is saved successfully, the **Status** of the scheduled query changes from **Draft** to **Queued**.
You can edit the **SQL Code** in Data Explorer, if necessary.
Click **Run Now** to run the scheduled query immediately.
The scheduled query now appears in the Jobs queue.
Click **Save Changes**. If the query is saved successfully, the **Status** of the scheduled query changes from **Draft** to **Queued**.
You can edit the **SQL Code** in Data Explorer, if necessary.
Click **Run Now** to run the scheduled query immediately.
The scheduled query now appears in the Jobs queue.
 ## Edit a Scheduled Queries Job
You can modify or delete a scheduled query job at any time by clicking the edit or delete icons in the jobs queue. You can also run a job manually at any time by clicking **Run Now**.
## Edit a Scheduled Queries Job
You can modify or delete a scheduled query job at any time by clicking the edit or delete icons in the jobs queue. You can also run a job manually at any time by clicking **Run Now**.
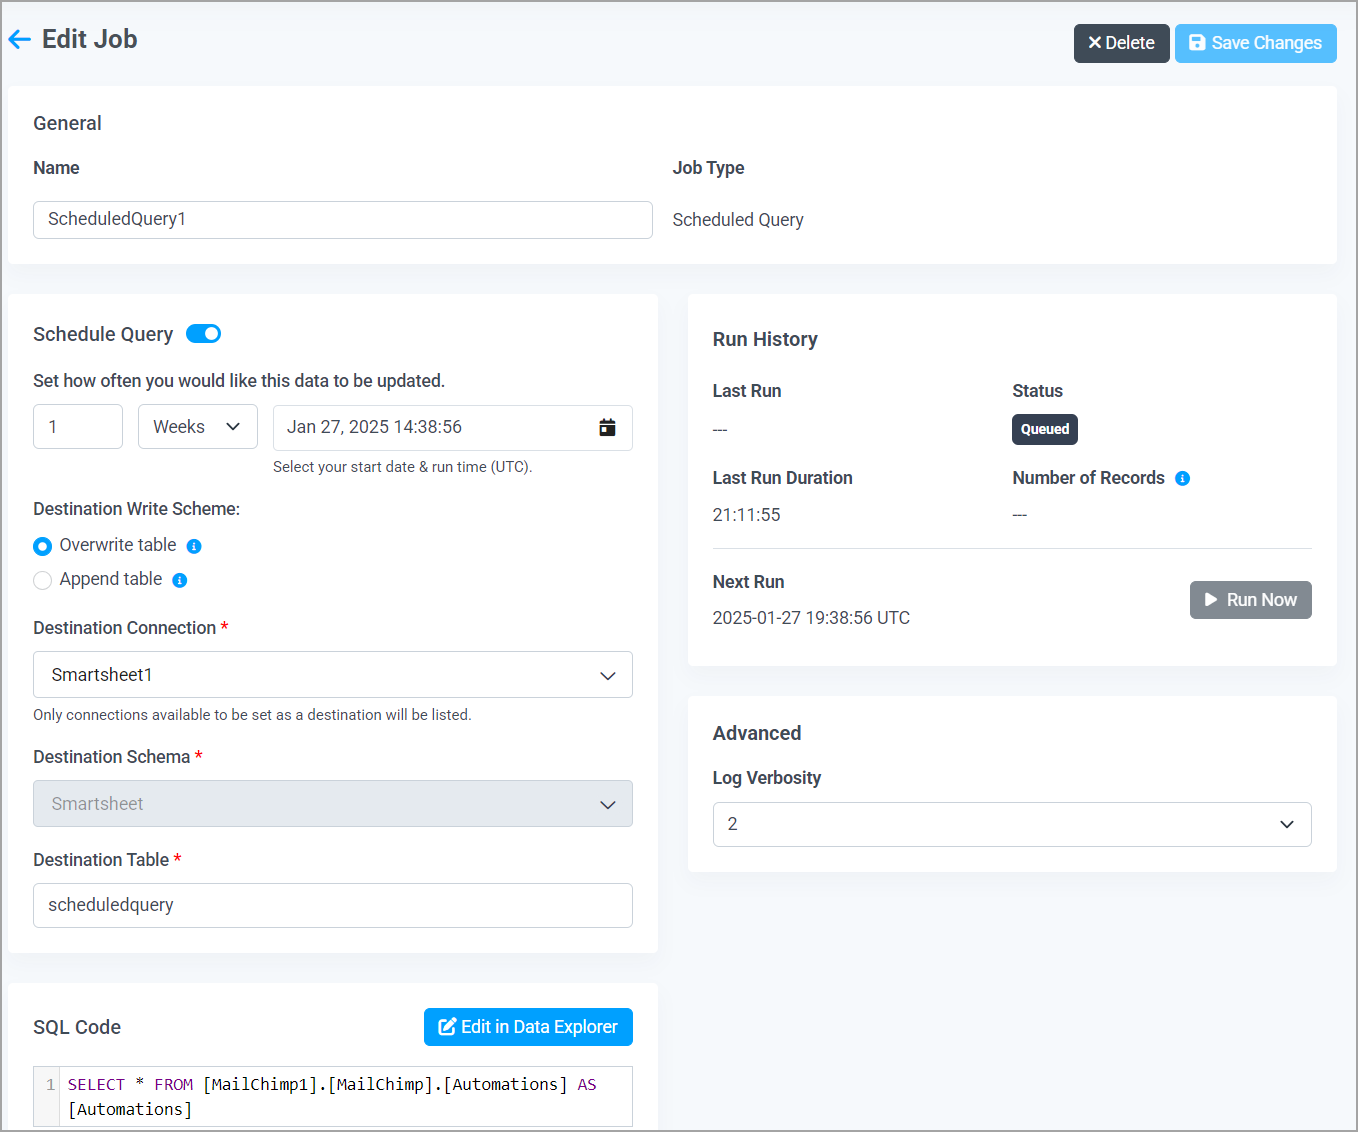 In the **Edit Job** page, you can do the following:
* Change the query schedule, or change the destination write scheme.
* Change the destination connection and table.
* View the run history and status, making sure the previous job run was successful.
* Change the log verbosity.
* Run a single job manually. You can run multiple jobs in the main **Jobs** page.
* Disable the scheduled query temporarily by turning the toggle next to **Schedule Query** off.
* Edit the SQL code of the scheduled query.
* Delete the scheduled query.
In the **Edit Job** page, you can do the following:
* Change the query schedule, or change the destination write scheme.
* Change the destination connection and table.
* View the run history and status, making sure the previous job run was successful.
* Change the log verbosity.
* Run a single job manually. You can run multiple jobs in the main **Jobs** page.
* Disable the scheduled query temporarily by turning the toggle next to **Schedule Query** off.
* Edit the SQL code of the scheduled query.
* Delete the scheduled query.