> ## Documentation Index
> Fetch the complete documentation index at: https://docs.cloud.cdata.com/llms.txt
> Use this file to discover all available pages before exploring further.
# Roles
> The **Roles** tab on the ***Users*** page enables you to manage system roles and access roles on your Connect AI account.
A **Role** defines the user's privileges and permissions.
In Connect AI, privileges are administrative actions, while permissions are data and execution
access.
The following system roles are available:
* **Administrator** has full access to all Connect AI functions, including adding and managing users.
* **Connection Administrator** can create, edit, and delete connections and workspaces. They can also assign connection and workspace permissions, view users, query all connections, and view connection-related audit log events.
* **User Administrator** can create, invite, edit, and disable users, assign and revoke the **User Administrator** and **Query** roles, and view user-related audit events.
* **Query** users can authenticate to a connection with their own credentials, as long as the user and connection meet the following criteria:
* An Administrator or Connection Administrator grants the user permission to use the connection.
* An Administrator selects **Per-User Authentication**, rather than **Shared Authentication**, for the connection.
The query user can also issue queries to connections they have access to through the [Data Explorer](/en/Data-Explorer) page and through [integration tools](/en/Integrations). This role also allows viewing personal query logs.
Every account must have at least one active Administrator.
See [Permissions and Access Control](/en/Permissions) for more information about the scope of these roles.
By default, all CData Connect Spreadsheets users have an Administrator role. They have full
Select, Insert, Update, Delete, and Execute permissions.
The **Roles** tab contains information about every role in Connect AI. Roles consist of predefined **system roles** and **access roles**:
* A **system role** (Administrator, Connection Administrator, User Administrator, or Query) defines what a user can do across the platform (managing connections, users, and running queries), and every user has exactly one.
* An **access role** is an optional, admin-defined set of data and workspace permissions assigned on top of the system role; access roles are additive, so a user can hold several.
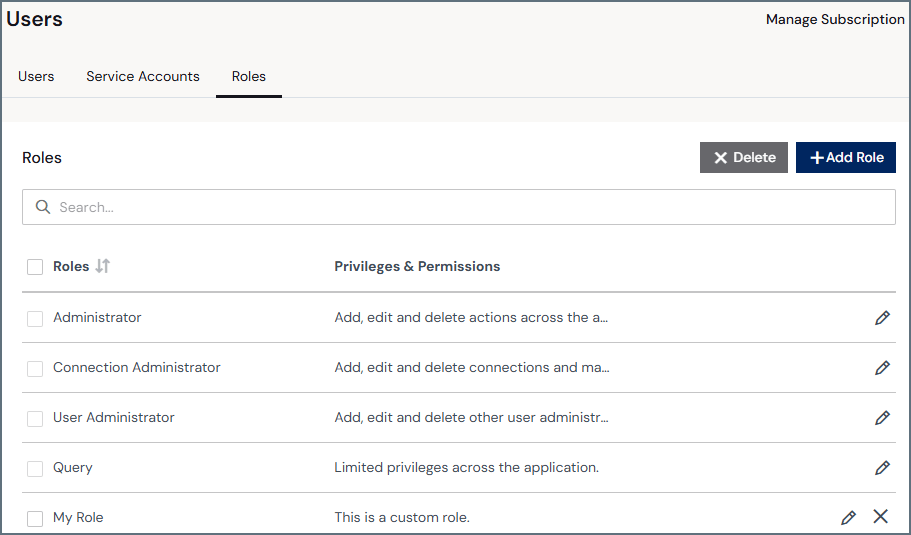 It contains the following information:
* A row for every role in your account:
* **Role** is the role name.
* **Privileges & Permissions** is a short overview of the scope of the role.
* Edit and delete icons for the role. System roles cannot be deleted.
## Add an Access Role
In the **Roles** tab of the **Users** page, click **Add Role** to open the **Add Role** page.
It contains the following information:
* A row for every role in your account:
* **Role** is the role name.
* **Privileges & Permissions** is a short overview of the scope of the role.
* Edit and delete icons for the role. System roles cannot be deleted.
## Add an Access Role
In the **Roles** tab of the **Users** page, click **Add Role** to open the **Add Role** page.
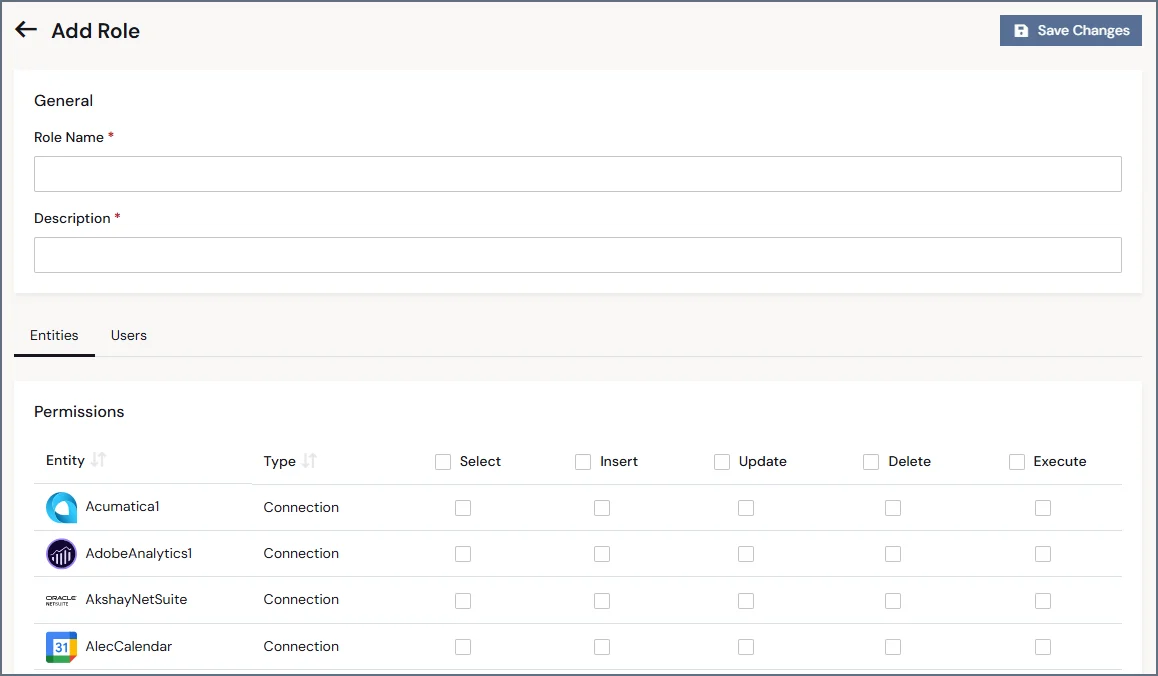 Enter the **Role Name**.
Enter a short description of the role that will appear on the **Roles** list.
In the **Entities** tab, select the appropriate permissions for entities (data connections and
workspaces) in your Connect AI instance. For more information about permissions, see
[Permissions and Access Control](/en/Permissions).
In the **Users** tab, click **Assign Users** to assign multiple users to the same access role.
You can also add permissions to a user on an individual basis. These permissions are added to
the role-based permissions.
Select one or more users to assign to the role, and click **Confirm**.
Click **Save Changes** to save the role.
## Edit a Role
You can modify any role or delete an access role at any time by clicking the edit or delete icons in the **Roles** list.
Enter the **Role Name**.
Enter a short description of the role that will appear on the **Roles** list.
In the **Entities** tab, select the appropriate permissions for entities (data connections and
workspaces) in your Connect AI instance. For more information about permissions, see
[Permissions and Access Control](/en/Permissions).
In the **Users** tab, click **Assign Users** to assign multiple users to the same access role.
You can also add permissions to a user on an individual basis. These permissions are added to
the role-based permissions.
Select one or more users to assign to the role, and click **Confirm**.
Click **Save Changes** to save the role.
## Edit a Role
You can modify any role or delete an access role at any time by clicking the edit or delete icons in the **Roles** list.
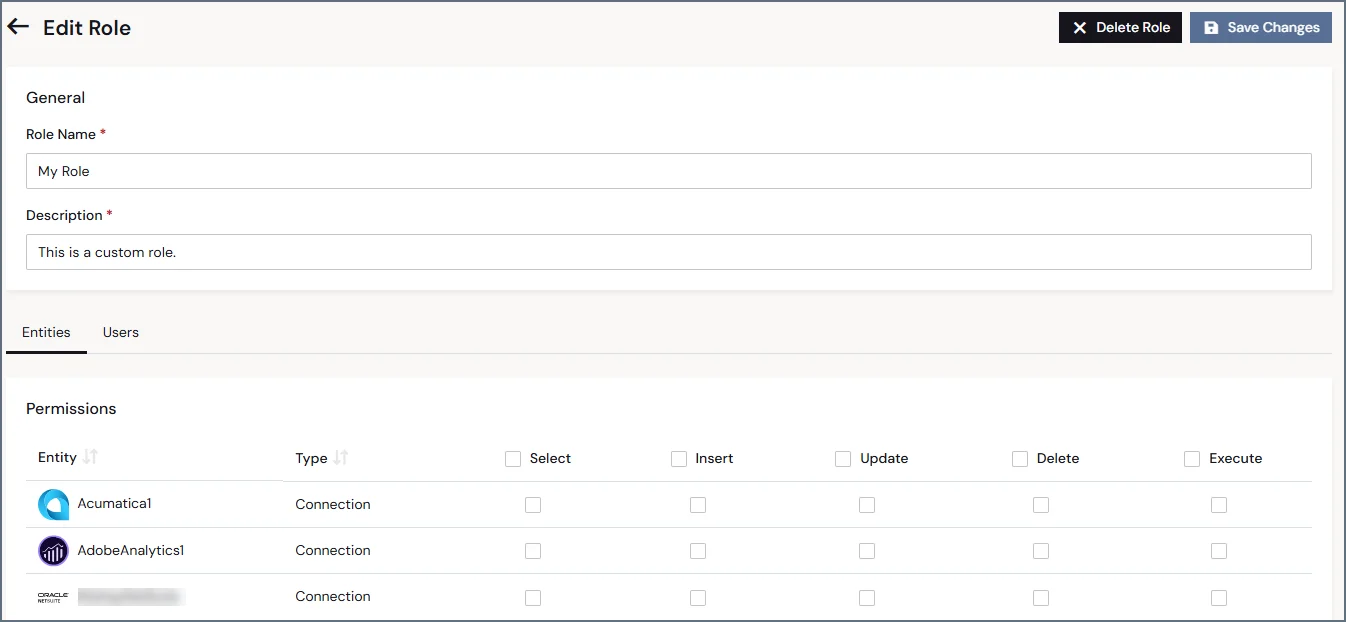 In the **Edit Role** page, you can do the following:
* Edit the **Role Name** and **Description** fields (access roles only).
* Edit the permissions for the role.
* Assign or delete the users assigned to the role.
* Delete the entire role (access roles only).
In the **Edit Role** page, you can do the following:
* Edit the **Role Name** and **Description** fields (access roles only).
* Edit the permissions for the role.
* Assign or delete the users assigned to the role.
* Delete the entire role (access roles only).