> ## Documentation Index
> Fetch the complete documentation index at: https://docs.cloud.cdata.com/llms.txt
> Use this file to discover all available pages before exploring further.
# Virtual Keys
> Virtual keys are the credentials a client sends to the LLM Gateway to authenticate.
After you create a project in the LLM Gateway, you issue a virtual key for the project. You can then send requests through the gateway by pointing your LLM client at the Base URL for your LLM and authenticating with the virtual key.
The **Virtual Keys** tab of the **LLM Gateway** page contains a list of virtual keys assigned to LLM Gateway projects.
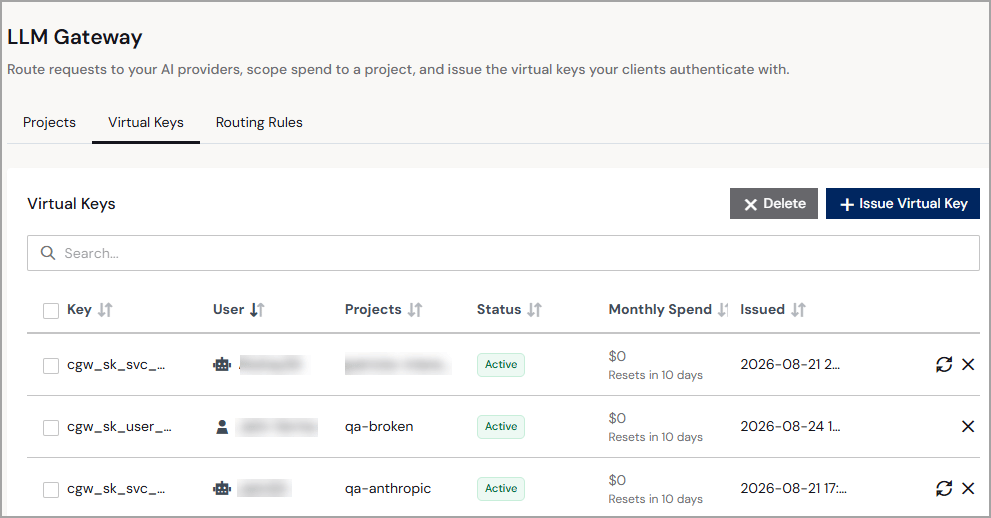 Each virtual key entry displays the following information:
* **Key**—the beginning of the virtual key. The full virtual key does not appear again after it is issued.
* **User**—the user or service account the key is issued to.
* **Projects**—the project the key is issued to.
* **Status**—the status of the project the virtual key is issued to: **Active** or **Inactive**.
* **Monthly Spend**—(coming soon) the monthly spend allotted to the project, along with the spend reset date.
* **Issued**—the date and time the virtual key was issued.
Click the rotate or delete icons to manage the virtual key for the project.
## Issue a Virtual Key
You can issue a virtual key from the main **LLM Gateway** page or within a project.
To issue a virtual key from the main **LLM Gateway** page, do the following:
In the **Virtual Keys** tab, click **+ Issue Virtual Key**. An **Issue Virtual Key** dialog appears.
Select the **User** and **Project** to issue the virtual key to.
Click **Issue**.
Copy the virtual key. The entire virtual key is only shown once, so save it before clicking **Close**.
Part of the virtual key appears on the **Virtual Keys** tab of the **LLM Gateway** page. The default status of the virtual key is **Active**. You can rotate or delete the virtual key by clicking the rotate or delete icons.
To issue a virtual key within a project, do the following:
In the **Projects** tab, select the project to assign a virtual key to.
In the lower part of the project page, click the **Virtual Keys** tab.
Each virtual key entry displays the following information:
* **Key**—the beginning of the virtual key. The full virtual key does not appear again after it is issued.
* **User**—the user or service account the key is issued to.
* **Projects**—the project the key is issued to.
* **Status**—the status of the project the virtual key is issued to: **Active** or **Inactive**.
* **Monthly Spend**—(coming soon) the monthly spend allotted to the project, along with the spend reset date.
* **Issued**—the date and time the virtual key was issued.
Click the rotate or delete icons to manage the virtual key for the project.
## Issue a Virtual Key
You can issue a virtual key from the main **LLM Gateway** page or within a project.
To issue a virtual key from the main **LLM Gateway** page, do the following:
In the **Virtual Keys** tab, click **+ Issue Virtual Key**. An **Issue Virtual Key** dialog appears.
Select the **User** and **Project** to issue the virtual key to.
Click **Issue**.
Copy the virtual key. The entire virtual key is only shown once, so save it before clicking **Close**.
Part of the virtual key appears on the **Virtual Keys** tab of the **LLM Gateway** page. The default status of the virtual key is **Active**. You can rotate or delete the virtual key by clicking the rotate or delete icons.
To issue a virtual key within a project, do the following:
In the **Projects** tab, select the project to assign a virtual key to.
In the lower part of the project page, click the **Virtual Keys** tab.
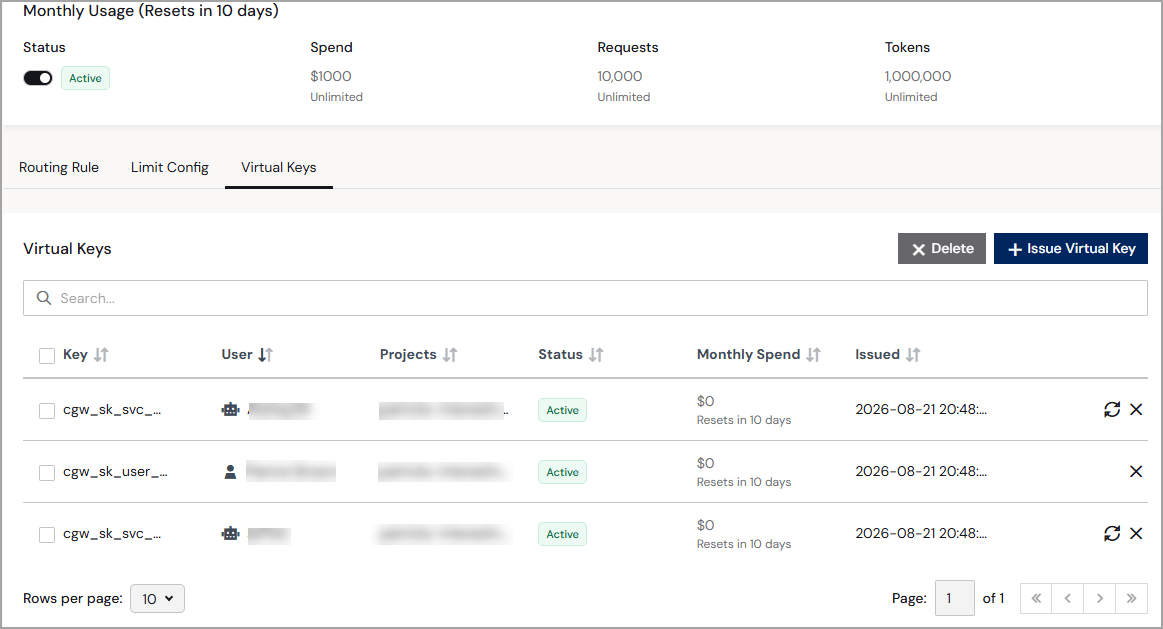 Click **+ Issue Virtual Key**. An **Issue Virtual Key** dialog appears.
Select the **User** to issue the virtual key to. The **Project** is pre-selected and cannot be changed.
Click **Issue**.
Copy the virtual key. The entire virtual key is only shown once, so save it before clicking **Close**.
Part of the virtual key appears in the **Virtual Keys** section of the project edit page. The default status of the virtual key is **Active**. You can rotate or delete the virtual key by clicking the rotate or delete icons.
This documentation is built and hosted on [Mintlify](https://mintlify.com), a developer documentation platform.
Click **+ Issue Virtual Key**. An **Issue Virtual Key** dialog appears.
Select the **User** to issue the virtual key to. The **Project** is pre-selected and cannot be changed.
Click **Issue**.
Copy the virtual key. The entire virtual key is only shown once, so save it before clicking **Close**.
Part of the virtual key appears in the **Virtual Keys** section of the project edit page. The default status of the virtual key is **Active**. You can rotate or delete the virtual key by clicking the rotate or delete icons.
This documentation is built and hosted on [Mintlify](https://mintlify.com), a developer documentation platform.