> ## Documentation Index
> Fetch the complete documentation index at: https://docs.cloud.cdata.com/llms.txt
> Use this file to discover all available pages before exploring further.
# Blackbaud Financial Edge NXT
export const title_0 = "Blackbaud Financial Edge NXT";
## Prerequisites
Before you use the Blackbaud Financial Edge NXT connector, you must configure your own custom OAuth application via the Blackbaud SKY Developer Portal.
In your [SKY API Developer account](https://developer.blackbaud.com/):
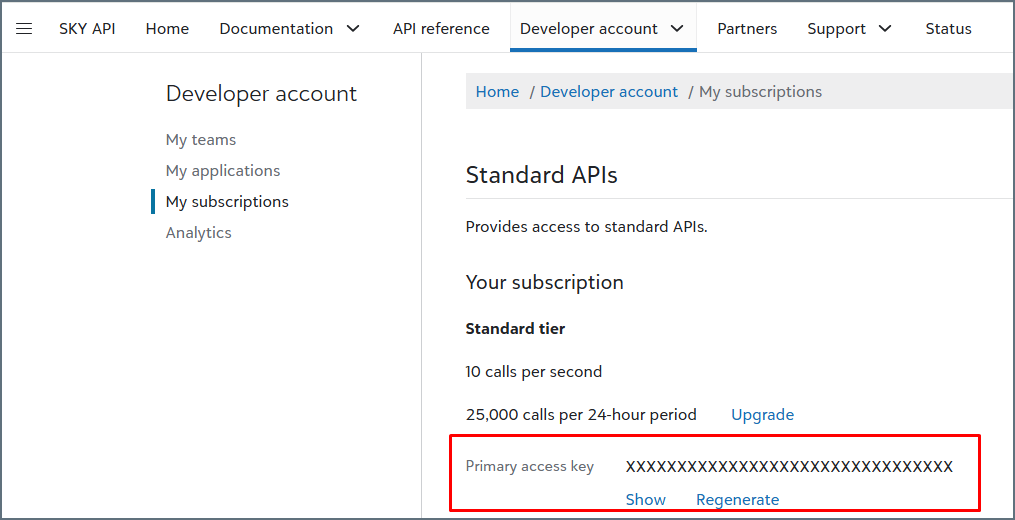
On the **My subscriptions** page, locate your subscription Id (primary access key).
 On the **My applications** page, click **+New application** to configure a new OAuth application.
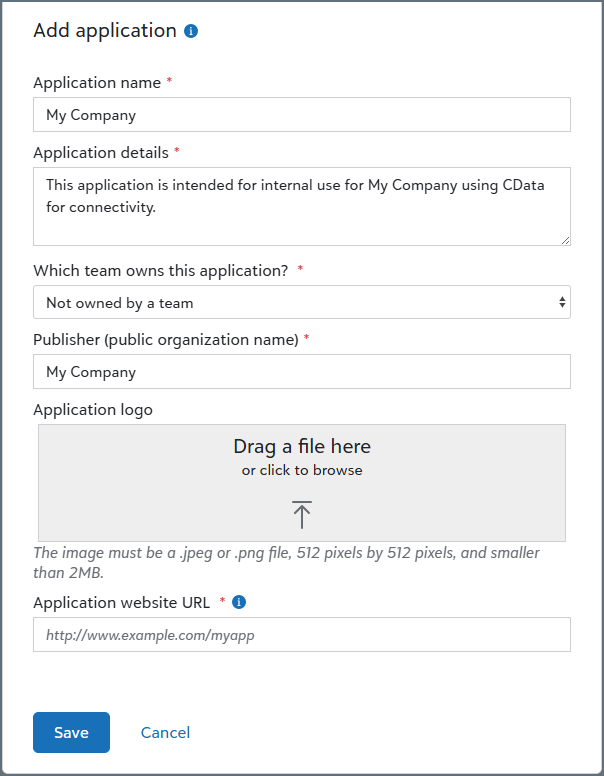
In the **Add application** dialog, enter the information about the OAuth application as needed for your organization and click **Save**.
On the **My applications** page, click **+New application** to configure a new OAuth application.
In the **Add application** dialog, enter the information about the OAuth application as needed for your organization and click **Save**.
 On the next page, do the following:
* Add the CData redirect URI ([https://oauth.cdata.com/oauth/](https://oauth.cdata.com/oauth/)).
* Copy the OAuth **Client Id** and **Client Secret** to paste into Connect AI.
* Edit **Scopes** to the desired level of data access.
## Setup Guide
Follow these steps to connect Blackbaud Financial Edge NXT to your Connect AI account:
Open the **Sources** page of the Connect AI navigation menu.
Click **+ Add Connection** in the upper-right corner.
Type *Blackbaud Financial Edge NXT* into the search field, then click the data source name.
On the **Basic Settings** tab of the new connection, enter a connection name or keep the default name.
Enter your **Subscription Key**. Your subscription key can be found in your Blackbaud Financial Edge NXT profile.
Paste the **Client Id** and **Client Secret** that you created in the prerequisites.
Click **Sign in** to connect securely through OAuth. This action opens the Blackbaud Financial Edge NXT sign-in page in a new tab.
Log in to your Blackbaud Financial Edge NXT account and provide the requested permissions (if applicable).
At the top of the Connect AI **Add {title_0} Connection** page, click **Save & Test**.
* If the connection test succeeds, a **Connection successfully saved** message appears, indicating that your connection has been created. The **Status** on the **Edit Connection** page also changes to **Authenticated**. View the data model of your successful connection in the right pane of the **Edit Connection** page, in the **Data Model** tab.
* If the connection test fails, ensure that you entered your login information correctly with no stray spaces or other characters. Connect AI displays error messages under the required fields with missing data. Some data sources require that you sign in directly to the source website. If you did not, an error message appears under the **Sign in** button. Correct the errors and try again.
* Unsuccessful connections are saved as drafts and have a **Status** of **Not Authenticated**. You can return to the connection and authenticate it later.
On the next page, do the following:
* Add the CData redirect URI ([https://oauth.cdata.com/oauth/](https://oauth.cdata.com/oauth/)).
* Copy the OAuth **Client Id** and **Client Secret** to paste into Connect AI.
* Edit **Scopes** to the desired level of data access.
## Setup Guide
Follow these steps to connect Blackbaud Financial Edge NXT to your Connect AI account:
Open the **Sources** page of the Connect AI navigation menu.
Click **+ Add Connection** in the upper-right corner.
Type *Blackbaud Financial Edge NXT* into the search field, then click the data source name.
On the **Basic Settings** tab of the new connection, enter a connection name or keep the default name.
Enter your **Subscription Key**. Your subscription key can be found in your Blackbaud Financial Edge NXT profile.
Paste the **Client Id** and **Client Secret** that you created in the prerequisites.
Click **Sign in** to connect securely through OAuth. This action opens the Blackbaud Financial Edge NXT sign-in page in a new tab.
Log in to your Blackbaud Financial Edge NXT account and provide the requested permissions (if applicable).
At the top of the Connect AI **Add {title_0} Connection** page, click **Save & Test**.
* If the connection test succeeds, a **Connection successfully saved** message appears, indicating that your connection has been created. The **Status** on the **Edit Connection** page also changes to **Authenticated**. View the data model of your successful connection in the right pane of the **Edit Connection** page, in the **Data Model** tab.
* If the connection test fails, ensure that you entered your login information correctly with no stray spaces or other characters. Connect AI displays error messages under the required fields with missing data. Some data sources require that you sign in directly to the source website. If you did not, an error message appears under the **Sign in** button. Correct the errors and try again.
* Unsuccessful connections are saved as drafts and have a **Status** of **Not Authenticated**. You can return to the connection and authenticate it later.