> ## Documentation Index
> Fetch the complete documentation index at: https://docs.cloud.cdata.com/llms.txt
> Use this file to discover all available pages before exploring further.

# Tables

## Summary

After connecting to your API, you can create, view, and configure the data from it in the form of tables. Tables can be customized via a wizard. You can also specify server-side filters to improve efficiency. This page covers creating tables and configuring table data, parameters, headers, and filters.

## Create Tables

When creating tables for [API Connector](/en/Data-Sources/APIConnector), it is important to remember that each table must be created individually in order to be listed in the Connector's catalog. To do so, follow the steps below:

<Steps>
  <Step>
    Click **Add** to begin creating a new table.
  </Step>

  <Step>
    Enter a **Name** for the table.
  </Step>

  <Step>
    In **Request URL**, choose either `Get` or `Post`.
  </Step>

  <Step>
    Enter the URL of your API endpoint into the **Request URL** field.
    <Note>To connect to an API that requires a different request for each record, include the name of the column in curly braces. For example, `https://api.example.com/table/{id}`.</Note>
  </Step>

  <Step>
    If you select `Post`, supply the **Body** to include in the API request. Then enter the `URL` of your API endpoint.

    <p>
      You can use the **Body** section to request body filters for `Post` API requests. The following is an example of a request body and a filter:

      ```
      {
      	"query": { "date_utc": { "$gte": "[_input.startDate]", "$lte": "[_input.endDate]" } }, "options": { "select": \["name", "date_utc", "success", "details"], "sort": { "date_utc": "asc" }, "limit": 20 } 
      }
      ```
    </p>

    In this case, the user is prompted to input a start date and an end date.

    <p>
      When you have a body filter, **Edit Table** displays the message **Body Filter(s) Detected**.
    </p>

    <Note>
      If your table request body also contains filters, you need to add an escape character to the square bracket, as shown in the example above before `"name"`.
    </Note>
  </Step>

  <Step>
    Select a **Response Type** of **JSON**, **LDJSON**, **XML**, or **CSV**.

    * **JSON**—the response is formatted as JSON.
    * **LDJSON**—the response is formatted as Linked Data JSON, which allows you to link definitions of objects within the JSON data.
    * **XML**—the response is formatted as XML-tagged data.
    * **CSV**—the response is formatted as comma-delimited data.
  </Step>
</Steps>

### Table Data

Next, you must tell the connector how to model the API's response into a table.

<Steps>
  <Step>
    Click **Configure** in the **Table Data** section to open the configuration wizard.
  </Step>

  <Step>
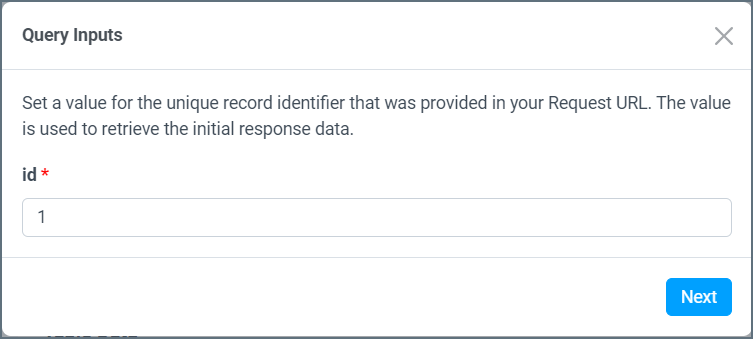
    (Optional) If you added a unique record identifier in the **Request URL**, such as `{id}`, a **Query Inputs** dialog appears. Set a value for the record identifier in order to retrieve the initial response data, and click **Next**.

    <Frame>
      <img src="https://mintcdn.com/cdata/8B5SN8TlQOoh6rM4/en/images/api_query_inputs.png?fit=max&auto=format&n=8B5SN8TlQOoh6rM4&q=85&s=cc9b5f99813400d9b4edaecd8274c4eb" alt="API query inputs" width="753" height="339" data-path="en/images/api_query_inputs.png" />
    </Frame>
  </Step>

  <Step>
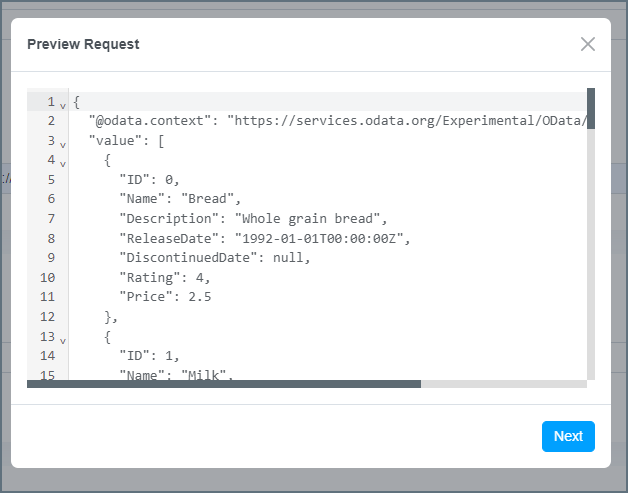
    Connect AI calls your API and provides a preview of the data.

    <Frame>
      <img src="https://mintcdn.com/cdata/8B5SN8TlQOoh6rM4/en/images/APIConnectorTable01.png?fit=max&auto=format&n=8B5SN8TlQOoh6rM4&q=85&s=c0f3b0d3596813279364948403afebc5" alt="API Connector Table" width="628" height="493" data-path="en/images/APIConnectorTable01.png" />
    </Frame>
  </Step>

  <Step>
    Click **Next**.
  </Step>

  <Step>
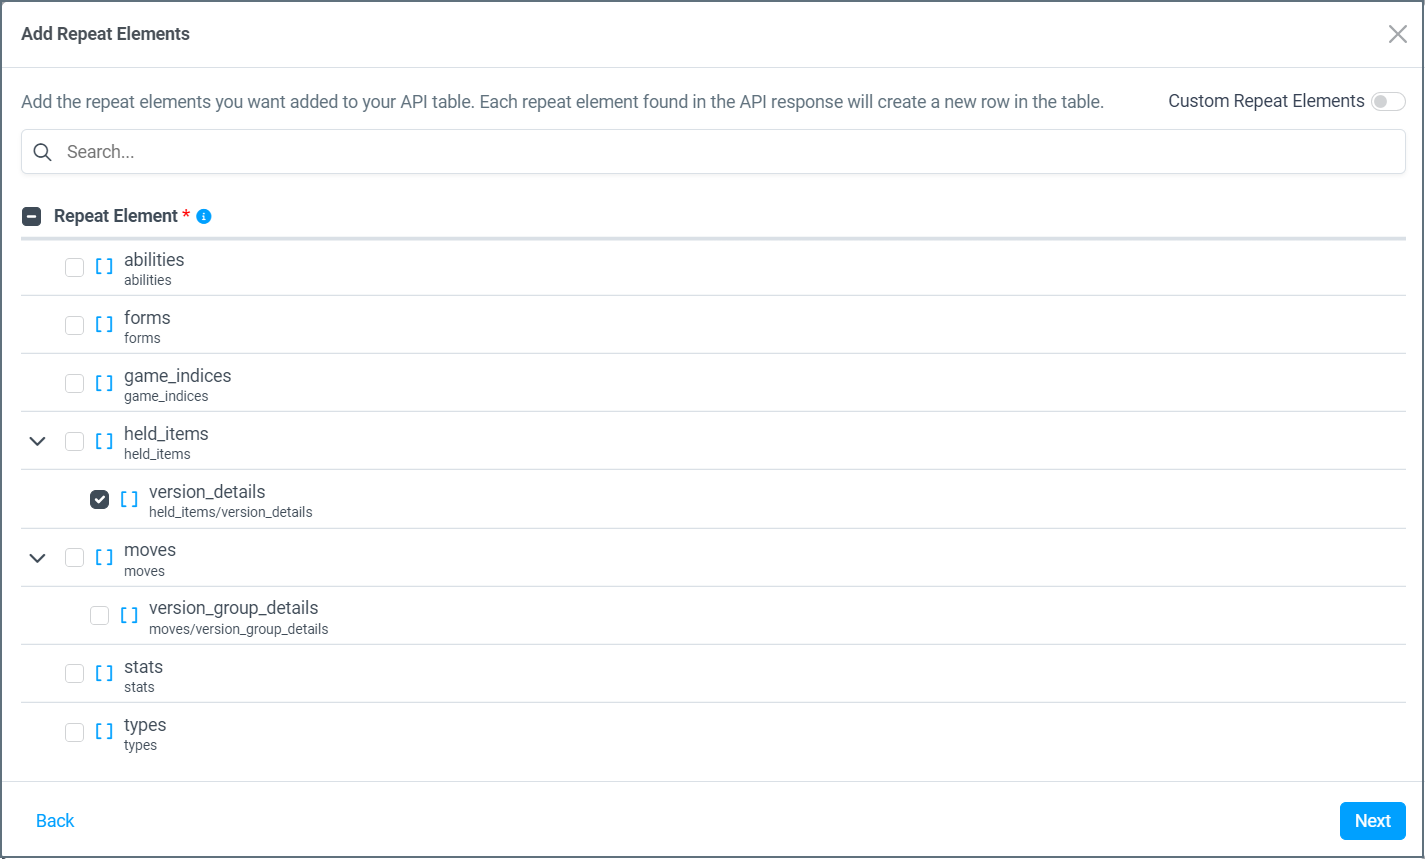
    In the **Add Repeat Elements** dialog, select the checkbox next to the repeat elements you want added to your API table. This is the path of the element in your API endpoint which contains the repeating items to be used as rows. You can select multiple repeat elements if there are repeat elements within multiple paths in the response.

    <Frame>
      <img src="https://mintcdn.com/cdata/8B5SN8TlQOoh6rM4/en/images/api_add_repeat_elements.png?fit=max&auto=format&n=8B5SN8TlQOoh6rM4&q=85&s=b87907d506d4edc1c21c99f3044efad6" alt="API add repeat elements" width="1425" height="860" data-path="en/images/api_add_repeat_elements.png" />
    </Frame>
  </Step>

  <Step>
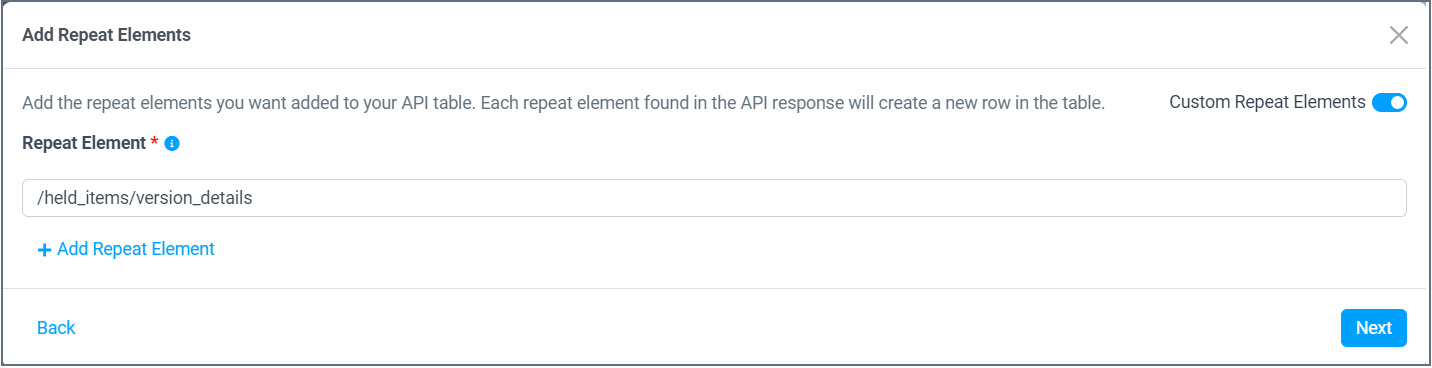
    (Optional) You can toggle **Custom Repeat Elements** to add repeat elements manually, rather than selecting from a list.

    <Frame>
      <img src="https://mintcdn.com/cdata/8B5SN8TlQOoh6rM4/en/images/api_custom_repeat_elements.png?fit=max&auto=format&n=8B5SN8TlQOoh6rM4&q=85&s=85743dad03d4493c5fef5ea4338409d9" alt="API custom repeat elements" width="1432" height="368" data-path="en/images/api_custom_repeat_elements.png" />
    </Frame>

    Click **Add Repeat Element** to add another repeat element manually.
  </Step>

  <Step>
    Click **Next**.
  </Step>

  <Step>
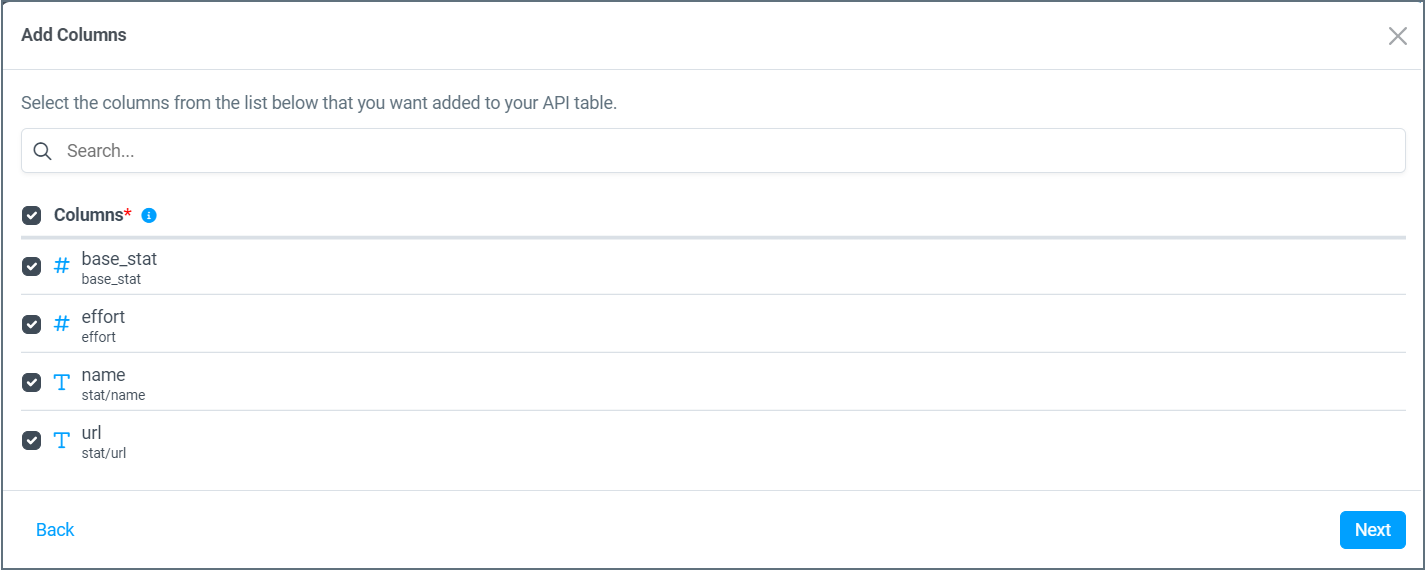
    In the **Add Columns** dialog, select the columns to add to your API table.

    <Frame>
      <img src="https://mintcdn.com/cdata/8B5SN8TlQOoh6rM4/en/images/api_add_columns.png?fit=max&auto=format&n=8B5SN8TlQOoh6rM4&q=85&s=f0dec2cc6f0375001c1f32172f05979b" alt="API add columns" width="1428" height="572" data-path="en/images/api_add_columns.png" />
    </Frame>

    Once you have selected your columns, click **Next**.
  </Step>

  <Step>
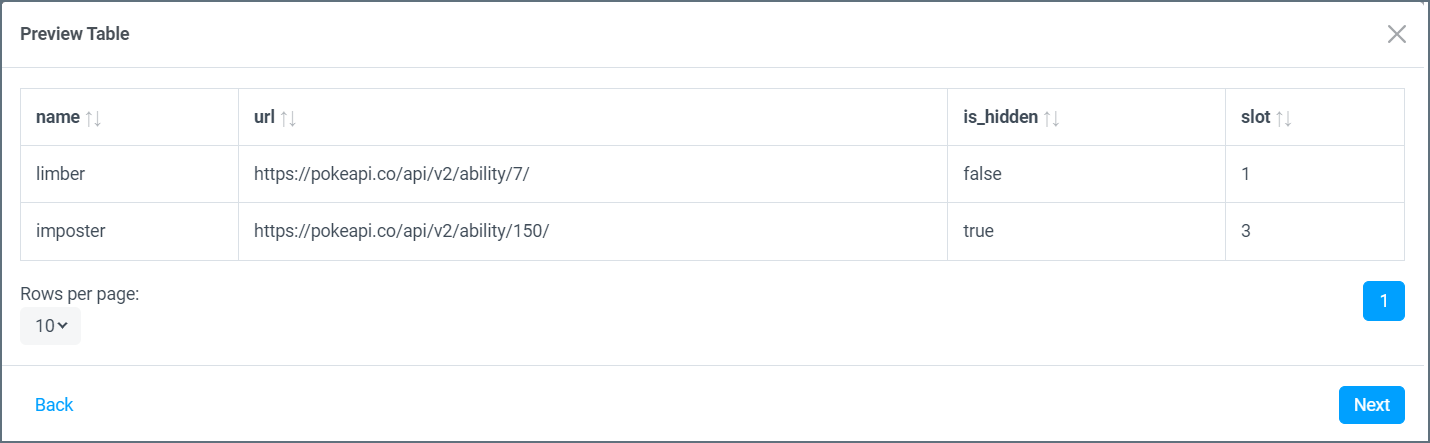
    In the **Preview Table** dialog, review the table contents. Click **Back** to make any changes.

    <Frame>
      <img src="https://mintcdn.com/cdata/8B5SN8TlQOoh6rM4/en/images/api_preview_table.png?fit=max&auto=format&n=8B5SN8TlQOoh6rM4&q=85&s=e7a003307a84b84d31add41f1e09bb10" alt="API preview table" width="1430" height="443" data-path="en/images/api_preview_table.png" />
    </Frame>
  </Step>

  <Step>
    Review the preview of your table and click **Next**. The Configuration Wizard automatically imports all selected columns into the correct fields.
  </Step>

  <Step>
    Back in the **Table Data** section of the **Edit Table** screen, you can edit column names and data types. You can also assign primary keys or delete columns. In the case of child tables, you can also change the parent reference column. For other edits, click **Configure** again to adjust repeat elements and other data.
  </Step>

  <Step>
    In the **Pseudo Columns** tab, you can add columns to be used as filters in the WHERE clause of queries, but are not present in the data output.
  </Step>

  <Step>
    Click **Save** at the top of **Edit Table** screen to save the table data.
  </Step>

  <Step>
    Click **Preview** at the top of the **Edit Table** screen to preview your table. If you added a unique record identifier, a **Query Inputs** dialog appears. Set a value to preview the response data.
  </Step>
</Steps>

### Parameters

You can add URL parameters to be sent with all API requests for this table. To create a parameter:

<Steps>
  <Step>
    Click **Add Param**.
  </Step>

  <Step>
    Enter the parameter **Name**.
  </Step>

  <Step>
    Enter the parameter **Value**.
  </Step>
</Steps>

To add more parameters, repeat the steps above.

### Headers

You can add HTTP headers that are sent with all API requests for this table. These headers are in addition to the headers configured with the API connector itself. To add a new header:

<Steps>
  <Step>
    Enter the header **Name**.
  </Step>

  <Step>
    Specify the **Value** of the header.
  </Step>
</Steps>

To add more headers, click **Add Header** and repeat the steps above.

### Filters

After creating the table with columns, you can create filters to define the behavior of the API Connector when a WHERE clause is issued during a query. Filters are optional, but can improve performance for WHERE clause conditions.

<Steps>
  <Step>
    Click **Add Filter**.
  </Step>

  <Step>
    Select the **Column Name** the filter applies to. This filter is applied when the selected column and SQL operator exist in the WHERE clause.
  </Step>

  <Step>
    Select an **SQL Operator**. This filter is applied when the selected column and SQL operator exist in the WHERE clause.
  </Step>

  <Step>
    Select a **Request Filter** from the drop-down list: **URL Parameter** or **Request Header**. The request filter determines how the filter is passed in the request to the API.
  </Step>

  <Step>
    Specify the **URL Parameter** or the **Request Header** that this API uses to filter.
  </Step>
</Steps>

To add more filters, repeat the steps above.

#### Example

This example shows how to create a filter that processes a query that filters records in the Reports table by the date the record was created.

Here is an example of such a query:

```sql theme={null}
SELECT * FROM Reports Where CreatedDate > 2022-12-31
```

If no filter has been defined for this table, the connector processes this filter in memory by reading all of the rows from the API and filtering the list in memory by the specified `CreatedDate` column. However, this API supports this type of filtering on the server side which can improve performance substantially. This is what this query would look like to the API:

```bash theme={null}
https://www.mycustomapi.org/api/reports?$startdate=2022-12-31
```

In order to tell the connector how to send this filter to the API, you would specify the following fields:

**Column Name**: CreatedDate

**SQL Operator**: Greater Than

**Request Filter**: URL Parameter

**Parameter Name**: startdate

This instructs the connector that when a greater than operator has been specified for the `CreatedDate` column, include the `startDate` URL parameter with the filter value in the API request.
