> ## Documentation Index
> Fetch the complete documentation index at: https://docs.cloud.cdata.com/llms.txt
> Use this file to discover all available pages before exploring further.
# Gemini Enterprise
> Gemini Enterprise is Google's enterprise AI assistant, available as part of Google Workspace. This page explains how to connect CData Connect AI to Gemini Enterprise as a custom MCP server data store, enabling natural language queries over live data.
## Prerequisites
Before you can configure and use Gemini Enterprise with Connect AI, you must first do the following:
* Connect a data source to your Connect AI account. See [Sources](/en/Sources) for more information.
* Have a [Gemini Enterprise](https://cloud.google.com/gemini-enterprise) account (trial available).
* Have a Google Cloud project with billing enabled.
* In your Google Cloud account:
* Override the organization policy for Custom MCP data stores. [Learn more](https://docs.cloud.google.com/gemini/enterprise/docs/connectors/custom-mcp-server/override-constraint-for-custom-mcp-data-stores).
* Grant the **Discovery Engine Editor** role to the administrator. [Learn more](https://docs.cloud.google.com/gemini/enterprise/docs/connectors/custom-mcp-server/set-up-custom-mcp-server#before_you_begin).
## Create an OAuth App in CData Connect AI
Gemini Enterprise uses OAuth 2.0 to authenticate users against the CData Connect AI MCP Server. This requires a user-based OAuth App in your CData Connect AI account.
Click the gear icon in the top-right corner of Connect AI to open **Settings**.
Navigate to **OAuth Apps** and click **+ Create App**. The **Create OAuth App** dialog appears.
Enter the following settings:
* **Name**–enter a descriptive name (for example, *GeminiEnterpriseOAuth*).
* **Application Type**–select **Web Application**.
* **Callback URL**–enter *[https://vertexaisearch.cloud.google.com/oauth-redirect](https://vertexaisearch.cloud.google.com/oauth-redirect)*.
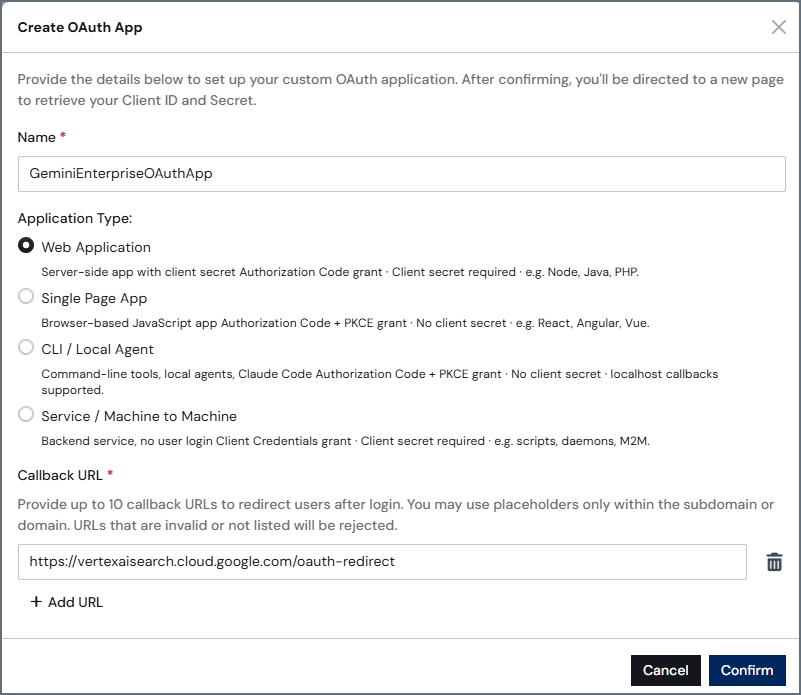 Click **Confirm**. CData Connect AI generates a **Client ID** and **Client Secret**.
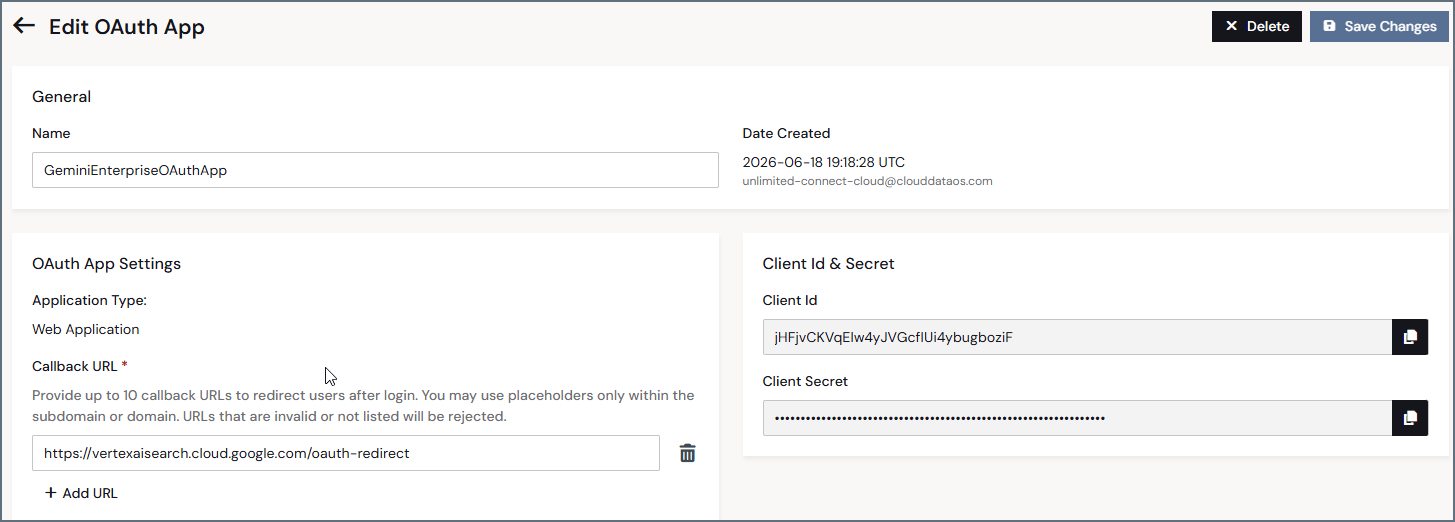
Copy both the **Client ID** and **Client Secret**. You will need them in the next section.
Click **Confirm**. CData Connect AI generates a **Client ID** and **Client Secret**.
Copy both the **Client ID** and **Client Secret**. You will need them in the next section.
 ## Create the Custom MCP Server Data Store
Open **Gemini Enterprise** and navigate to the **Data stores** screen.
Click **+ Create data store**.
On the **Select a data source** page, search for *Custom MCP Server* and click **Add MCP server**.
In the **Authentication settings** section, enter the following:
* **MCP Server URL**–enter *[https://mcp.cloud.cdata.com/mcp](https://mcp.cloud.cdata.com/mcp)*.
* **Authorization URL**–enter *[https://cloud-login.cdata.com/authorize](https://cloud-login.cdata.com/authorize)*.
* **Token URL**–enter *[https://cloud-login.cdata.com/oauth/token](https://cloud-login.cdata.com/oauth/token)*.
* **Client ID** and **Client Secret**–from the OAuth App created above.
## Create the Custom MCP Server Data Store
Open **Gemini Enterprise** and navigate to the **Data stores** screen.
Click **+ Create data store**.
On the **Select a data source** page, search for *Custom MCP Server* and click **Add MCP server**.
In the **Authentication settings** section, enter the following:
* **MCP Server URL**–enter *[https://mcp.cloud.cdata.com/mcp](https://mcp.cloud.cdata.com/mcp)*.
* **Authorization URL**–enter *[https://cloud-login.cdata.com/authorize](https://cloud-login.cdata.com/authorize)*.
* **Token URL**–enter *[https://cloud-login.cdata.com/oauth/token](https://cloud-login.cdata.com/oauth/token)*.
* **Client ID** and **Client Secret**–from the OAuth App created above.
 Click **Login** and complete the sign-in.
Click **Continue**. The **Advanced options** section opens.
In the **MCP Server Description** field, enter a description that helps Gemini Enterprise understand what the server does and when to use it.
Click **Continue**.
In the **Configure your data connector** section, select the **Location of your data connector** from the **Multi-region** field list.
In **Your data connector name**, enter a name for your data store.
Click **Create**. Gemini Enterprise creates your data store.
## Enable Actions
After creating the data store, you must enable at least one action before it can be used in Gemini Enterprise.
By default, no tools or actions from your custom MCP server are enabled after the data store is created.
Go to your custom MCP server data store.
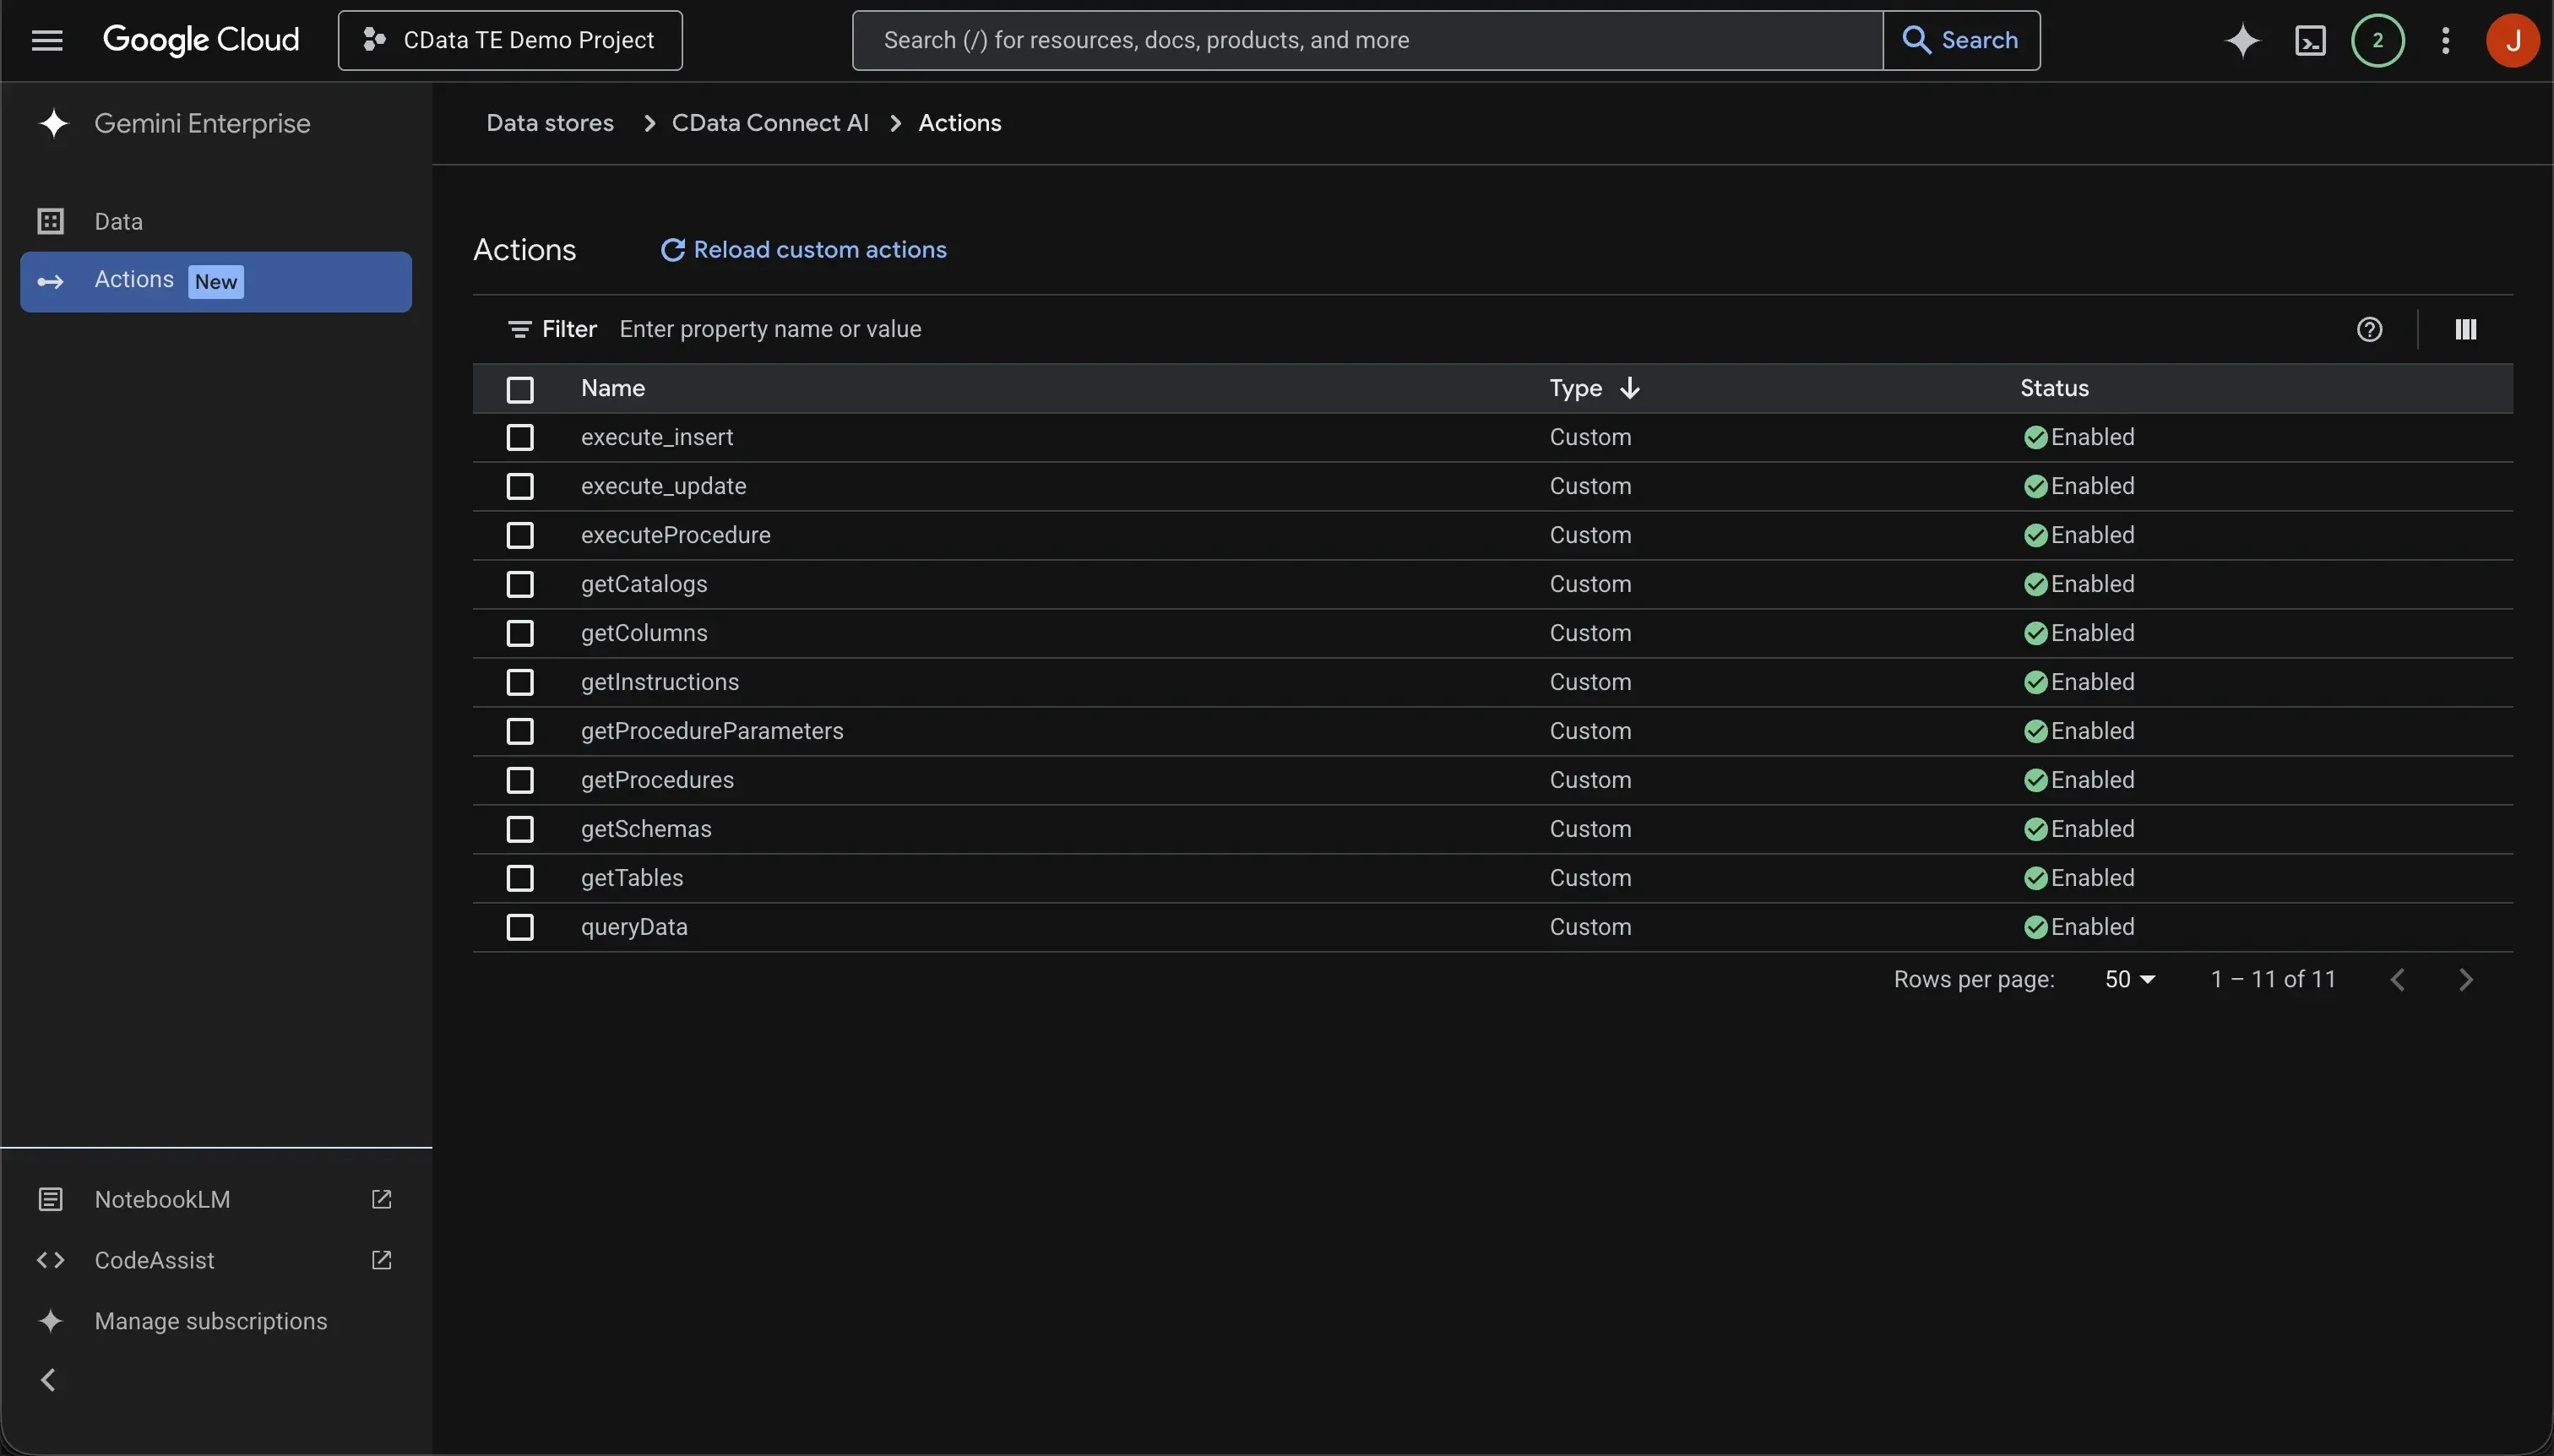
Open the **Actions** tab and click **Reload custom actions** to authenticate and retrieve available tools.
This performs a `tools/list` call on the MCP server to retrieve available tools, which are then displayed on the screen.
Select the actions to enable.
Click **Enable actions**.
Click **Login** and complete the sign-in.
Click **Continue**. The **Advanced options** section opens.
In the **MCP Server Description** field, enter a description that helps Gemini Enterprise understand what the server does and when to use it.
Click **Continue**.
In the **Configure your data connector** section, select the **Location of your data connector** from the **Multi-region** field list.
In **Your data connector name**, enter a name for your data store.
Click **Create**. Gemini Enterprise creates your data store.
## Enable Actions
After creating the data store, you must enable at least one action before it can be used in Gemini Enterprise.
By default, no tools or actions from your custom MCP server are enabled after the data store is created.
Go to your custom MCP server data store.
Open the **Actions** tab and click **Reload custom actions** to authenticate and retrieve available tools.
This performs a `tools/list` call on the MCP server to retrieve available tools, which are then displayed on the screen.
Select the actions to enable.
Click **Enable actions**.
 ## Connect the Data Store to a Gemini Enterprise App
In the Google Cloud console, go to the [Gemini Enterprise page](https://console.cloud.google.com/gemini-enterprise/start).
From the navigation menu, click **Apps**.
Select the Gemini Enterprise app where you want to connect your data store.
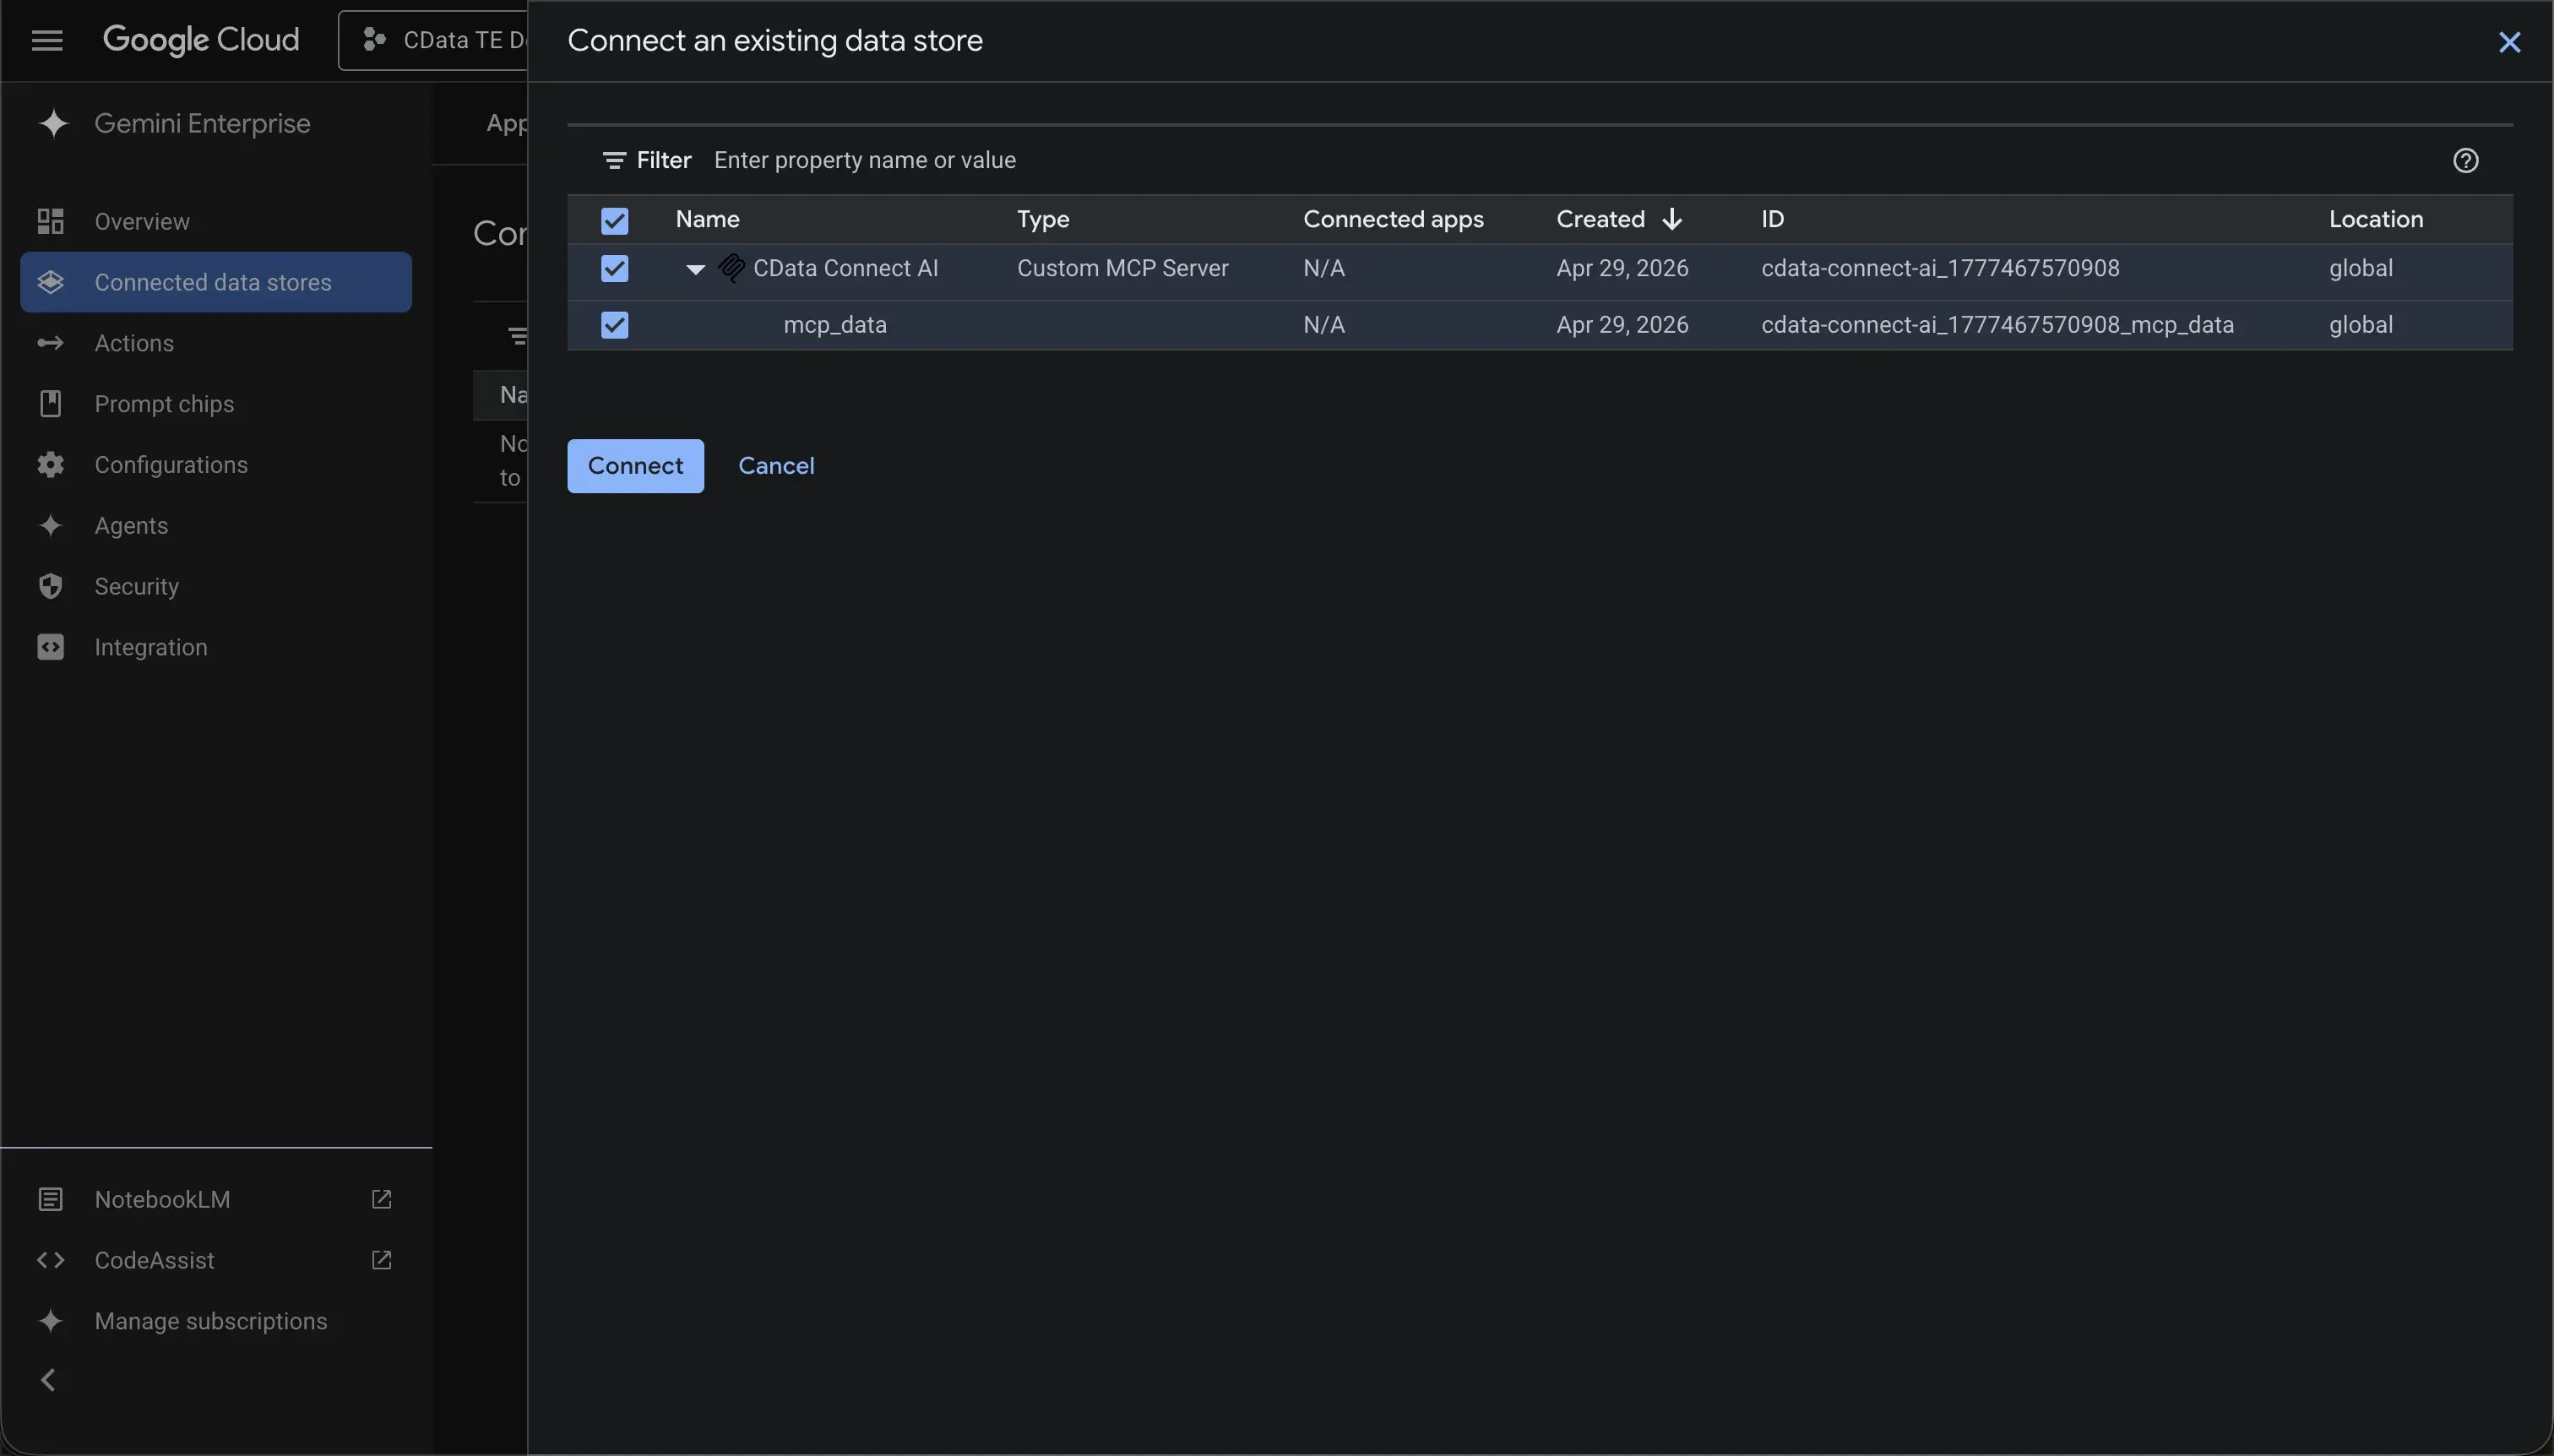
From the navigation menu of the app, click **Connected data stores**.
Click **Add existing data stores** and select your data store.
Click **Connect**.
## Connect the Data Store to a Gemini Enterprise App
In the Google Cloud console, go to the [Gemini Enterprise page](https://console.cloud.google.com/gemini-enterprise/start).
From the navigation menu, click **Apps**.
Select the Gemini Enterprise app where you want to connect your data store.
From the navigation menu of the app, click **Connected data stores**.
Click **Add existing data stores** and select your data store.
Click **Connect**.
 ## Query Live Data with Natural Language
With the data store connected, you can query live data using natural language from the Gemini Enterprise web application. Each user authorizes CData Connect AI on first use.
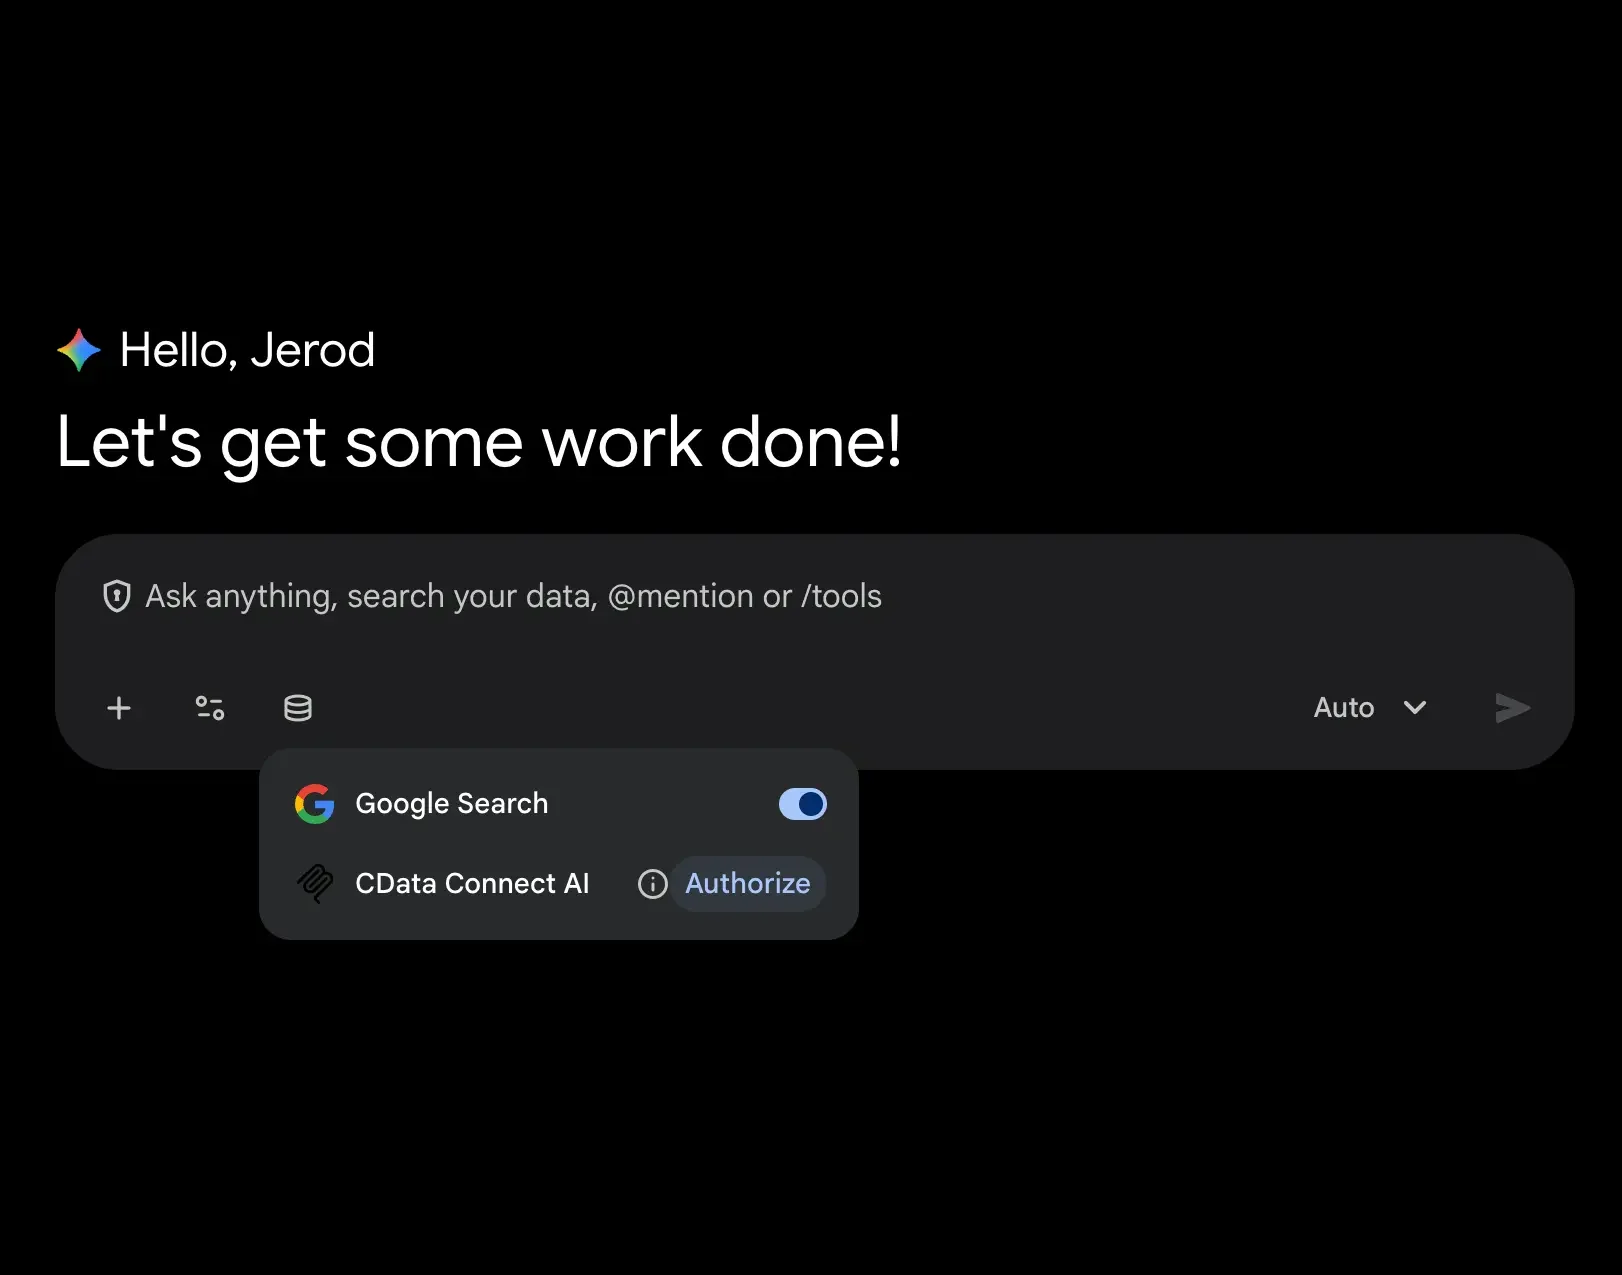
Open **Gemini Enterprise** and click the connections icon. Click **Authorize** next to **CData Connect AI** and complete the sign-in.
## Query Live Data with Natural Language
With the data store connected, you can query live data using natural language from the Gemini Enterprise web application. Each user authorizes CData Connect AI on first use.
Open **Gemini Enterprise** and click the connections icon. Click **Authorize** next to **CData Connect AI** and complete the sign-in.
 Ask natural language questions about your data, such as:
* "Show me all records from the last 30 days"
* "What are the top accounts by revenue?"
* "List all active opportunities and their current status"
* "Summarize activity for this quarter"
The agent automatically discovers available connections in Connect AI, generates SQL, and returns results—all without requiring you to write queries or understand the underlying data structure.
Ask natural language questions about your data, such as:
* "Show me all records from the last 30 days"
* "What are the top accounts by revenue?"
* "List all active opportunities and their current status"
* "Summarize activity for this quarter"
The agent automatically discovers available connections in Connect AI, generates SQL, and returns results—all without requiring you to write queries or understand the underlying data structure.