> ## Documentation Index
> Fetch the complete documentation index at: https://docs.cloud.cdata.com/llms.txt
> Use this file to discover all available pages before exploring further.
# Amazon Quick
> This page outlines the steps to connect Amazon Quick to your Connect AI account.
Amazon Quick lets you build and share AI agents that act on your data. This page explains how to connect Connect AI to Amazon Quick as a Model Context Protocol (MCP) connector, enabling your agents to query and take action on live data.
## Prerequisites
Before you can configure and use Amazon Quick with Connect AI, you must first do the following:
* Connect a data source to your Connect AI account. See [Sources](/en/Sources) for more information.
* Have access to Amazon Quick and an IAM user with permission to create and publish connectors for your team.
## Create an MCP Connector in Amazon Quick
Begin creating the connector in Amazon Quick. During setup, Amazon Quick displays the redirect URL that you need to create the OAuth App in Connect AI.
Log in to Amazon Quick with your IAM user.
Click **Connectors**, and then click **Create for your team**.
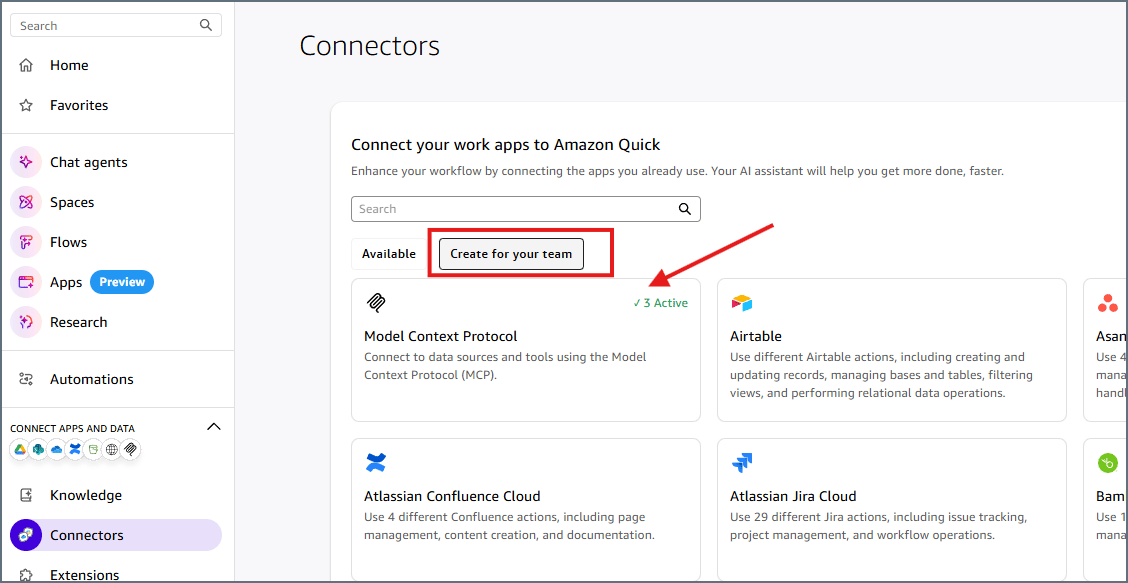 Choose **Model Context Protocol**.
Create a new MCP connector by providing the **MCP URL** *[https://mcp.cloud.cdata.com/mcp](https://mcp.cloud.cdata.com/mcp)*. You can also use a toolkit URL to scope the connector to a specific toolkit.
Choose **Model Context Protocol**.
Create a new MCP connector by providing the **MCP URL** *[https://mcp.cloud.cdata.com/mcp](https://mcp.cloud.cdata.com/mcp)*. You can also use a toolkit URL to scope the connector to a specific toolkit.
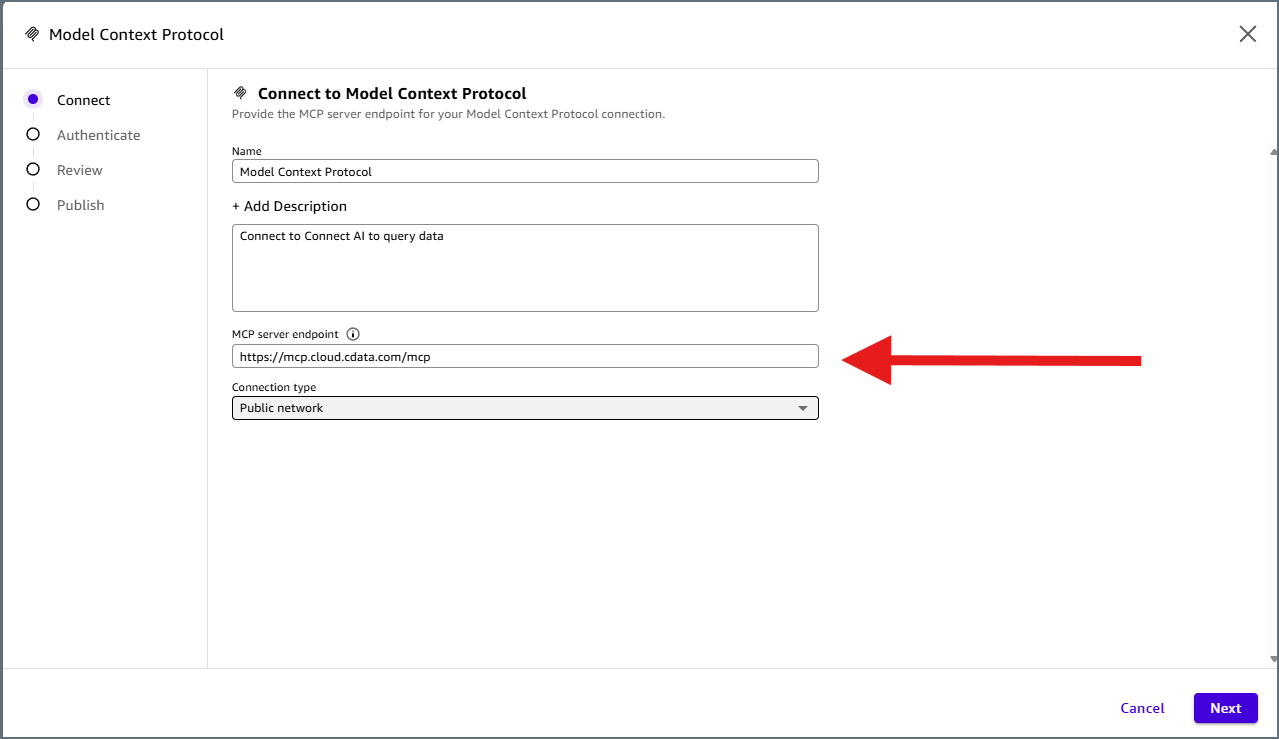 Click **Next**.
Select **Custom user-based OAuth App**.
Click **Next**.
Select **Custom user-based OAuth App**.
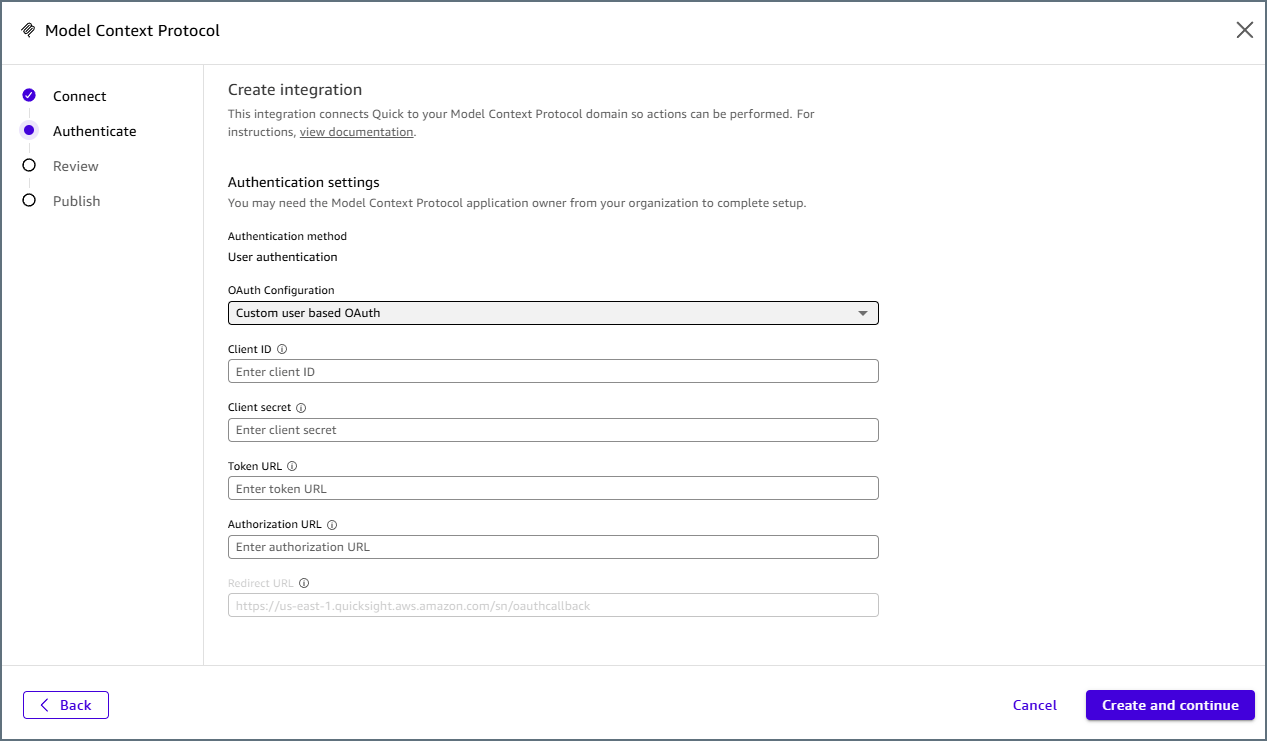 Copy the **redirect URL** that Amazon Quick displays. It follows this format:
```
https://{region}.quicksight.aws.amazon.com/sn/oauthcallback
```
You will enter this URL when you create the OAuth App in the next section. Leave this screen open, because you will return to it to enter your Client ID and Client Secret.
## Create an OAuth App in Connect AI
Amazon Quick uses OAuth 2.0 to authenticate users against the Connect AI MCP Server. This requires a user-based OAuth application in your Connect AI account.
Click the gear icon in the top-right corner of Connect AI to open **Settings**.
Navigate to the **OAuth Apps** tab and click **+ Create App**. The **Create OAuth App** dialog appears.
Enter the following settings:
* **Name**–enter a descriptive name (for example, *AmazonQuickOAuth*).
* **Application Type**–select **Web Application**.
* **Callback URL**–enter the redirect URL you copied from Amazon Quick (for example, *[https://us-east-1.quicksight.aws.amazon.com/sn/oauthcallback](https://us-east-1.quicksight.aws.amazon.com/sn/oauthcallback)*).
Copy the **redirect URL** that Amazon Quick displays. It follows this format:
```
https://{region}.quicksight.aws.amazon.com/sn/oauthcallback
```
You will enter this URL when you create the OAuth App in the next section. Leave this screen open, because you will return to it to enter your Client ID and Client Secret.
## Create an OAuth App in Connect AI
Amazon Quick uses OAuth 2.0 to authenticate users against the Connect AI MCP Server. This requires a user-based OAuth application in your Connect AI account.
Click the gear icon in the top-right corner of Connect AI to open **Settings**.
Navigate to the **OAuth Apps** tab and click **+ Create App**. The **Create OAuth App** dialog appears.
Enter the following settings:
* **Name**–enter a descriptive name (for example, *AmazonQuickOAuth*).
* **Application Type**–select **Web Application**.
* **Callback URL**–enter the redirect URL you copied from Amazon Quick (for example, *[https://us-east-1.quicksight.aws.amazon.com/sn/oauthcallback](https://us-east-1.quicksight.aws.amazon.com/sn/oauthcallback)*).
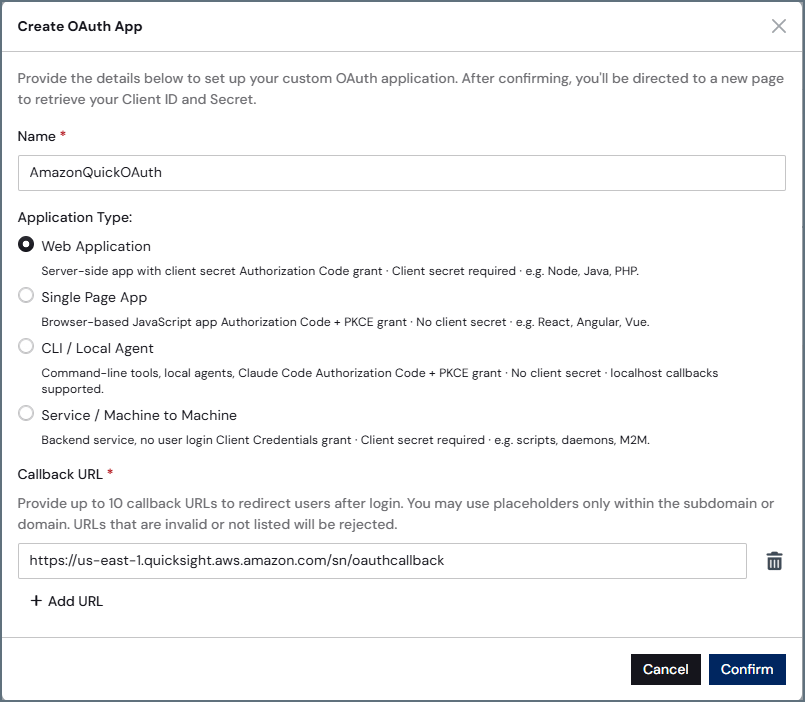 Click **Confirm**. Connect AI generates a **Client ID** and **Client Secret**.
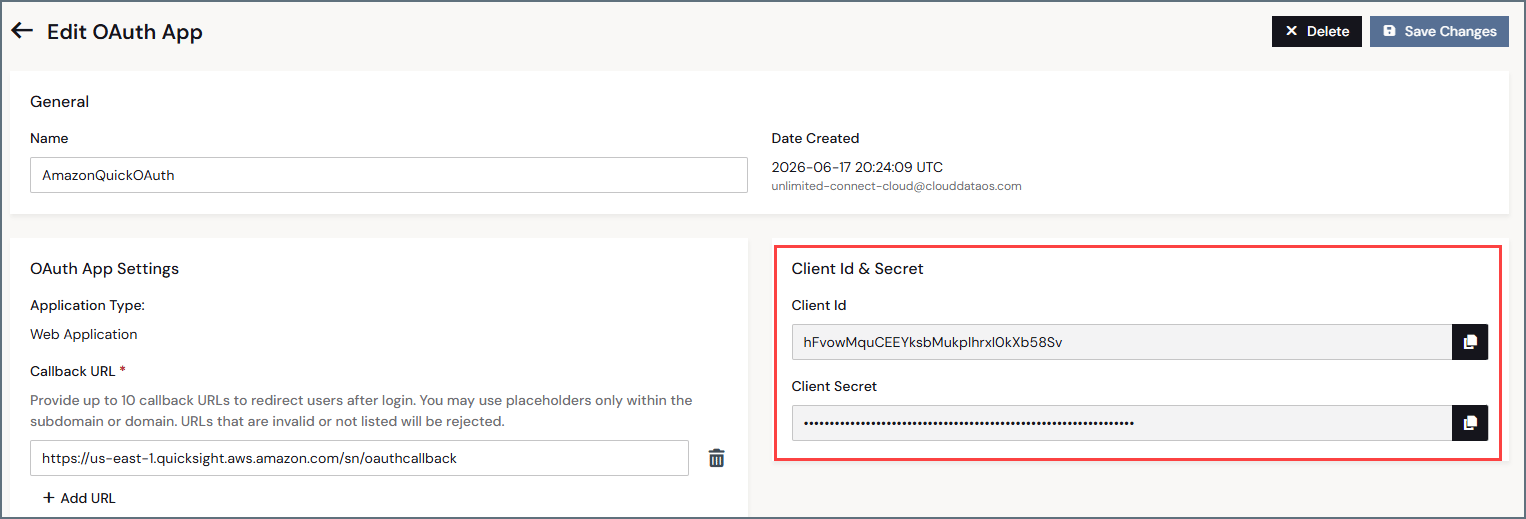 Copy both the **Client ID** and **Client Secret**. You will need them in the next section.
## Complete the Connector in Amazon Quick
Return to the Amazon Quick connector setup and enter the following settings:
* **Client ID** and **Client Secret**–from the OAuth application created above.
* **Token URL**–enter *[https://cloud-login.cdata.com/oauth/token](https://cloud-login.cdata.com/oauth/token)*.
* **Authorization URL**–enter *[https://cloud-login.cdata.com/authorize](https://cloud-login.cdata.com/authorize)*.
Copy both the **Client ID** and **Client Secret**. You will need them in the next section.
## Complete the Connector in Amazon Quick
Return to the Amazon Quick connector setup and enter the following settings:
* **Client ID** and **Client Secret**–from the OAuth application created above.
* **Token URL**–enter *[https://cloud-login.cdata.com/oauth/token](https://cloud-login.cdata.com/oauth/token)*.
* **Authorization URL**–enter *[https://cloud-login.cdata.com/authorize](https://cloud-login.cdata.com/authorize)*.
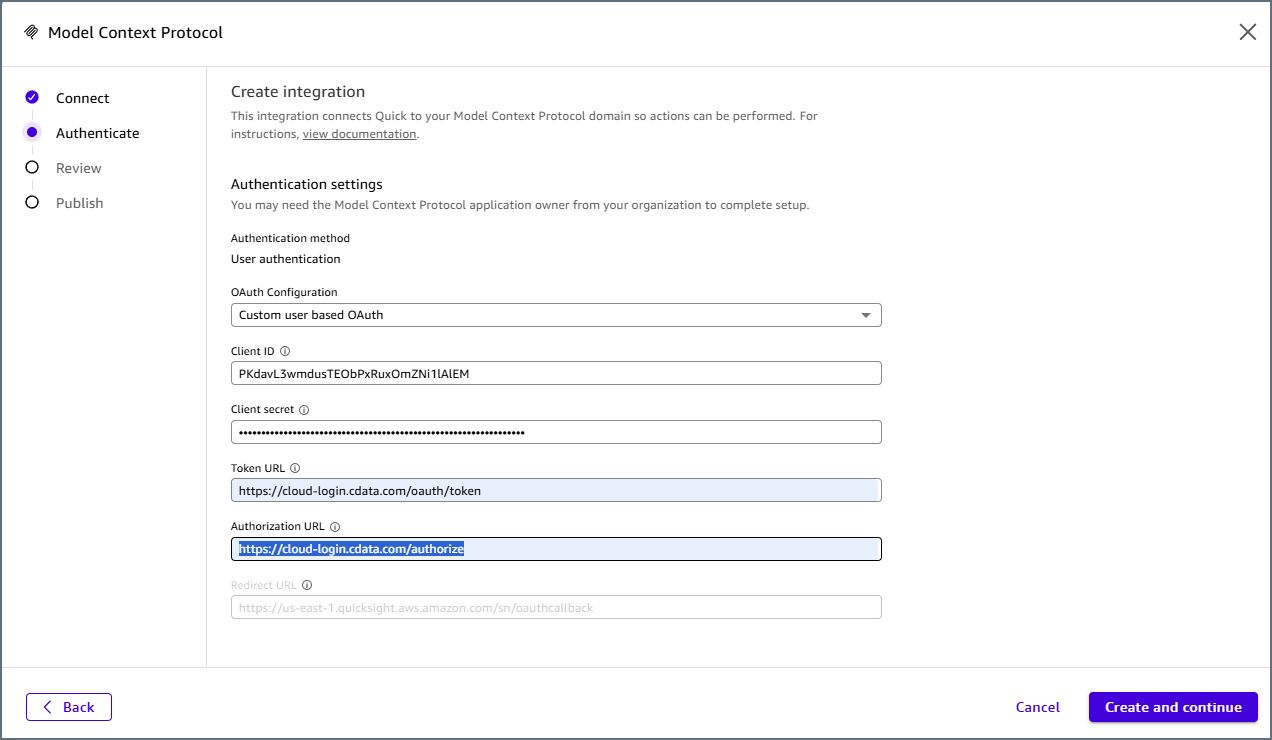 Click **Create and Continue**. You are prompted with a login screen. Complete the sign-in.
Publish the connector.
## Use the Connector in an Agent
After you publish the connector, you can add it to any Amazon Quick agent and call its tools to query.
Click **Create and Continue**. You are prompted with a login screen. Complete the sign-in.
Publish the connector.
## Use the Connector in an Agent
After you publish the connector, you can add it to any Amazon Quick agent and call its tools to query.
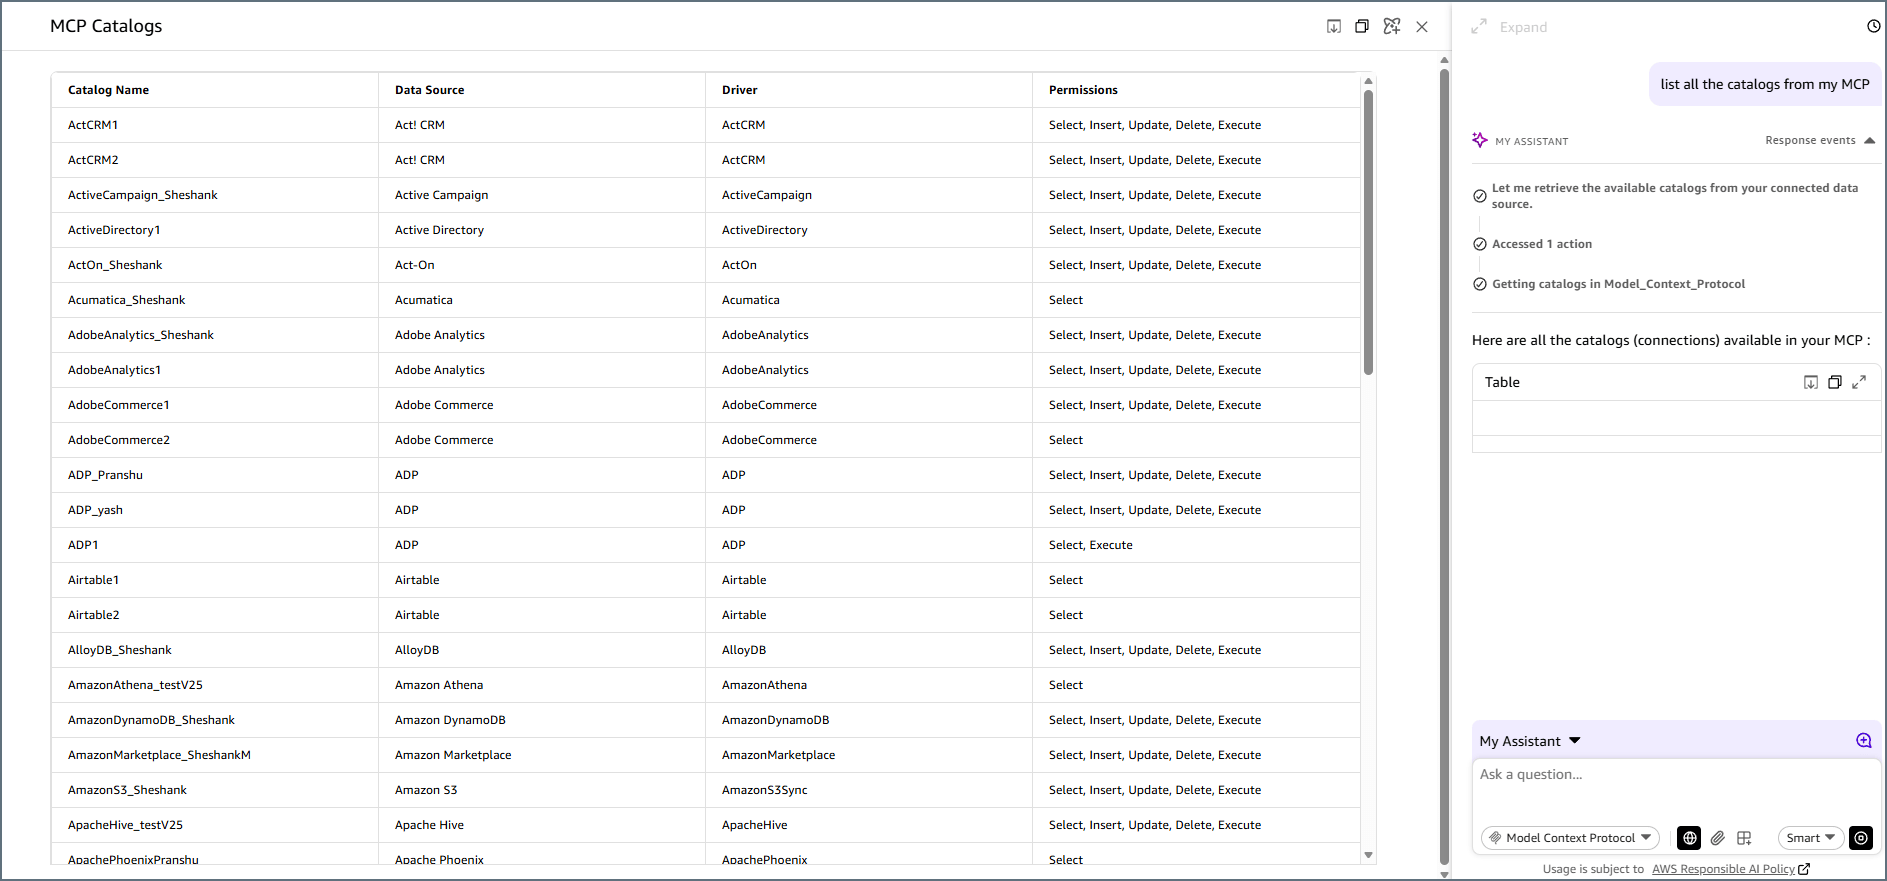
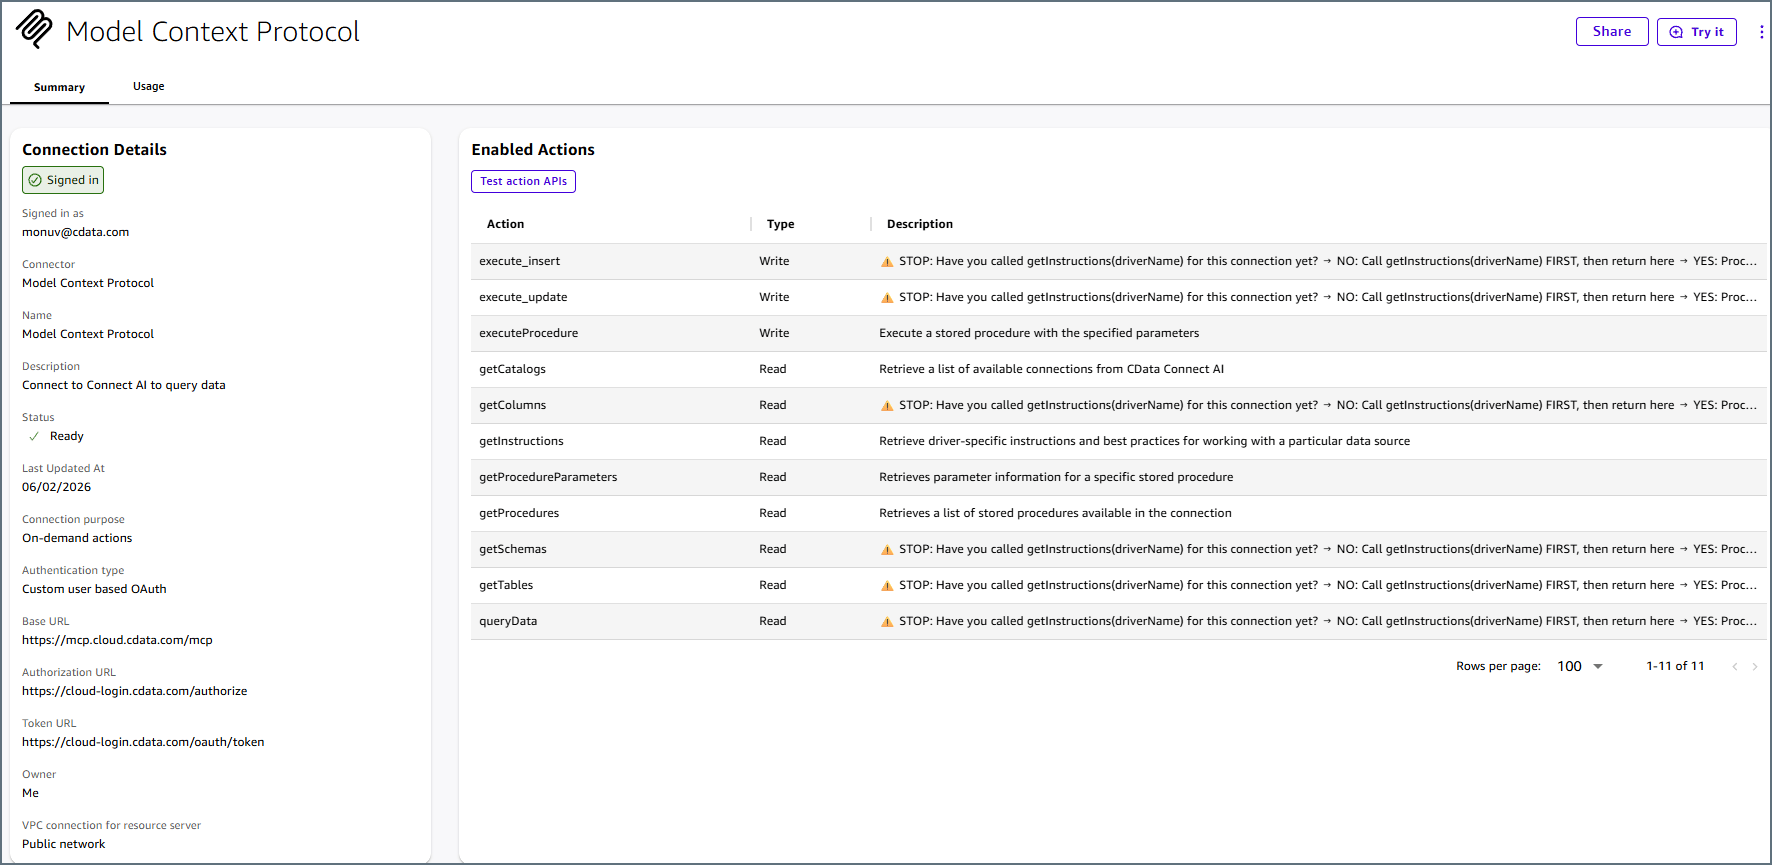 Test the connector by asking it a question: